Thermal Labels: The Complete How-To Guide
Master thermal labels with this step-by-step guide. Learn direct vs thermal transfer, materials, printer setup, calibration, and troubleshooting for shipping and asset labeling in everyday environments.

This article helps you select, print, and apply thermal labels for shipping, inventory, and asset tagging. You’ll choose between direct thermal and thermal transfer, pick the right stock, calibrate your printer, and troubleshoot common issues. The Print Setup Pro Team shares practical, field-tested steps to reduce waste and improve label durability in real-world office environments.
What are thermal labels and why they matter
Thermal labels are a printing solution that relies on heat to create images on specially coated label stock. They are popular in shipping, inventory management, asset tracking, and retail labeling because they streamline workflows and reduce the need for ink or toner. There are two main paths: direct thermal, which uses heat directly on the label, and thermal transfer, which uses a ribbon to transfer ink onto the label surface. Direct thermal labels are often used for short-term applications, while thermal transfer labels offer greater durability and resistance to heat, chemicals, and abrasion. According to Print Setup Pro, the right choice depends on the environment and lifespan you expect from the label. This section will help you evaluate the trade-offs and set realistic expectations for readability, legibility, and cost over time. In practice, most home offices and small businesses begin with direct thermal for simplicity and then transition to transfer when labels must survive harsher conditions or longer timelines.
Direct thermal vs thermal transfer: choosing the right path
Choosing between direct thermal and thermal transfer hinges on durability and exposure. Direct thermal labels are heat-sensitive and can fade in sunlight or heat-heavy environments, making them suitable for internal or short-term labeling such as shelves, internal assets, or temporary packaging. Thermal transfer labels use a ribbon to apply ink, producing tougher, longer-lasting prints that resist moisture, UV light, and solvents. They’re a better fit for outdoor use, cold storage, or asset tags that remain on equipment for years. When deciding, consider the surface to which you will apply the label, how long the label will stay readable, and whether exposure to heat or chemicals is likely. The Print Setup Pro Team recommends pairing high-quality stock with the appropriate ribbon (wax, wax-resin, or resin) based on the expected conditions. A quick proof print on your intended surface will reveal how well the chosen method holds up under real-world conditions.
Label materials: stocks, adhesives, and coatings
Label material choice defines durability and readability. Direct thermal stock is typically paper-based and absorbs heat to create marks, but it can yellow or fade with time. Thermal transfer stock comes in paper, polyester, polypropylene, and specialty films that resist abrasion and moisture. Adhesives vary from permanent to removable, with silicone or acrylic formulations for temperature extremes. Coatings can add chemical resistance or gloss, which affects how ink sits on the surface. When selecting stock, assess the expected exposure: sunlight, heat, moisture, chemical cleaners, and abrasion. Also consider the surface texture of your target (flat, curved, or embossed) and whether the label needs to conform to a curved edge. Print Setup Pro’s analysis highlights that matching surface compatibility with stock type dramatically reduces misprints and increases legibility in the field.
Printer compatibility and calibration
Your printer matters as much as the stock. Check that your printer supports the label width and length you plan to print, and update drivers for optimal performance. Calibrate the printer to align the label sensor, set the correct print darkness, and configure the speed to balance quality and throughput. For direct thermal labels, ensure the printhead is clean and free of residue. For thermal transfer, verify ribbon alignment and tension. Keep a small stock of sample labels to test alignment and print quality before mass printing. The goal is consistent, scannable barcodes and legible text across batches. Print Setup Pro emphasizes routine maintenance, including cleaning the printhead with isopropyl alcohol and replacing worn components when needed.
Printing quality: resolution, density, and typography
Resolution (DPI) and print density influence legibility, especially for small barcodes. Most common thermal printers operate at 203 or 300 DPI. Higher DPI improves barcode readability and reduces smudging on coated stock. Choose a font that remains clear at the chosen size and avoid overly decorative styles near barcodes. Test prints should verify barcode integrity, data readability, and scanning performance with typical scanners used in your workflow. Ink and density settings can alter contrast; err on the side of higher density for darkened characters on lighter stock. Print Setup Pro advises running a standard test label with multiple font sizes and a few common barcode formats to ensure consistent results across printers and shifts.
Applications across industries and use cases
Thermal labels serve a wide range of tasks: shipping labels for e-commerce, inventory and shelf labeling for retail, asset tags for IT equipment and facilities, and patient or specimen labeling in clinical settings (where allowed). In warehouses, labels must endure abrasion and contact with minor cleaners; in cold storage, adhesive and stock must resist moisture. For food packaging, select stock and coatings that meet basic safety guidelines and comply with local regulations. This versatility is why thermal labeling remains a core skill in home offices and small businesses. Print Setup Pro’s guidance for choosing materials based on environmental exposure helps optimize longevity, readability, and cost per label across diverse workflows. By aligning label type, stock, and application, you reduce waste and improve traceability.
Environmental and storage considerations
Temperature, humidity, and light exposure impact label life. Direct thermal labels fade when exposed to heat or sunlight and should be used away from sunlit shelves or hot equipment. Thermal transfer labels with resin or wax-resin ribbons offer better durability in outdoor or harsh environments, but they require proper storage in cool, dry places to prevent stock degradation. Plan for shelf life by labeling a representative batch and observing any color shifts, readability changes, or adhesion failures over time. Avoid stacking heavy items directly on top of printed labels, which can smear or peel. Proper storage reduces waste and ensures that labels perform as intended when they’re needed.
Common mistakes and how to avoid them
Common missteps include selecting the wrong stock for the environment, failing to calibrate the printer, and neglecting test prints. To avoid these, always verify label material compatibility with surface texture and exposure, perform a full print test on actual packaging or assets, and adjust print speed and darkness for readability. Don’t neglect cleaning the print head or ribbon path when using thermal transfer; residue can cause banding and unreadable bars. Keep a small set of spare labels and ribbons so you can quickly reprint if errors occur. Regularly review label data (e.g., SKUs, serial numbers) for accuracy, and implement a simple QC checklist before mass printing. Print Setup Pro notes that a careful, repeatable process saves time and reduces costs over the long term.
Maintenance and long-term reliability
Regular maintenance keeps thermal labels readable and adhesives performing well. Clean print heads, sensors, and rollers weekly or after heavy use, and replace worn parts as needed. Store tools and stock in a cool, dry area away from direct sunlight and solvents. Maintain inventory by organizing label stock by size and type, and keep a log of printer settings for common label batches. When issues arise—fading print, misalignment, or poor adhesion—revisit stock selection, adhesive choice, and printer calibration. A systematic approach, guided by best practices from Print Setup Pro, ensures label quality stays high and operational downtime stays low.
Quick-start checklist for immediate results
- Identify whether you need direct thermal or thermal transfer.
- Select stock matching your environment and surface.
- Load the correct width/length and calibrate printer sensors.
- Run a test print on the actual surface.
- Implement a simple QC to catch issues early.
- Maintain clean print heads and keep stocks organized for efficiency.
Tools & Materials
- Thermal direct label stock(Choose width x length to match your printer and surface area)
- Thermal transfer label stock(Needed if durability and external exposure are concerns)
- Ribbon (wax or resin, for thermal transfer)(Select based on environment and label material)
- Thermal printer(Ensure compatibility with stock width and driver support)
- Cleaning swabs and isopropyl alcohol(Used for de-linting print head and sensors)
- Scissors or label cutter(Trim labels cleanly after printing)
- Spare labels and ribbons(Keeps workflow smooth during batches)
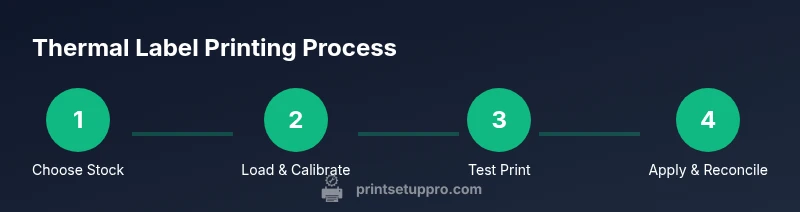
Steps
Estimated time: 30-60 minutes
- 1
Define labeling goals
Clarify the purpose, expected life, and exposure of the labels. Decide between direct thermal for shorter-term use or thermal transfer for durable labels in challenging conditions.
Tip: Document the label size, content, and durability requirements before purchasing stock. - 2
Select stock and adhesive
Choose label stock that matches the application surface and environmental exposure. Pick adhesive type (permanent or removable) based on whether you need future removal or repositioning.
Tip: When in doubt, request a small sample sheet to test on your actual product surface. - 3
Prepare and calibrate printer
Update drivers, set the correct label width, and calibrate the sensor alignment. Clean the print head and tension path to prevent skewed printing.
Tip: Run a single test label on the target stock before large prints. - 4
Load stock and set printer parameters
Load the stock securely, adjust print darkness and speed, and check ribbon alignment if using thermal transfer. Ensure the label sensor detects the leading edge accurately.
Tip: Use a label jig or guide to maintain consistent feeding. - 5
Print a proof sheet
Print a small batch of proof labels that include fonts, barcodes, and a sample of the actual asset. Inspect readability and barcode scan performance.
Tip: Scan each proof with your typical scanners to confirm reliability. - 6
Apply and store
Apply labels to surfaces with clean fingertips or a roller for consistency. Store unused stock in a cool, dry place away from direct sunlight.
Tip: Label orientation matters for scanning; keep consistent alignment across batches.
People Also Ask
What is the difference between direct thermal and thermal transfer labels?
Direct thermal labels require no ribbon and are best for short-term labeling, as heat can cause fading over time. Thermal transfer uses a ribbon to apply ink, producing more durable labels suitable for harsh environments. Choose based on expected label life and exposure.
Direct thermal is quick and cheap for short-term use, while thermal transfer lasts longer in tough conditions. Choose based on how long you need the label to stay readable.
Can I use thermal labels outdoors or in heat?
Outdoor or high-heat applications favor thermal transfer labels with resin or wax-resin ribbons due to better resistance to fading. Direct thermal labels are more susceptible to fading in sunlight and heat.
Outdoor use usually calls for transfer labels with tougher ribbons for durability.
What surfaces can thermal labels adhere to best?
Flat, smooth surfaces like plastic, metal, and finished wood generally print cleanly. Textured or curved surfaces may need specialty stock or primers to ensure legibility and adhesion.
Flat surfaces print best; textured or curved ones may require tested stock.
Do I need a ribbon if I choose direct thermal labels?
No ribbon is needed for direct thermal labels. Ribbon is only required for thermal transfer to achieve longer durability.
Direct thermal doesn't use ribbon; transfer requires a ribbon.
How long do thermal labels last?
Longevity depends on stock and exposure. Direct thermal labels can fade with time and exposure; thermal transfer labels offer longer readability in harsh conditions. Always test in your environment.
Durability depends on the stock and exposure; test for your use case.
Are there safety considerations for labels on food or healthcare?
For food and healthcare, ensure stock meets relevant safety and labeling regulations and avoid inks or coatings that could contaminate products or patient data. Follow local guidelines and manufacturer specifications.
Check regulatory requirements and use compliant stock for food or healthcare labeling.
Watch Video
Quick Summary
- Choose the right thermal path for expected label life.
- Calibrate and test before mass printing.
- Match stock and adhesive to environment and surface.
- Maintain printer cleanliness to ensure consistent quality.
- Store and manage labels to minimize waste.