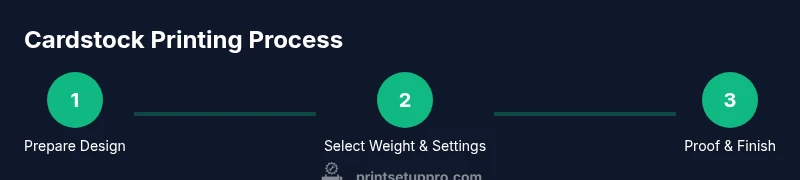
Cardstock Printing: A Practical Guide for Home Offices
Master cardstock printing with a step-by-step approach to selecting weights, configuring printers, layout, finishing, and troubleshooting for crisp, durable results.

To print on cardstock, choose a compatible weight (typically 80–110 lb cover), load the stock correctly, and adjust printer settings to thick paper. Enable single-page feeding, set the correct orientation, margins, and image scaling, and run a test print before the full job. Use high-quality cardstock for best results. Keep an eye on curling and feed jams, and adjust if needed.
What cardstock printing is and when to use it
Cardstock printing refers to printing on thicker, more durable paper traditionally used for greeting cards, business cards, invitations, and craft projects. For home offices and small studios, cardstock adds a premium feel to DIY projects, wedding stationery, labels, and signage. According to Print Setup Pro, cardstock printing opens up possibilities for professional-looking results without leaving your desk. When you need sturdier prints that withstand handling, adhesive backing, or trimming, cardstock is the obvious choice. This guide helps you navigate weight, finishes, and printer settings so you can produce reliable results from your own printer.
Throughout this article you’ll see practical tips for choosing the right weight, preparing your document, feeding techniques, and finishing options that keep projects aligned with your goals. We’ll also cover common hurdles—curl, jams, ink setbacks—and how to avoid them with better preparation and tuning.
Understanding cardstock weights and finishes
Cardstock comes in various weights and finishes that impact how it feeds, prints, and finishes. In the United States, a common desktop standard is 80–110 lb cover (approximately 216–300 gsm). Heavier weights feel premium and are ideal for business cards and invitations, while lighter end of the range suits flyers and small signage. Coated or glossy finishes can enhance color vibrancy but may affect feed reliability, especially on an inkjet printer. Uncoated finishes are easier to work with for envelopes and rustic looks, and they tend to dry faster in most home setups. Always verify your printer’s supported media list before loading, and test a small batch to observe curling, color accuracy, and drying behavior. Print Setup Pro notes that selecting the correct weight and finish is key to minimizing misfeeds and achieving crisp edges.
Printer compatibility and feeding strategies
Not all printers handle cardstock equally. Check the manufacturer’s specifications for maximum media weight, width, and whether the printer supports thick-paper or manual-feed modes. Feeds can be smoother with single-sheet feeding rather than stacking a whole tray. When possible, use the rear feeder or a straight-path feed to reduce warping. If your printer supports a “thick paper” or “heavy stock” setting, enable it; otherwise you may see color banding, smearing, or jams. For automatic printers without a robust thick-paper option, consider trimming to fit and using a manual feed technique with one sheet at a time. Print Setup Pro’s guidance emphasizes testing with a single sheet to confirm feeding reliability before proceeding with a larger run.
Preparing your document: layout, margins, and bleeds
Prepare your design with edge-to-edge intentions in mind. Include bleed (extending artwork 1/8 inch beyond the final trim) so you don’t see white gaps after cutting. Set margins to a safe zone that accounts for die cuts or trimming variations. If your project is color-critical, verify color profiles and alignments for trims and folds. For text and important details, keep a minimum margin of at least 0.25 inches (6 mm) from trim. Export to a printer-friendly format (PDF with embedded fonts) and ensure the resolution is at least 300 dpi for sharp lines and crisp text. Before printing the full batch, run a small proof to confirm alignment, color fidelity, and bleed areas.
Printing workflow: from test print to full job
Start with a test sheet on the same cardstock and printer settings you plan to use for the full run. Inspect alignment, color accuracy, ink behavior, and drying time. If colors appear off, adjust your printer’s color balance or ICC profile and re-test. When you’re satisfied, print in batches that match your tray’s feeding capacity to minimize jams, and pause between batches to allow drying. For multi-page or duplex projects, enable the printer’s duplex feature if supported, and verify front/back alignment with a single-page proof first. Take notes on any quirks (curl, edge feathering) to refine the setup for subsequent batches.
Finishing and post-processing
After printing, let pages dry completely before handling to prevent smudging. If your project requires trimming, use a sharp blade or a guillotine and verify your trim lines with a straightedge. If you’re producing invitations or cards that will be shipped, consider light scoring or perforation to improve folding accuracy. For a professional finish, test a small run of die-cut shapes or corner rounding to ensure the finish aligns with the design. Store finished sheets flat in a dry, low-humidity environment to preserve color stability and prevent curl. Regularly inspect inkjet vs. toner behavior on your cardstock, and adjust settings as needed for future runs.
Troubleshooting common issues and maintenance tips
Curl, misfeeds, and color bleed are common cardstock printing challenges. Curl can be minimized by using humid-free storage and ensuring you’re printing in a stable environment. If you notice frequent jams, check the rollers for dust and clean them gently with a microfiber cloth. Keep the cardstock flat and aligned, fan the stack before loading, and avoid overfilling the feeder. Color bleed can be mitigated by using appropriate ink types and enabling printer settings for light or plain stock when necessary. Regular printer maintenance—cleaning feeds, checking rollers, and updating drivers—helps maintain consistent results across projects.
Quick-start reference: a printable checklist
- Confirm cardstock weight (80–110 lb cover) and finish suitability.
- Load cardstock using the correct feeder path for your printer.
- Enable thick-paper or manual-feed settings if available.
- Create bleed and safe margins in your design (avoid critical text near edges).
- Run a test print and adjust as needed before the full run.
- Allow drying time; trim and finish as required.
- Store finished pieces flat in a dry environment to prevent curl.
Tools & Materials
- Cardstock stock (80–110 lb cover / 216–300 gsm)(Choose weight and finish based on project (matte, satin, glossy).)
- Printer with thick-paper support(Check manufacturer’s max media weight and tray options.)
- Feeder tray extension or straight path option(Helps minimize jams for heavy stock.)
- Single-sheet feed or test sheets(Use for careful loading and proofing.)
- Cutting tool (guillotine or craft knife) and ruler(For clean trims and precise finishing.)
- Scanner or color-calibration sheet (optional)(Helps verify color accuracy if you're producing brand-critical pieces.)
Steps
Estimated time: 45-75 minutes
- 1
Load cardstock
Fan the cardstock stack to prevent thickness from binding together. Place the sheets in the feed tray with the printable side facing the correct direction and align the edges. Ensure the stack is smooth and not bent; misfeeds start with curled or warped sheets.
Tip: Fan lightly and tap the stack on the desk to settle the sheets. - 2
Adjust tray settings
Set the printer to thick paper or heavy stock if available. Use the rear tray or straight path feeder to reduce skew. Confirm the media type in the printer driver to ensure correct color handling and feed rate.
Tip: If you see feed errors, switch to a manual single-sheet feed. - 3
Configure margins and bleed
Design with bleed and safe margins. In your software, extend artwork by 1/8 inch (3 mm) beyond the trim edge. Save as a print-ready PDF with embedded fonts and notes for printers.
Tip: Double-check the final trim area on a printed proof. - 4
Print a test page
Run a small batch on the chosen cardstock to verify alignment and color. Inspect front and back sides (if duplex). Adjust color, density, and align as needed before full production.
Tip: Use a spare sheet to save the main sheets during testing. - 5
Run full batch in controlled batches
Print the project in manageable batches that match your tray capacity. Between batches, inspect for jams and curling, and allow sheets to rest before handling. This minimizes warping and misalignment.
Tip: Keep a log of batch size and any adjustments made. - 6
Finish and trim
Let prints dry completely before trimming. Use a sharp blade or guillotine for clean edges and alignment. Check folds and score lines if your design includes them.
Tip: Trim slowly with a straight guide to maintain accuracy. - 7
Quality check
Review color consistency, alignment, and edge quality. Compare with your proof and adjust the design or printer settings if discrepancies appear.
Tip: Document any recurring issues for future projects. - 8
Store finished pieces
Store in a dry environment flat to prevent curl. If storing for long periods, consider acid-free pockets and desiccants to minimize moisture exposure.
Tip: Avoid stacking heavy items on top of freshly printed pieces.
People Also Ask
Can all printers handle cardstock printing?
No. Not all printers support thick cardstock. Check the device's manual for maximum media weight, width, and whether it supports thick-paper feeding or manual sheet feeding.
Not every printer handles thick cardstock; check your model’s limits and feeding modes before starting.
What weight cardstock should I use for invitations?
80–110 lb cover is a common range for invitations, with heavier weights providing a premium feel. Consider your printer’s capabilities and the finish you want.
For invitations, 80 to 110 pound cover stock is typical, depending on your printer.
How can I prevent jams when printing cardstock?
Ensure stock is flat and aligned, load gradually using single-sheet feed when possible, and verify the tray settings match the media weight.
To avoid jams, load one sheet at a time and check the tray settings for thick stock.
Can I print on glossy cardstock?
Yes, if your printer supports glossy media and you use the correct printer profile. Glossy stock may require slower speeds and proper curing time.
Glossy cardstock works if your printer supports it; use the right profile and allow drying time.
Why do my prints curl after printing?
Curl is affected by humidity, stock quality, and cooling practices. Store stock properly and allow prints to dry flat on a clean surface before handling.
Curling often comes from humidity and drying conditions; let prints flatten before handling.
Should I use bleed on cardstock projects?
Bleed prevents white edges after trimming. Include bleed in your design by extending artwork 1/8 inch beyond trim lines and verify in print preview.
Bleed helps edge-to-edge designs; add 1/8 inch beyond trim in your layout.
Watch Video
Quick Summary
- Choose the correct cardstock weight (80–110 lb cover).
- Enable thick-paper settings and use single-feed feeding.
- Incorporate bleed and safe margins in designs.
- Test prints first and allow drying before finishing.