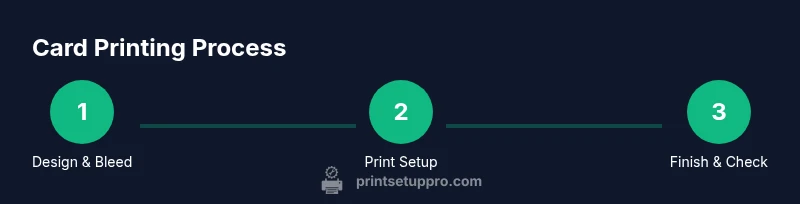
Card Printing: A Practical Step-by-Step Guide
Learn how to print professional-quality cards at home or in a small office. This comprehensive how-to covers stock selection, printer setup, color management, finishing, and troubleshooting for business cards, membership cards, and event badges.

This guide shows you how to print high-quality cards at home or in a small office, whether you’re making business cards, membership cards, or event badges. You’ll learn stock choices, printer settings, color management, and finishing options to achieve durable, print-ready cards. Follow practical steps to reduce misfeeds, color shifts, and edge misalignment while keeping costs reasonable.
Why Card Printing Matters
Card printing is a practical way to convey identity, professionalism, and information quickly. Whether you’re printing business cards for networking, membership cards for a club, or event badges, the quality of your printed card reflects your brand. At Print Setup Pro, we see many home offices struggle with misaligned text, dull color, and cards that warp after trimming. A clear, repeatable process can dramatically improve outcomes and save time on future runs. In this guide, you’ll learn how to select materials, configure your printer, design for print, and finish with durable coatings or lamination. We’ll cover common configurations, plus tips to avoid typical pitfalls, so you can achieve consistent results whether you print a single prototype or a batch of hundreds. From card stock choice to finishing options, every decision affects durability, color fidelity, and edge quality. We’ll also discuss how to prepare a design with bleed, margins, and safe zones to prevent critical information from being cut off. The goal is to deliver cards that look sharp, scan well, and stand up to handling in real-world conditions. According to Print Setup Pro, card printing continues to empower home offices and small businesses to project professionalism without outsourcing, especially in 2026.
Card Printing Formats and Card Stock
Cards come in several common formats for different use cases. The standard card size for business and ID cards is commonly used worldwide, and many printers can handle it with the right settings. When choosing card stock, look for a durable yet printable option in the range of light to medium cover stock. Bleed-ready designs (extra image area beyond the final trim) help prevent white edges. Glossy, matte, or satin finishes each have trade-offs: gloss offers vibrant color but can show fingerprints, while matte provides a subdued look and easier readability. If you plan to laminate, ensure your stock is compatible with your chosen lamination method. For plastic cards, verify printer compatibility and feed path. In 2026, you’ll find a wide range of stock options from standard paper-based cards to flexible PVC or composite cards for durability and wear resistance.
Choosing a Printer for Card Stock
Not all home printers are created equal for card printing. Inkjet printers with a straight-through feeding path, manual feed, and good border control are well-suited for most paper-based cards. If you’re printing on thicker stock, look for a printer that explicitly lists card stock support and provides a rear or manual feed option. Laser printers can deliver fast output with crisp text, but may require thicker stock compatibility or specialized cartridges. For plastic or PVC cards, consider equipment designed for card printing or a service bureau for long runs. Always run a test sheet to confirm alignment, color, and edge quality before starting a larger batch. In 2026, the Print Setup Pro team notes that matching your stock to your printer’s capabilities is the single biggest factor in minimizing jams and misfeeds.
Designing Your Card: Layout and Bleed
A clean layout prevents misinterpretation and ensures scannability. Start with a canvas size that matches your final card dimensions and add a bleed area around the edges (usually 0.125 inches). Keep critical information (names, logos, contact details) within a safe zone away from trim. Use vector logos when possible and choose fonts with clear readability at small sizes. If you’re printing in color, design in a color-managed workflow and export to PDF or a printer-friendly format with embedded color profiles. Save multiple versions (spot color vs. full color) and test print to confirm how the design prints in real life. This planning reduces the need for rework and helps you scale up later if you need more cards.
Color Management and Design Tips
Color accuracy starts with a calibrated display and proper color space. For card printing, CMYK is typically closer to what the printer can reproduce than RGB. Use embedded ICC profiles when available and soft-proof your design to anticipate color shifts. Avoid overly saturated palette choices that can look different on screen versus print. For best results, print a small color test swatch on your card stock to fine-tune color balance, contrast, and saturation before producing a full run. Print Setup Pro’s guidance emphasizes consistent lighting in your workspace and regular monitor calibration to maintain predictable results across print batches.
Printer Settings for Quality: Resolution, Margins, and Media Type
Start with a high resolution setting—300 to 600 DPI depending on your printer and stock. Select the corresponding media type in your printer driver (e.g., “card stock” or “thick paper”) and enable borderless printing only if your stock permits. Adjust margins to align with your card width; many printers require non-printable margins, so compensate in your design. Use a high-quality color mode and avoid draft settings. If your printer supports duplexing, test one-sided prints before enabling double-sided jobs. Always print a test sheet to verify alignment, color, and edge crispness before committing to a full run. These steps reduce waste and save time.
Finishing Options: Laminating, Coating, and Die-Cutting
Finishing adds durability and polish. For most paper-based cards, a clear laminate or coating protects against wear and moisture. Lamination can be pouch or roll, with matte, satin, or gloss finishes; each has a distinct look and feel. If you anticipate frequent handling, consider edge sealing or UV coating for extra protection. For specialty cards, a die-cut or rounded-corner punch can improve aesthetics and ergonomics. Always ensure the finish does not obscure essential information and that the final size remains consistent across all cards.
Finishing on a Budget: DIY Lamination and Quick Coats
You don’t need expensive equipment to get great results. DIY laminating sheets with an at-home roller laminator or hand laminating pouches can deliver professional results at a fraction of the cost. For quick protection, a clear spray or brush-on coating can add water resistance and reduce smudging after trimming. Test the finish on a single card to make sure it adheres evenly and dries without leaving streaks. Budget-conscious printers can still achieve durable results with careful prep, mating finishes to stock, and controlled drying times.
Printing at Home: Practical Workflow from Design to Print
A practical workflow helps you scale from a single prototype to batches. Start by finalizing your design with bleed and safe margins, then export to a printer-ready format. Load your card stock into the printer, ensuring correct orientation and feed direction. Run a test print to verify alignment and color, adjust as needed, and proceed with the full run. After printing, trim carefully to final dimensions and inspect every card for edge quality and legibility. Finally, apply finishing as needed and store printed cards in a clean, dry area to prevent warping. This workflow minimizes waste and speeds up future runs, a philosophy Print Setup Pro champions for home and small business users.
Troubleshooting Common Card Printing Issues
Common issues include misalignment, color shifts, or edge tearing. When misalignment occurs, check margins in the design and ensure consistent paper feed. Color shifts may indicate a mismatch between the design color space and printer profile; reproof with a calibrated monitor and embedded ICC profile. If edges curl or warp, verify stock dew point and allow sufficient drying time before trimming. For jams, remove the stock carefully and check feeding paths for obstructions. Keeping a small supply of test sheets nearby speeds up debugging and ensures consistent results across batches.
Best Practices for Large Runs and Consistency
For larger runs, establish a repeatable template with fixed margins, bleed, and color settings. Maintain consistent stock batches to avoid variation in opacity or thickness. Track your results after each batch—note stock lot, printer settings, and finish type—to reproduce successful outcomes. Label finished cards clearly if multiple designs are printed in one session to prevent mix-ups. Regular maintenance of your printer and a simple checklist for setup will help you scale card printing while sustaining quality over time.
Tools & Materials
- Card stock (CR80-sized or standard business-card stock)(Choose 100–110 lb (approx. 270–300 gsm) cover stock for rigidity; confirm your printer supports thick stock.)
- Printer capable of handling thick stock and color work(Prefer a device with a straight feed path or rear feed for cards; ensure it supports the stock weight.)
- Ruler, craft knife or precision trimmer(For precise trimming after printing.)
- Laminator or clear coating (optional)(For extra durability; verify compatibility with chosen stock.)
- Bleed guidelines template and design software(Use vector logos when possible; set bleed to 0.125 inches.)
- Cutting mat and safety tools(Useful for careful trimming and edge finishing.)
- Color-calibrated monitor and ICC profiles(To ensure color accuracy from screen to print.)
- Test sheets and a clean workspace(Test prints help verify alignment and color before full run.)
Steps
Estimated time: 2-3 hours
- 1
Prepare design with bleed
Finalize your card layout in your design tool, add a 0.125-inch bleed around all edges, and place critical content inside a safe area. Export to a printer-friendly format with embedded color profile.
Tip: Double-check that logos and text stay within the safe zone so trimming won’t cut them off. - 2
Load card stock correctly
Place a single sheet in the feeder and align guides to match the card size. Use a test sheet to verify orientation and feed without skewing.
Tip: Use manual feed if your printer offers a thicker-stock option to improve alignment. - 3
Configure printer for card stock
Select the appropriate media type (card stock) in the printer driver, choose high-quality printing, and enable maximum resolution. If your printer has a borderless option, enable only if your stock supports edge-to-edge printing.
Tip: Avoid automatic scaling; print at 100% scale to preserve card dimensions. - 4
Print a color test sheet
Run a small color test to verify saturation, hue, and contrast. Adjust color settings if necessary before the full batch.
Tip: Soft-proof on screen first to anticipate how colors will reproduce. - 5
Print full run
Print the entire batch in your chosen order, using a clean, flat surface. Allow prints to dry completely before handling to prevent smudges.
Tip: If your run is large, print in smaller batches to monitor consistency. - 6
Trim to final size
Trim each card precisely using a cutting mat and sharp blade or a dedicated trimmer. Maintain consistent pressure and blade angle for clean edges.
Tip: Take a sample card from the batch to verify dimensions before finishing the entire run. - 7
Apply finish (if desired)
Apply lamination or a clear coating to protect against wear and moisture. Allow adequate drying time between coats if applying multiple layers.
Tip: Test finish on a single card first to check compatibility with stock. - 8
Quality check and catalog
Inspect edges, color consistency, and legibility. Separate any imperfect cards and rework or discard as needed.
Tip: Maintain a simple log of stock used, printer settings, and finish type for repeatability. - 9
Pack and store finished cards
Store finished cards flat in a dry, cool environment to prevent warping. Use protective sleeves if cards will be handled frequently.
Tip: Label batches by design, stock, and finish to simplify future reprints. - 10
Revisit design for future runs
Capture lessons from the current run—adjust bleed, margins, or color settings for even better results next time.
Tip: Keep a digital archive of templates and profiles for quick reprints. - 11
Explore advanced options
If you print high volumes, consider professional-grade presses or card-printing services for cost efficiency and color consistency.
Tip: Evaluate whether the time saved justifies outsourcing for very large runs.
People Also Ask
What card sizes are standard for business cards?
The common standard is a rectangular card roughly the size of a credit card, typically around 3.5 x 2 inches, but sizes can vary by country and purpose. Always verify your printer’s supported sizes and set up your design accordingly.
Common business cards are about 3.5 by 2 inches; check your printer’s supported sizes before design and print.
Can I print on glossy photo paper for business cards?
Glossy photo paper can print nicely but may not be as durable as card stock. For best results, test with your stock and consider a laminate or protective coating to reduce wear and improve longevity.
Yes, but test first and consider finishing to protect the print.
Do I need a lamination for all cards?
Lamination is optional but recommended for wear resistance, especially for cards handled often. It adds durability and can improve moisture resistance, but will increase final thickness.
Laminate if cards will be handled frequently, but test first to ensure fit.
How can I ensure color accuracy from screen to print?
Color accuracy improves with monitor calibration and using printer-embedded color profiles. Soft-proof your design and run test prints to adjust saturation and hues before the final batch.
Calibrate your monitor, use profiles, and test print to match screen colors to print colors.
Is PVC card printing possible at home?
Printing on PVC or plastic cards at home is possible with the right printer and supplies, but not all home printers support PVC. Consider dedicated card printers or outsourcing for PVC runs.
Only with a printer that supports plastic cards; otherwise consider a service for PVC cards.
What’s a good finishing option for durability?
Lamination or a clear coating extends life and resists moisture. Choose a finish that suits your desired look (gloss, satin, or matte) and ensure compatibility with your stock.
Laminate or coat the cards to protect them and choose a finish based on your desired look.
Watch Video
Quick Summary
- Plan with bleed and safe zones for edge-to-edge prints
- Choose stock compatible with your printer to avoid jams
- Test prints save time and waste
- Color consistency relies on calibration and profiles
- Finish options add durability but may affect dimensions
- Document settings for repeatability