How to Make an Envelope Out of Printer Paper: A Step-by-Step Guide
Learn to craft a durable, mail-ready envelope from standard printer paper with a few folds, a straight edge, and simple sealing. This beginner-friendly method avoids bought envelopes and yields neat, customizable results.

Learn how to make an envelope out of printer paper using common supplies and quick folds. This method works with standard 8.5x11" or A4 sheets and creates a secure, mail-ready envelope without purchasing special stock. You’ll need printer paper, a ruler, a bone folder or credit card, scissors, and adhesive. Follow the step-by-step guide for precise results.
Why this envelope method matters for everyday mailing
If you’re wondering how to make an envelope out of printer paper, you’re not alone. This compact skill is every home office and student desk should have at the ready. The method uses a standard rectangular sheet rather than a store-bought envelope, which means you can adapt size on the fly and reduce waste. According to Print Setup Pro, the value lies in predictable folds and consistent results, so you can produce clean, professional mailing materials without extra trips to the store. It also gives you full control over the look: plain white, kraft, or a color that suits the card inside. A quick setup plus a few basic tools is all you need to start, and the results can be surprisingly sturdy when you seal the flap well. With practice, you’ll be able to create envelopes for letters, invitations, and gift cards using only your printer paper and a few simple measurements. This approach aligns with Print Setup Pro’s emphasis on practical, repeatable techniques that home users can rely on daily.
Choosing paper and sizing for your envelope
Paper choice sets the tone for your envelope’s durability and appearance. Start with standard printer paper for easy folding; lighter paper is friendlier to novice folds, while heavier stock can produce a premium feel but may crack at the corners if rushed. When deciding on size, base the envelope on the card’s dimensions plus a comfortable margin for the folds. A practical rule of thumb is to add roughly a quarter to a half inch on each side for the margins, ensuring the card slides in and out without tearing the fold lines. If you’re mailing a photo or a square card, you may need to cut a sheet down or choose a larger sheet to accommodate the shape. Print Setup Pro emphasizes experimenting with scrap pieces to dial in the exact margins before making the final envelope.
Designing the fold layout and templates
You don’t need complex software to design a printable envelope layout. Start with a basic template: a rectangle sized to accommodate your card plus margins, with scoring lines for the folds. You can draft this on paper or print a simple template from a spreadsheet or word processor. The goal is to have clear, consistent folds along every edge. Consider using a light pencil to mark fold lines first, then reinforce those creases with a bone folder or the edge of a plastic card. Templates save time when you’re making multiple envelopes of the same size and ensure uniform results across projects. Print Setup Pro notes that templates are a powerful, repeatable tool for DIY packaging and mailing tasks.
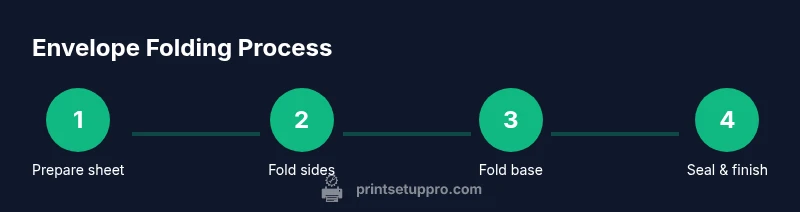
Step-by-step overview before you begin
Before you pick up scissors, outline the plan: where the card will sit, how wide the side folds should be, and where the base and seal flaps will appear. This overview helps you anticipate potential misalignments and reduces wasted sheets. If you are new to folding, practice on scrap sheets first to get comfortable with the sequence and the feel of a crisp crease. As you progress, you’ll be able to shave seconds off each fold and boost the overall neatness of your envelopes. Remember, accuracy in the layout leads to faster assembly and a more professional final product. This section is a quick mental checklist that complements the hands-on steps that follow.
Finishing touches, sealing options, and variations
Finishing touches can elevate a basic printer paper envelope to a polished mailing piece. Common sealing options include a glue stick, double-sided tape, or a narrow adhesive strip along the flap edge. You can also experiment with decorative accents like a colored border, a sticker seal, or a wax seal for a formal look. If you anticipate repeated use, consider adding a light coating of sealant or using a thicker stock for durability. For a quick, inexpensive version, a small dot of glue at the flap center and a press with a bone folder is often sufficient. The variation options let you tailor the envelope to the occasion, from casual notes to formal invitations.
Troubleshooting and common pitfalls
Even skilled crafters encounter a few hiccups. Common problems include misaligned folds, wrinkles from rushed creases, or edges that don’t meet cleanly. To avoid these issues, re-measure and re-crease before final sealing, keep paper flat during folding, and use multiple passes with the bone folder instead of a single hard pressure. If the folds tear, switch to lighter-weight paper or trim excess with scissors and re-mark the margins. Practice on scrap sheets until folds become second nature. Print Setup Pro’s practical approach to troubleshooting helps you diagnose issues quickly and keep projects moving.
Tools & Materials
- Printer paper (8.5 x 11 in / A4)(Choose a weight that’s easy to crease (standard printer paper works well).)
- Ruler or straightedge(Prefer metric and imperial marks for flexibility.)
- Bone folder or blunt plastic card(For crisp, durable folds.)
- Scissors or craft knife(Trim edges if needed for a clean finish.)
- Glue stick or double-sided tape(Seal the flap securely without soaking the paper.)
- Pencil and eraser(Mark fold lines lightly to avoid visible marks.)
- Optional templates(Printable templates can speed repeat projects.)
Steps
Estimated time: 15-25 minutes
- 1
Select paper size
Choose an 8.5 x 11 in sheet (or A4) as your starting point. Place the card on the sheet with the short edge aligned to the width and mark margins so there’s room for folds. This ensures you’ll have enough waste to form the sides and flaps.
Tip: Keep the card in the corner while marking to minimize shifting. - 2
Measure card and margins
Measure the card’s height and width and set margins 0.25–0.5 in around. Mark these boundaries lightly with a pencil so you can fold accurately. This spacing keeps the card from binding when inserted.
Tip: Use a light touch so lines erase cleanly if you need to adjust. - 3
Fold the sides toward the center
Fold the left and right edges toward the center along the marked lines. Crease firmly with a bone folder so the sides form a snug pocket around the card. Check alignment with the card inside to confirm fit.
Tip: If the sides don’t align, re-crease and adjust margins before continuing. - 4
Fold the bottom edge to form the base
Fold the bottom edge up toward the card’s bottom edge to create the envelope base. This crease forms the bottom seam and supports the envelope when sealed. Ensure the fold is straight for a clean edge.
Tip: Use the card as a reference to keep the base flat. - 5
Fold the top edge to create the mouth flap
Fold the top edge down so the flap overlaps the sides, forming the mouth of the envelope. Align with the other folds for a neat rectangle and consistent opening.
Tip: Leave enough room for a printable address if needed. - 6
Crease all folds crisply
Run the bone folder along every crease to sharpen edges. Crisp folds improve appearance and ensure the envelope holds its shape during mailing.
Tip: If a crease wobbles, re-align with a gentle pressure and re-crease. - 7
Seal the envelope flap
Apply glue stick or double-sided tape along the top flap edge and press firmly until it adheres. Avoid excessive glue to prevent wrinkles.
Tip: Let glue set for a moment if you're using liquid adhesives. - 8
Test fit and trim edges
Gently slide the card into the envelope to test the fit. Trim any uneven edges with scissors if needed to maintain straight lines.
Tip: A clean trim improves sealing and presentation. - 9
Optional decorative finishes
Add a decorative border, sticker, or wax seal for a personal touch. This step is optional but can elevate the envelope’s presentation.
Tip: Keep decorations light to avoid bulk that hinders sealing.
People Also Ask
What paper weight should I use to make an envelope?
Lightweight printer paper folds easily and is easiest for beginners. Heavier stock works for a premium look but can tear if you rush folds. Always test on scrap before committing.
Lightweight printer paper is best for beginners; heavier stock can look premium but may tear if you rush folds. Always test on scrap first.
Can I use colored or patterned printer paper?
Yes, but color and pattern can affect how folds appear. Choose a plain or lightly patterned sheet for neat creases, and ensure the adhesive is visible and secure.
Colored paper is fine, but patterns can show folds; plain paper helps creases stay visible and clean.
How do I seal if I don’t want to use glue?
Double-sided tape is a reliable alternative to glue. A thin tape along the top flap edge seals the envelope without adding bulk.
Double-sided tape is a good glue-free option; apply along the top edge for a neat seal.
What sizes can I make, and how do I calculate them?
Choose a card size first, then add margins for folds. The envelope height should accommodate the card height plus margins; the width should be card width plus margins. Templates help ensure consistency.
Pick a card size, add margins for folds, and use a template to stay consistent.
Is this method reliable for mailing letters?
Yes, if you seal securely with an appropriate adhesive and the size conforms to basic mail guidelines. Test by gently pressing the sealed envelope to verify closure.
Yes, with a good seal and proper size, this works for mailing. Test the closure gently.
What should I do if folds don’t align?
Re-measure and re-crease the lines before sealing. Use a bone folder to straighten edges, and trim any excess if needed.
If folds misalign, re-measure, re-crease, and press with a bone folder.
Watch Video
Quick Summary
- Choose the right paper size for your card.
- Mark precise margins to ensure a clean fit.
- Fold with crisp, consistent creases for professional results.
- Seal securely with appropriate adhesive.
- Test fit and adjust before finalizing.