How to Use a Printer to Print on Envelopes: A Complete Guide
Learn how to print on envelopes with a printer, including size selection, margin setup, loading envelopes, alignment, and troubleshooting for clean, professional results.

You can print on envelopes by configuring the printer's paper type, selecting the correct envelope size in your software, and using alignment guides. This guide covers setup, printer settings, and common pitfalls to avoid, so you can print clean, correctly aligned addresses or logos on mailers. Have your envelope stock ready, verify feed orientation, and run a test print on plain paper first.
Understanding Envelope Printing Basics
Envelope printing is a precise craft that hinges on matching envelope size to your printer's feed system, choosing the right finish, and designing content that sits safely within the print area. The envelope market includes plain, window, security, and textured options, each with its own feed and ink absorption characteristics. The Print Setup Pro team emphasizes that success starts with the basics: select the envelope size in your document and printer settings, verify that your printer can accommodate that stock, and plan the layout around edges and windows. When you choose a common size like #10 or a standard A2 envelope, you minimize feeding errors and alignment drift. Remember that window envelopes require special attention to avoid printing over the adhesive area, which can smear ink or obscure the address. Envelopes can vary in paper weight and finish, from smooth white paper to textured recycled stock; each type may feed differently and require slight adjustments. By understanding these basics, you set a foundation for clean, professional results that look deliberate and polished on every sheet.
According to Print Setup Pro, starting with the right envelope and printer compatibility reduces frustration and saves time in the long run.
Selecting the Right Envelope and Printer Settings
Before you print, pick envelopes that match your project and your printer's capabilities. Not all printers handle every size or weight, especially thick or glossy stocks. Check the envelope type (plain, window, or security), then locate the correct paper size in the printer driver. In most setups you’ll choose an envelope option in the driver and set the orientation so the address prints on the correct side. If your printer supports it, enable a thick-media or envelope printing mode; this reduces jams and improves feed consistency. Keep clear the print path by removing any staples or layers that could catch during feed, and use a manual feed tray if available for stubborn stock. This careful preparation reduces misfeeds and misprints and helps you achieve a crisp, legible result.
The Print Setup Pro team recommends testing envelope stock with a short run before committing to a larger batch to ensure compatibility with your specific model.
Preparing Your Document for Envelope Printing
Layout is the key. Design your address block and logos with a safe margin away from the edges—aim for a margin of at least a few millimeters depending on your printer. Use a high resolution image (300 dpi or higher) for logos and stamps so they print cleanly on the envelope surface. Choose a font that remains legible at small sizes; avoid decorative fonts for address lines. If you’re printing a return address with a logo, align it to the top left or center according to your envelope type. In addition, avoid text that sits directly over adhesive areas or envelope seams, which can bleed or crease. Finally, run a test print on plain paper to verify alignment before using actual envelopes.
According to Print Setup Pro's guidance, evidence shows that alignment tests reduce errors in real-world mailings and improve overall presentation.
Loading Envelopes Correctly into the Printer
Open the appropriate feed tray and position the envelopes with the flap facing the correct direction for your printer model. Place a small stack at a time if your machine has a narrow feed path, and use the feeder guides to keep them aligned. Do not force envelopes into the tray; gently adjust the guides to snug the edges without bending the stock. If your printer supports manual feed, insert one envelope at a time to ensure accurate placement. Close the tray carefully and avoid overloading the stack, which can cause skew or jams. Run a single test print on plain paper to confirm the orientation and feed path before printing actual envelopes.
Pro tip: only handle envelopes by the edges to avoid fingerprints that could affect ink adhesion.
Aligning Text and Images for Envelope Print
Position text and logos within the printable area that your printer can reach. Use grid-based design approaches or built-in alignment guides in your software to center or left-align content consistently. Build in a safety zone around the edges; most printers cannot print flush to the edge, especially near the flap. For colored logos, convert them to solid fills to prevent color bleeding, and ensure color contrast against the envelope background. Verify the DPI of any artwork; poor resolution prints appear pixelated on the envelope surface. Keep the address lines short enough to avoid wrapping, which can cause misalignment when the envelope feeds through the printer.
This section highlights practical tips for consistent, professional-looking results across different envelope finishes and brands.
Troubleshooting Common Envelope Printing Issues
Skewed print is often caused by misaligned feed or incorrect orientation. Start by re-checking the envelope size in your software and printer settings, then run a test page; adjust the margins if necessary. Envelopes smearing ink usually means the ink is still wet when the envelope passes through the feed; allowing extra drying time or using a faster drying ink type can help. If your printer jams, remove the stack, clear any stuck stock, and clean the feed rollers per the manufacturer’s guidance. For window envelopes, make sure the printed area does not overlap the window and that the adhesive area remains free of ink. Keep a spare tray of plain paper to test feed paths during adjustment.
Regular maintenance of the feed rollers reduces jams and extends the printer's life.
Live Demonstration: Printing a Return Address and Logo on Envelopes
In this example, you’re printing a simple return address block on a #10 white envelope with a small company logo. Start with a document that has the address at the top left and the logo aligned above or beside it. Load envelopes in the tray with the flap facing down (or as your printer requires), then set the driver to envelope mode and the proper size. Print a test page first, then proceed to print a small batch of envelopes, checking alignment after each few prints. If the logo seems faint, verify that the color profile and contrast are appropriate for the envelope finish and re-run a test after adjusting brightness.
This practical walkthrough helps you translate digital designs into tangible, professional mail pieces.
Tips for Different Envelope Sizes and Materials
Different envelope sizes require different safe zones and alignment strategies. For white kraft or recycled paper envelopes, ink absorption may be different; you may need to slightly increase margins to prevent text from appearing too close to the edge. For heavier stock, use the thick-media setting if available and consider slower printing speeds to ensure ink adheres properly. If you frequently mail, consider saving envelope presets in your printer driver with the exact size and orientation to streamline future jobs.
Print Setup Pro notes that system presets reduce setup time and improve consistency across repeated tasks.
Final Preparation Before Mail Campaigns or Large Runs
Before committing to a large print run, do a final quality check of a small sample and review the alignment, margins, and color accuracy. Confirm that the chosen envelope size is supported on all machines in the workflow to avoid misfeeds in production. Prepare a simple naming convention for files to prevent mismatches between the design and the envelope stock. Have a backup stock and a testing plan in case an envelope type is discontinued. By following these steps, you reduce waste and ensure consistency across batches and campaigns.
With careful preparation, you can scale envelope printing from a single test to full campaigns while maintaining quality.
Tools & Materials
- Printer capable of envelope feeding(Confirm it supports the envelope size you plan to use)
- Envelope stock (e.g., #10 or chosen size)(Choose weight and finish appropriate for your design)
- Plain paper for test prints(2-3 sheets recommended)
- Printer driver software or settings(Set correct envelope size and feed mode)
- Ruler or alignment guides(Helpful for initial layout checks)
- Pencil or removable tape(Temporary marks for positioning)
- Logo graphic (optional)(Vector formats print best)
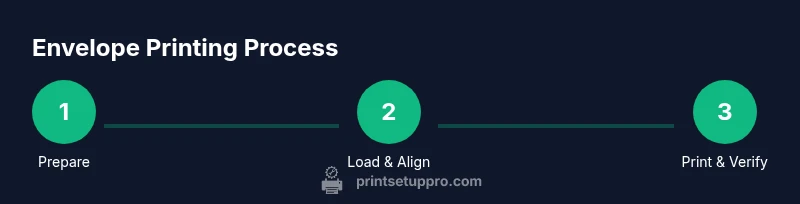
Steps
Estimated time: 30-60 minutes
- 1
Verify envelope and document setup
Check that the chosen envelope size matches the document and printer settings. Confirm margins are within the printable area and that any window areas are accounted for. Create a mental map of where addresses and logos will print.
Tip: Double-check the envelope size in both the document and printer settings before proceeding. - 2
Load the envelopes into the printer correctly
Place envelopes into the tray with the correct orientation for your model. Align the guides to the edges, and avoid overloading the stack. If your printer supports manual feed, use it for the first envelope.
Tip: Use the manual feed when dealing with thick or textured stock to prevent skew. - 3
Configure printer driver for envelope printing
Select the envelope size in the driver, and enable any envelope or thick-media settings. Ensure the orientation is set so the address prints on the correct side. Save the preset if you print this size often.
Tip: Saving presets saves time and reduces setup errors for future runs. - 4
Prepare the document with proper margins
Design the layout with a safe zone away from the edges and seams. Use high-resolution logos and legible fonts sized for the envelope surface. Run a test print on plain paper to verify alignment before using actual envelopes.
Tip: Aim for at least a 3-5 mm safe margin from all edges. - 5
Print a test page and adjust if needed
Print a single test envelope or a plain-paper mock-up to check alignment and print quality. If misalignment occurs, tweak margins or orientation and run another test. Confirm that the adhesive area is free of ink.
Tip: Always test before a full run to catch issues early. - 6
Execute the final envelope print
Print the envelopes in small batches to monitor feed stability. Periodically check for skew and adjust as necessary. After finishing, inspect every envelope for alignment and readability.
Tip: Keep a spare set of the same envelope stock for quick retests if needed.
People Also Ask
Can I print on any envelope size with my home printer?
Most home printers support common sizes like #10, but not all models handle every size. Always consult your printer manual and run a test with the specific stock before a full print.
Most home printers support common sizes, but check your manual and test before a full run.
What is the best practice for envelope print quality?
Use envelopes with smooth finishes, set the driver to envelope mode, and print at a resolution of at least 300 dpi for sharp text and logos.
Set envelope mode and print at 300 dpi or higher for sharp results.
How do I fix skewed printing on envelopes?
Recheck envelope size, adjust the printer's feed guides, and run a plain-paper test to confirm orientation before printing envelopes.
Recheck settings, adjust guides, then test on plain paper.
Should I print logos and text in color on envelopes?
Color logos can look great on envelopes, but ensure the logo is high resolution and that the envelope finish supports the ink. Convert logos to solid fills to prevent bleed.
Yes, color logos can work if high resolution and solid fills are used.
Is it better to outsource large envelope campaigns?
For very large mailings or strict brand control, professional printers can offer speed and consistency, but with proper presets and testing, a well-equipped home or office setup can handle moderate runs.
For very large runs, outsourcing can help, but small to medium batches can be done in-house with care.
What maintenance helps prevent feeding problems?
Keep feed rollers clean, use dust-free envelopes, and run occasional cleaning cycles per the printer manufacturer to maintain reliable feeding.
Clean rollers and use proper stock to prevent feed issues.
Watch Video
Quick Summary
- Plan layout before printing on envelopes.
- Use the correct envelope size and printer settings.
- Always test on plain paper first.
- Inspect output for alignment and readability.