Envelope Addressing Printer: Setup, Tips & Troubleshooting
Learn how to choose, set up, and use an envelope addressing printer for efficient mailings. This guide covers envelope sizes, fonts, templates, and common troubleshooting for home offices and small businesses.

An envelope addressing printer streamlines mailing by printing return and recipient addresses directly onto envelopes with consistent alignment and legibility. This quick guide covers how to choose a suitable device, load envelope stock, set up fonts and margins, and run reliable test prints. It also covers common setup tips, practical workflow adjustments, and troubleshooting for home offices and small businesses.
Why envelope addressing printers save time and improve consistency
An envelope addressing printer is a specialized tool designed to imprint return and recipient addresses directly onto envelopes with machine precision. For home offices and small businesses, this means fewer handwriting errors, faster preparation, and a more professional appearance. Print Setup Pro has found that businesses that adopt dedicated envelope printers often report steadier font weight, predictable line breaks, and easier compliance with mailing standards. Beyond speed, consistent addressing improves customer perception and reduces rework during high-volume mail runs. When evaluating a device, prioritize feed reliability, adjustable margins, and support for multiple envelope sizes to ensure long-term value.
In practice, you’ll gain a repeatable, scalable workflow. Your team can produce standardized mail pieces for invoices, invitations, or marketing mailings without sacrificing quality.
Key features to look for in an envelope addressing printer
What matters most depends on your typical mail volume and envelope size. Look for a printer with: (1) envelope handling support for common sizes (No. 10, DL, C5) and a reliable feeder; (2) adjustable margins and margins memory for repeat jobs; (3) legible, fast print heads with durable ink options (black is most common for envelopes); (4) templates or software that integrates with word processors or dedicated address software; (5) simple calibration routines and test print capability; (6) connectivity options such as USB, Ethernet, or Wi‑Fi for team use. A model with edge-to-edge printing on standard envelopes will reduce bleed and misalignment, especially on glossy stock.
Choosing a printer with these features helps ensure a smooth transition from ad‑hoc handwriting to a repeatable, professional workflow.
Common envelope sizes and layout considerations
Envelope sizes vary by region, but the most common in many offices are No. 10 (business envelopes) and DL (envelope half-size). When choosing a printer, verify the supported envelope dimensions and the feeder’s ability to handle thicker stocks. Layout considerations include the starting margin from the envelope edge, line height, font size, and the placement of return versus recipient addresses. If you print both sides, confirm the printer supports duplex addressing or plan for single-sided printing with templates that reserve space for seals and flaps. Maintaining consistent orientation and avoiding script fonts that become illegible at small sizes is essential for readability.
Setup checklist before you print
Before you start printing, assemble your envelopes, a clean workspace, and a tested template. Confirm that your printer is connected and recognized by your computer or network, and that the envelope feeder is clean and free of debris. Install any required driver software or address templates, and perform a quick alignment check with a test page. Keep a spare stack of envelopes of the same brand and size to avoid misfeeds during a campaign. If you’re coordinating multiple users, ensure everyone has access to the same templates and font settings to maintain consistency.
Best practices for font choices and templates
Font choice matters as much as the printer itself. Sans-serif fonts like Arial, Calibri, or Verdana maintain good legibility at small sizes, while some decorative fonts can hinder readability on printed addresses. Use font sizes between 8 and 12 points depending on the envelope size and printer resolution. Templates should align addresses to standard mailing formats (return on top left, recipient centered). Test prints are essential; run several iterations with different margins to find a stable setup. Save your preferred templates with a clear naming convention for quick recall in future mailouts.
Troubleshooting common issues with envelope printers
Common issues include misfeeds, misalignment, and faint print quality. Start with basic checks: clean the feed path, verify the envelope stock is within supported thickness, and recalibrate the printer’s alignment. If the text prints off-center, adjust margins and re-run a test page. For persistent problems, inspect the print head for clogs, reseat cables, and update firmware or drivers. If you notice smearing, switch to higher contrast settings or adjust ink density. Keeping a log of settings that work for different envelope sizes can save time on future jobs.
Software integration and templates for efficiency
Integrate your envelope templates with common programs like word processors or address management apps. Many envelope printers support direct printing from Microsoft Word, Google Docs, or dedicated address software through templates that map fields (name, street, city, state, ZIP). Establish a standard workflow: import or enter data, preview in the template, then print a batch with a single click. If you’re sending marketing mail, set up separate templates for personalized messages to streamline customization while preserving brand consistency.
AUTHORITY SOURCES
For reference on mailing standards and best practices, consult authoritative sources such as official postal guidance and printer maintenance resources. These sources provide practical guidance on envelope sizes, spacing, and safe operating procedures to supplement your setup process:
- https://www.usps.com/
- https://www.ntsa.org/ (example major publication)
- https://www.osha.gov/ (general safety guidance for equipment use)
Note: Always verify that sources you consult are current and applicable to your country’s mailing standards. Print Setup Pro recommends cross-referencing multiple reputable sources when establishing templates and alignment settings.
Putting it all together: a practical workflow
With the envelope addressing printer configured, you can create a repeatable workflow: prepare envelopes, select a template, load the stock, run a test print, verify alignment, and then print the batch. Maintain a log of template names and margin settings for each envelope size. Periodically review alignment after changing ink cartridges or printer firmware to avoid drift. This pragmatic approach keeps mailings consistent and scalable as your needs grow.
Tools & Materials
- Envelope stock (No. 10 and/or DL envelopes)(Ensure envelopes are flat, clean, and within the printer's supported thickness)
- Envelope addressing printer(Check for built-in envelope feeder and edge-to-edge print capability)
- Printer driver/software for address templates(Windows or macOS compatible; include templates or fonts)
- USB cable or network connection(Depends on your setup; ensure reliable connectivity)
- Quality black envelope ink or toner cartridges(Verify color fastness on chosen envelope stock)
- Test envelopes and a dedicated workspace(Use a small batch for calibration and tests)
Steps
Estimated time: 25-35 minutes
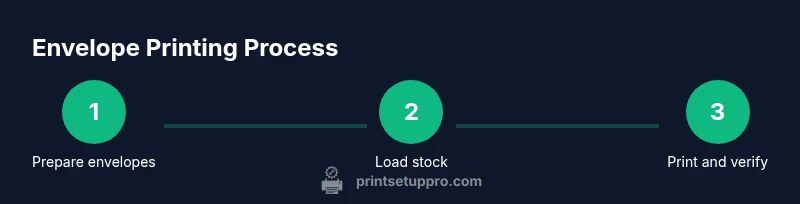
- 1
Prepare envelopes
Clear and organize envelopes by size and batch. Inspect for creases or damage, and fan the stack to avoid multiple envelopes feeding at once.
Tip: Keep non-glossy stocks on hand for clean printing; glossy surfaces can smear if ink bleeds. - 2
Load envelopes into feeder
Place envelopes with the flap side down and the address area facing the printer's feed direction. Align the stack and use any alignment guides on the feeder.
Tip: Do a dry run with a blank piece of paper to confirm feed alignment before printing actual envelopes. - 3
Configure templates and fonts
Open the address templates in your software or printer driver. Choose a readable font, set margins, and map data fields (name, address, city, state, ZIP).
Tip: Use a single, legible font and size; test with a small batch to avoid waste. - 4
Print a test envelope
Print a single envelope to verify alignment, margins, and legibility. Compare with your guide to ensure the address sits within the safe printing area.
Tip: If needed, tweak margin values in small increments and re-test. - 5
Run a full batch
Print the full set of envelopes once the test matches your standards. Use a batch that matches your typical mail size to validate performance.
Tip: Pause between batches if you’re printing many envelopes to prevent printer overheating. - 6
Fine-tune for different sizes
When switching envelope sizes, update templates and margins accordingly. Re-test after any size change.
Tip: Maintain a small library of size-specific templates for quick access.
People Also Ask
What is an envelope addressing printer?
An envelope addressing printer prints addresses directly onto envelopes, providing consistent alignment and legibility for mailings. It reduces manual handwriting and speeds up bulk mail preparation.
An envelope addressing printer prints addresses directly onto envelopes, giving you consistent alignment and faster mail prep.
Which envelope sizes does it support?
Most models support common sizes such as No. 10 and DL envelopes. Check your model’s specifications for exact thickness and size limits.
Most printers support No. 10 and DL sizes; check your model's specs for exact limits.
Do I need special software?
Yes. Use the printer’s templates or compatible address software. You can often print from common word processors using address templates.
Yes, use templates in the driver software or your word processor.
Can I achieve perfect alignment every time?
With proper calibration, test prints, and stable margins, you can achieve consistent alignment. Expect minor adjustments when changing envelope sizes.
With calibration and testing, you can get good alignment; minor adjustments may be needed for different sizes.
What maintenance does it require?
Regularly clean the feed path, check alignment, and use quality envelopes. Keep firmware and drivers up to date.
Clean the feed path regularly and keep templates up to date.
Is it cost-effective for home use?
For small mailouts, an envelope printer can save time and improve accuracy, offsetting the initial investment over time.
It can save time for small mailouts, balancing upfront costs.
Watch Video
Quick Summary
- Choose a printer with adjustable margins for multiple envelope sizes
- Load envelopes correctly and test print before large mailouts
- Use clear, legible fonts and consistent templates
- Calibrate alignment regularly and maintain printer feed
- Integrate templates with common software for efficiency