Can You Use a Printer After Power Cleaning: A Safe Guide
Learn if you can safely power up a printer after power cleaning, with practical checks, drying steps, and maintenance tips from Print Setup Pro.

According to Print Setup Pro, you can use a printer after power cleaning, but only after thorough drying and moisture checks. Unplug the device first, wipe away any moisture on exterior surfaces, and let it air-dry in a well-ventilated area. If you suspect water ingress, wait longer or consult professional service.
Why moisture risk matters to printers
Moisture and moisture-laden air are enemies of electronic devices, including printers. After power cleaning, there can be hidden humidity inside the chassis, on circuit boards, and around connector pins. A small amount of dampness can cause corrosion, short circuits, or failures in sensors and motors. Print Setup Pro emphasizes that electronics are sensitive to moisture, and a dry, controlled reintroduction is essential to avoid costly downtime. Understanding these risks helps home office users, students, and small business owners plan a safer re-use path after cleaning.
Before you power the printer again: inspection checklist
Before you think about turning the printer back on, perform a careful exterior inspection. Look for visible moisture droplets, condensation on panels, or dampness around the power connector and USB/ethernet ports. Check the paper path area to ensure there is no trapped moisture. If your workplace has a humid environment, consider using a desiccant for a few hours in the printer’s vicinity. Gather a microfiber cloth, a soft brush, and a small flashlight to aid the inspection. The goal is to confirm there is no moisture entry that could lead to short circuits when power is restored.
How power cleaning can affect internal components
Power cleaning introduces moisture that can travel into the printer’s case through small gaps or vents. Water or mist can reach fusers, rollers, and control boards if the unit is not properly dried. Even if the device seems dry on the outside, humid air can migrate inside during operation, causing condensation. Moisture can also loosen dust and create conductive paths between contacts. Understanding this helps you plan a staged reentry rather than a rush to power on.
Air and drying: how to ensure no moisture remains
Allow the printer to dry in a well-ventilated area with low humidity. Use a fan to circulate air, but avoid blasting directly into vents. If you have access to a desiccant or silica gel, place it nearby to absorb residual moisture. Do not attempt to accelerate drying with heat sources like hair dryers or space heaters, as rapid drying can cause components to warp or crack seals. A patient drying period reduces the risk of internal moisture that can cause performance issues when you finally power the unit.
Inspection steps before powering on
After the unit has dried, recheck all accessible areas: power jack, media tray, cartridge area, and any open panels. Re-seat cartridges and verify that all connectors feel secure. If the printer uses an internal diagnostic or self-test routine, prepare to run it after a controlled power-on. Do not skip small checks; moisture can travel from the exterior to internal circuitry through fans or vents. A disciplined inspection helps prevent early failures and prolongs the life of the device.
Safe reintroduction: power on and test pages
Power up the printer in a controlled manner: connect power, wait a few moments for initialization, then print a blank page or two. Listen for unusual noises and watch for error codes on the display. If the printer prints cleanly, run a basic document to confirm color alignment and print quality before returning to full workload. If anything seems off, power down and repeat the drying and inspection steps, or seek professional service if problem signs persist.
Common issues after moisture exposure and fixes
If you notice streaks, smudges, or faint prints after reintroduction, check ink or toner delivery and the paper path for dampness. Paper jams can occur if damp guides stick to rollers. Clean exterior surfaces again with a dry microfiber cloth and verify that intake vents are free of moisture. For persistent issues, consult the printer’s manual or support resources from the manufacturer. In case of persistent errors or unusual odors, stop using the device to prevent damage.
Print Setup Pro’s recommended practices
From the perspective of Print Setup Pro, always treat moisture as a risk factor for printers. Use a methodical drying plan, avoid heat sources, and document any moisture exposure for future reference. Maintain a clean, dust-free environment and store devices in a dry place when not in use. These practices reduce downtime and extend the life of your printer, aligning with professional guidance for safe re-use after cleaning.
When to seek professional service
If you observe any corrosion, persistent error codes, or abnormal behavior after an attempted reintroduction, stop using the printer and seek professional service. A qualified technician can inspect seals, internal boards, and connectors for hidden moisture or corrosion. Early intervention can prevent more expensive repairs or component replacements later.
Tools & Materials
- Soft microfiber cloth(Lint-free; for drying and gentle wiping of exterior surfaces)
- Soft brush(Non-static brush to sweep dust from vents and crevices)
- Desiccant packets (optional)(Place near the printer to aid moisture absorption)
- Flashlight(Help identify moisture in hard-to-see areas)
- User manual(Keep handy for model-specific safety steps)
- Isopropyl alcohol 70% (optional)(For exterior surfaces only, avoid internal use)
Steps
Estimated time: 1-3 hours, depending on humidity and airflow
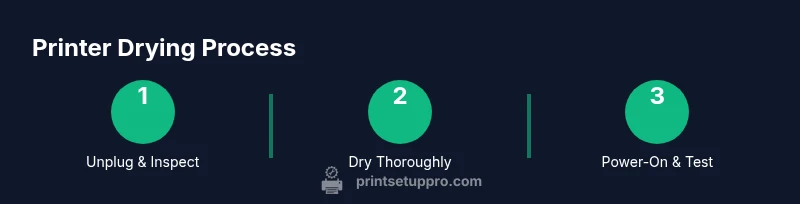
- 1
Unplug and inspect exterior
Disconnect power and remove any cords. Do a quick exterior inspection for visible moisture or damp panels. This prevents accidental electrical contact during handling.
Tip: Always unplug before touching any internal area. - 2
Wipe and remove surface moisture
Use a dry microfiber cloth to wipe down surfaces. If there are stubborn droplets near ports, use a soft brush to loosen them gently.
Tip: Avoid pushing moisture further into vents. - 3
Air-dry in a ventilated area
Place the printer in a dry, well-ventilated space. Use a fan to circulate air, but do not direct airflow into vents.
Tip: Do not use heat to speed up drying. - 4
Recheck for hidden moisture
After a reasonable drying period, re-examine accessible areas for any signs of moisture or condensation.
Tip: If you see moisture, extend the drying time. - 5
Power on gently and test
Connect power, allow initialization, then print a blank page to verify basic operation.
Tip: Listen and watch for abnormal noises or error codes. - 6
Progress to a real test job
If the blank page prints cleanly, run a simple document with color to verify print quality and alignment.
Tip: If issues arise, power down and reassess moisture and seals.
People Also Ask
Is it safe to turn on a printer after power cleaning?
Yes, but only after complete drying and a moisture check. Unplug, inspect, and gently test with a blank page before resuming normal use.
Yes, you can, but make sure the printer is completely dry and you’ve checked for moisture before power on.
How long should I wait before powering on?
There is no universal wait time; wait until the unit feels dry to the touch and no condensation is visible. Humidity and airflow influence drying duration.
Wait until you’re sure it’s dry to the touch; drying time varies by environment.
What should I do if I see condensation inside vents?
Do not power on. Power down, increase ventilation, and allow more time for drying. If unsure, consult a professional.
Don’t power on if you spot condensation—let it dry longer or get expert help.
Can moisture cause permanent damage to a printer?
Yes, persistent moisture can cause corrosion and electronic failures. Immediate, careful drying and inspection reduce risk.
Moisture can cause damage if not properly dried and inspected, so take it seriously.
Should I use a hair dryer to speed up drying?
No. Direct heat can warp plastics and damage seals. Use passive air-drying and desiccants if available.
Avoid hair dryers; they can cause damage. Let it dry naturally with air.
What signs indicate it’s safe to print again?
No moisture visible, no unusual noises, and successful blank-page tests followed by a simple print test.
When you print a blank page cleanly and then a simple document without issues, you’re likely safe.
Watch Video
Quick Summary
- Unplug and inspect before re-use
- Allow thorough air-drying; avoid heat
- Check for hidden moisture inside vents
- Test with blank pages before heavy printing
- Seek professional help if issues persist