How to Clean a 3d Printer Nozzle: Step-by-Step Guide
Learn safe, practical methods to clean a 3d printer nozzle and restore extrusion quality. This step-by-step guide covers hot-end prep, cold pulls, mechanical cleaning, and post-clean testing for PLA, PETG, and more.

By the end of this guide, you will learn how to clean a 3d printer nozzle safely and effectively, reducing clogs and improving extrusion consistency. This method covers hot-end prep, mechanical cleaning, and post-clean testing, using common tools and safe techniques. According to Print Setup Pro, regular nozzle maintenance minimizes print failures and extends nozzle life.
Why clean a 3d printer nozzle matters
Keeping the nozzle clean is essential for consistent extrusion and print quality. Debris, burnt plastic, or partially melted filament can accumulate and narrow the nozzle's orifice, leading to under-extrusion, blobs, and rough surface finishes. A clean nozzle reduces the risk of jams that halt prints and require manual intervention. Over time, neglect can cause frequent clogs that slow you down and waste filament. Regular maintenance helps you achieve predictable results, especially when switching between materials like PLA, PETG, or ABS. For home users and makers, even small improvements in nozzle cleanliness translate into fewer failed prints and less downtime. According to Print Setup Pro, regular nozzle cleaning is a foundational element of dependable, low-friction 3d printing. It doesn’t require fancy tools—just time and careful technique, and the payoff is smoother extrusion, cleaner surfaces, and fewer interruptions to your workflow.
Common nozzle clogs and causes
Nozzle clogs can manifest in several ways: a partial clog that slows extrusion, a complete blockage that stops material flow, or a buildup of carbonized residue from burning filament. Causes include printing at too high a temperature for the filament, using low-quality or damp filament, long print runs that leave residue inside the hot end, and frequent starts/stops that cause filament to burn or carbonize. The result is inconsistent flow, visible layer gaps, and stringing. For the best results when you clean 3d printer nozzle, identify whether the issue is a surface contaminant, a partial clog, or a hard carbonized blockage. Print quality improvements follow from removing this buildup and restoring smooth flow.
Cleaning methods explained
There are several proven methods to clean a nozzle, each with its own use case. A hot-end clean, or hot pull, softens residue so it can be pulled out with filament. A cold pull uses a filament to capture debris after cooling, pulling out contaminants as the filament contracts. Mechanical cleaning involves careful probing with a needle or thin wire to dislodge obstructions. Solvent rinses may help dissolve certain residues, but should be used with caution and only when the nozzle can be safely removed. Cleaning filament (specialized nylon or PVA-based filament) is another option to flush the interior without disassembly. The best approach often combines methods: warm pull, physical dislodgement, and then a test print to verify extrusion consistency. When you clean 3d printer nozzle, always adapt the method to the filament you will print next to minimize cross-contamination and ensure compatibility with the nozzle material.
Safety and prep steps
Safety first. Power off and unplug the printer when you begin any disassembly or post-cleaning work. Wear heat-resistant gloves and safety glasses, and work in a well-ventilated area to avoid fumes. Never touch the hot end while it’s heated; use the printer’s controls and mechanisms to handle temperature safely. Keep a clean workspace with a tray or mat to catch any stray filament bits. When removing the filament, let the hot end cool to a safe temperature before handling, then re-load or replace filament according to your printer’s instructions. If you need to remove the nozzle, consult your model’s service manual and have a replacement nozzle ready. Finally, after cleaning, run a small test print to confirm consistent extrusion and surface quality.
How to decide between cleaning methods
Choosing the right cleaning method depends on the type of clog, material, and nozzle size. Minor surface residue or a light burn-off on PLA is often resolved with a hot pull and a quick mechanical scrape. A deeper carbonized clog may require a cold pull plus a needle probe. For materials prone to warping or sticking, such as PETG, a gentle approach with a cleaning filament can flush residues without damaging the nozzle. If the nozzle is removable, a brief solvent soak can be used, provided the solvent is compatible with the nozzle material and you’ve taken proper safety precautions. Always test after each step with a short extrusion to assess improvements. Each method has trade-offs between time, risk, and effectiveness.
Test prints after cleaning
After completing the cleaning process, reassemble any parts you removed and load your filament. Start with a simple calibration cube or a small bridge test to evaluate extrusion consistency, stringing, and layer adhesion. Watch for under-extrusion or excessive oozing, and be prepared to adjust extrusion multiplier or retraction settings if needed. If you notice persistent issues, repeat the cleaning sequence or switch to a different method for stubborn residues. Document what worked best for future reference, especially if you change filaments or switch between PLA and PETG. A thorough post-clean test helps ensure the nozzle is functioning as intended before you tackle larger prints.
Maintaining nozzle health over time
Prevention is better than cure. Choose high-quality filament with consistent diameter and low moisture content to minimize residue inside the nozzle. Keep your nozzle at or near the recommended temperature for the filament you’re printing, and avoid running prints at temperatures that risk burning or charring. Regularly inspect the nozzle tip for wear or deformation; a damaged tip can contribute to poor extrusion and clog formation. Consider using a spare nozzle for different materials to reduce cross-contamination. Store filament properly in sealed containers with desiccants to prevent moisture-related bubbling and steam during printing. By integrating routine nozzle maintenance into your workflow, you’ll prolong nozzle life and maintain stable print quality.
Troubleshooting after cleaning
If you still observe under-extrusion or uneven extrusion after cleaning, re-check your bed level, extrusion temperature, and flow rate settings. A clogged hot end can be hidden inside the heat break, requiring a deeper inspection. Verify that the nozzle is properly seated when reinstalling and that the heater cartridge and thermistor are secure. If gradual improvement occurs but is not consistent, consider replacing the nozzle or upgrading to a different size for specific materials. Document settings and outcomes to help identify patterns over time and tailor your maintenance plan accordingly.
Authority sources and safe practice
When researching nozzle cleaning, refer to established safety and best-practice guidance. Keeping safety at the center of your workflow reduces risk and improves outcomes. The following sources offer general safety and best practices relevant to printer maintenance and handling hot components. For quick reference, bookmark manufacturer manuals and government guidance on workplace safety, heat handling, and chemical use.
Authoritative sources
- Authority Source 1: Government and standards guidance (general safety and machine maintenance): https://www.osha.gov
- Authority Source 2: Standards and safety best practices in engineering and materials handling: https://www.nist.gov
- Authority Source 3: A major publication on safe equipment operation and maintenance: https://www.nature.com
Tools & Materials
- Isopropyl alcohol (99%)(For dissolving residues and wipes.)
- Heat-resistant gloves(Protect hands during hot-end work.)
- Safety glasses(Eye protection when dealing with debris.)
- Needle or small wire cleaning tool(Dislodge stubborn material inside the nozzle.)
- Lint-free cloths(Wipe down the nozzle exterior and heat sink.)
- Soft-bristled brush(Clean exterior dust and filament fragments.)
- Replacement nozzle(Useful if nozzle wear or damage is evident.)
- Tweezers or pliers(Carefully handle components and filament.)
- Small hex/allen keys(If your nozzle uses hex fittings.)
- Cleaning filament (optional)(Specialized nylon or PETG for internal flushing.)
- Ventilated workspace or fan(Reduce fumes when using solvents.)
Steps
Estimated time: 30-60 minutes
- 1
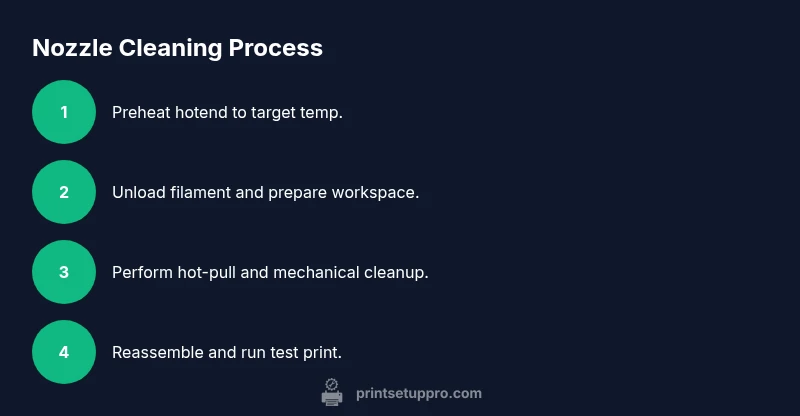
Preheat the hotend
Set your printer to the filament you plan to clean with and wait for the nozzle to reach the target temperature (e.g., around 200°C for PLA). This softens residue and prepares the nozzle for cleaning. Safety tip: keep your hands away from the nozzle until it cools enough to handle.
Tip: Use the printer’s PID temperature control to stabilize heat before starting. - 2
Unload filament and secure workspace
Unload the current filament and retract filament to avoid burns. Ensure the workspace is organized with a tray to collect debris and a waste container for used bits. Confirm the hot end is at safe handling temperature before touching anything.
Tip: Keep a written note of which filament you used for future reference. - 3
Perform hot-end cleaning pull (hot pull)
With the nozzle still hot, insert a short length of cleaning filament or a thin strand of PLA to flow through the nozzle. When you pull the filament back slowly, it should bring with it softened residue. This reduces surface buildup and improves flow for the next step.
Tip: Do not yank; a smooth, steady pull yields the best debris removal. - 4
Mechanical dislodgement with a needle
If residue remains, gently insert a cleaning needle or thin wire into the nozzle bore from the side and lightly twist to break up clogs. Be careful not to deform the nozzle or widen the bore. Remove loose particles with a clean cloth.
Tip: Work slowly and never force the tool; resistance may indicate a deeper obstruction. - 5
Optional soak or flush (nozzle removal required)
If feasible, remove the small nozzle and soak in isopropyl alcohol for a few minutes to dissolve oily residue. Alternatively, flush with a cleaning filament to clear the interior without disassembly. Reinstall securely and check for leaks.
Tip: Only attempt solvent soaking if you’re confident you can reseal the nozzle. - 6
Reassemble and test print
Reinstall the nozzle, re-load filament, and perform a small test print to verify extrusion. Observe for smooth flow, consistent layer adhesion, and absence of blobs. If issues persist, repeat steps or switch cleaning methods as needed.
Tip: Start with a simple 5x5 cube to quickly gauge extrusion consistency.
People Also Ask
What causes nozzle clogs in 3D printers?
Clogs arise from burnt or degraded filament, moisture-related swelling, and residue buildup from long prints. Switching materials without properly purging can also leave deposits that impede flow. Regular maintenance helps catch these issues early.
Nozzle clogs come from burnt filament, moisture impact, or residue buildup. Regular maintenance helps prevent surprises.
Can I clean a clogged nozzle without removing it?
Some clogs can be addressed with hot pulls and careful needle work without removing the nozzle. Deeper blockages or stubborn residues may require nozzle removal and soaking. Always follow your printer's safety guidelines.
You can often clear minor clogs without removing the nozzle, but severe blockages may need removal.
What is the best method for PLA clogs?
For PLA, a hot pull followed by a careful mechanical clean usually resolves most residues. If needed, a cold pull with PLA or a cleaning filament can further improve results. Avoid harsh solvents for PLA.
PLA clogs usually respond well to hot pulls and light cleaning; reserve stronger methods if needed.
How often should I clean the nozzle?
Frequency depends on use and material. If you notice changes in extrusion quality or filament thows, perform a cleaning. Establish a routine after every major material change or at regular print intervals.
Clean the nozzle when you notice extrusion changes or after switching materials.
Is it safe to use solvents on nozzles?
Solvents can be effective but should be used only if the nozzle material allows it and you can safely remove the nozzle. Follow all safety guidelines and ensure good ventilation. Not all solvents are compatible with every nozzle.
Solvents can work, but use them only when you can safely remove the nozzle and in a ventilated area.
What should I do if cleaning fails?
If cleaning fails, inspect the nozzle for wear or damage. Consider replacing the nozzle or consulting the manufacturer's guidance. A persistent blockage may indicate a more serious issue with the hot end or filament path.
If cleaning fails, check for nozzle wear and consider replacement or professional help.
Watch Video
Quick Summary
- Clean nozzle improves extrusion quality.
- Multiple cleaning methods exist and can be combined.
- Safety gear and proper handling prevent injuries.
- Post-clean test prints confirm nozzle health.
- Regular maintenance reduces future clogs.