How Often to Clean Printer Heads: A Practical Guide for 2026
Discover practical guidance on how often to clean printer heads to maintain print quality. Learn factors, scenarios, step-by-step methods, and expert tips from Print Setup Pro.

To keep printer output reliable, clean the printer heads when you notice color gaps, streaks, or uneven printing. How often you do it depends on usage, ink type, and the printer model, but a proactive nozzle check every few weeks is a good rule for moderate home use. Print Setup Pro recommends alternating between quick nozzle checks and light cleaning to maintain print quality.
What the question really asks: how often to clean printer heads and why it matters
If you print regularly, you may wonder about a fixed schedule for cleaning printer heads. The reality is that there is no one-size-fits-all timetable, because nozzle wear varies by usage, ink type, and environmental conditions. The goal of asking how often to clean printer heads is to minimize print defects, avoid costly repairs, and keep output consistent. According to Print Setup Pro, rather than rigid calendars, use diagnostic tests to guide you. A quick nozzle check helps you determine whether a cleaning cycle is necessary, and it should be your first step whenever you observe color gaps, streaks, or misalignment on test pages. This approach keeps you in control of maintenance while preventing unnecessary cleaning that wastes ink and time.
Why the frequency should be practical, not rigid
Maintenance routines work best when they align with actual outcomes rather than a fixed timeline. Print head cleaning consumes ink and may affect cartridge cycles, so scheduling it around detected issues is more economical and effective. The Print Setup Pro team emphasizes monitoring print quality indicators and responding promptly. This mindset reduces downtime and extends printhead life by keeping nozzles clear and minimizing recovery cycles.
What counts as a 'clean' run: quick vs. deep
A quick clean is a short cycle that aims to flush minor clogs and restore passable alignment. A deep clean is longer and uses more ink; it may be necessary if multiple colors are affected or if the printhead has been idle for an extended period. The decision hinges on the severity of symptoms and your printer’s guidelines. In all cases, start with a nozzle check and then decide whether a light wipe of the exterior or a formal cleaning cycle is warranted.
Practical signs that it’s time to check heads
Look for color streaks, missing lines, or dull grayscale when printing a standard test page. If you see inconsistent results across pages or noticeable banding, plan a nozzle check and possible cleaning. Regular checks help you catch problems early and avoid more extensive maintenance later. Print Setup Pro notes that early detection reduces the need for aggressive cleaning that can shorten cartridge life.
A simple baseline you can start with today
For most home users, begin with a monthly nozzle check and a light cleaning if quality drops. If you print daily with color-heavy documents, consider biweekly checks and more frequent light cleanings. Keep a small maintenance log to track symptoms and actions taken. This habit not only preserves print quality but also clarifies when it’s time to replace a cartridge or service the printer.
Tools & Materials
- Lint-free swabs(Use one-time, non-shedding swabs for any heads you can access.)
- Isopropyl alcohol (70%)(Only if recommended by your printer’s manual; dampen swab lightly—in short, controlled touches.)
- Distilled water(For printers that require water-based rinsing; avoid tap water due to minerals.)
- Microfiber cloth(Soft, lint-free cloth for exterior wipe-downs and spill control.)
- Gloves(Optional, to keep ink off your hands during maintenance.)
- User manual or nozzle-check sheet(Always consult your model’s guidance before cleaning heads.)
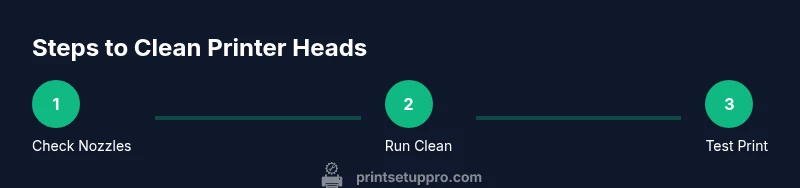
Steps
Estimated time: 20-40 minutes
- 1
Power off and prepare
Turn off the printer and unplug it. Open the printer cover and remove the cartridges if the model allows safe removal. Gather your cleaning tools and set up a clean, well-lit workspace. Why: a calm, controlled environment reduces the risk of damage and helps you perform precise actions.
Tip: Keep a simple log: date, symptoms, action taken, and observed results. - 2
Run a nozzle check
Print a test page to assess nozzle health and identify clogged colors. If lines are uniform, there may be no action required. If you see gaps or color bands, proceed to a cleaning cycle.
Tip: If your printer stores test patterns, print one on plain paper for clarity. - 3
Perform a light cleaning
Using the dampened swab or the printer’s built-in function, gently wipe or cycle through the affected head area. Avoid applying excess liquid and do not rub aggressively. This step helps loosen minor clogs without wasting ink.
Tip: Do not touch sensor pads or golden contacts; keep liquids away from them. - 4
Run a test print again
Print a color test page or a simple document to evaluate the result. If gaps persist, you may need a deeper cleaning cycle or consult the manual for a specific cleaning procedure.
Tip: If the issue remains, proceed to a deeper cleaning only if your manual permits it. - 5
Consider an extended cleaning
For stubborn clogs, run a deeper cleaning cycle or repeated passes, as directed by your printer’s guidelines. Keep an eye on ink usage and cartridge health to avoid waste.
Tip: Do not run extended cycles too frequently; excessive cleaning can shorten cartridge life. - 6
Reinstall cartridges and run alignment
Reinsert the cartridges, reset any color alignment settings, and run a final test page to verify alignment and print quality. This completes the routine and ensures consistent output.
Tip: Always store cartridges level and avoid touching protective tape on nozzles.
People Also Ask
How often should I clean printer heads for a home printer?
Cleaning frequency depends on usage and print quality. Start with a nozzle check monthly and perform light cleaning when you notice issues. Increase frequency if you print high-volume color documents.
Start with a monthly nozzle check and only clean when you notice print issues; increase frequency if you print a lot of color documents.
Can cleaning damage the printer heads?
If you follow the manufacturer’s guidance and use gentle techniques, cleaning is safe. Aggressive scrubbing or improper liquids can cause damage, so always consult the manual first.
Cleaning is safe when you follow the manual and use gentle methods; avoid aggressive scrubbing.
Should I use cleaning solutions or only water?
Use only recommended methods from your printer’s manual. Many printers require no external cleaners, while some allow distilled water or a mild solvent as directed.
Use only methods recommended by the manual; if in doubt, avoid cleaners and use the built-in functions.
When should I replace a print head or printer?
If printing issues persist after multiple cleaning cycles and nozzle checks, or if frequent clogging occurs, consider replacing the head or the printer, especially for older models.
If issues persist after cleaning and checks, replacement may be necessary for older models.
Is there a best time to run a deep cleaning?
Use deep cleaning sparingly; reserve it for persistent color issues after a nozzle check. Repeated deep cleaning wastes ink and could affect cartridge life.
Deep clean only when tests show persistent issues after a nozzle check.
Does Print Setup Pro have recommended practices?
Print Setup Pro advises using diagnostic tests to guide cleaning frequency, and to pair cleanings with regular maintenance like using quality ink and proper storage.
Print Setup Pro suggests diagnostics to guide cleaning and combining with good ink and storage habits.
Watch Video
Quick Summary
- Start with a nozzle check before cleaning.
- Match cleaning intensity to observed symptoms.
- Avoid over-cleaning; conserve ink and cartridges.
- Consult model-specific guidelines for safety.