How to Clean Printer Heads: A Step-by-Step Guide
Discover safe, practical steps to clean printer heads using built-in tools and common supplies. This guide covers nozzle checks, cleaning routines, and troubleshooting for inkjet printers.

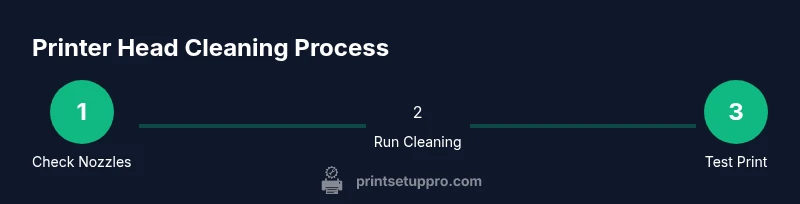
Goal: restore print quality by safely cleaning printer heads. Start with the printer’s nozzle check and built-in cleaning cycle, then use gentle manual cleaning if the problem persists. Always follow manufacturer guidelines to avoid damage and waste. This quick, repeatable process helps prevent clogged nozzles, color misalignment, and paper snags caused by dried ink. Regular checks also catch early signs before a full cleaning is needed.
What is involved in cleaning printer heads and why it matters
Cleaning printer heads is a maintenance task that helps restore and maintain print quality by removing dried ink, air bubbles, and minor clogs that cause color gaps or streaks. In many printers, a built-in nozzle check and cleaning routine can fix minor issues without disassembly. For home office users, small business owners, students, and DIY enthusiasts, understanding the basics of how printer heads work and how to perform safe maintenance is essential. The goal of this guide is to teach you how to clean printer heads safely, efficiently, and with equipment you likely already have on hand. According to Print Setup Pro, starting with a nozzle check and using the printer’s own cleaning tools minimizes the risk of damage and waste while preserving print head life. By keeping to manufacturer guidelines, you reduce the chance of unintentionally forcing ink or fluids into delicate areas.
You’ll benefit from knowing the difference between simple head cleaning and deeper interventions. A light cleanup is often enough, while persistent issues may require a more thorough approach. The keyword here is control: avoid rushing cycles or using aggressive solvents that the print head or cartridge assembly may not tolerate. This section will lay the groundwork for a safe, effective process that you can repeat as part of routine printer care.
Diagnosing the need for a cleaning
Clogging usually shows up as missing lines, color misalignment, or faint print results. Before you begin any cleaning, print a diagnostic test page or run a nozzle check to establish a baseline. If the test shows gaps or missing colors consistently in the same areas, it’s a strong sign you should proceed with cleaning. If your printer has multiple heads (e.g., for CMYK), inspect each color line; a blockage in one color often doesn’t affect the others. This step is important because it helps you confirm that a cleaning is warranted and helps you track improvement after each action.
From a workflow perspective, starting with the minimal intervention and escalating only as needed is best practice. Print Setup Pro emphasizes non-destructive approaches first, as early or repeated aggressive cleaning can wear ink channels or shorten cartridge life. Keep a log of your nozzle results and cleaning cycles to avoid overdoing it and to optimize future maintenance.
Safety and prep before cleaning
Always power off and unplug the printer before you begin any cleaning work. Remove cartridges if the user manual advises this step, and place the printer on a clean, dry surface. Use gloves to minimize skin contact with ink and fluids, and work in a well-ventilated area. Gather your cleaning tools in a tray to avoid spills and keep cleaners away from electronics. If your printer requires specific fluids, use only manufacturer-approved solutions to prevent damage. Print Setup Pro reminds readers that improper liquids or aggressive solvents can cause damage to print heads and circuitry, so follow model-specific guidance closely.
The safety mindset is part of the process: never spray liquids directly onto the print head or into the ink cartridge bays. Instead, dampen a swab and apply it softly to the relevant surface. This careful approach reduces the risk of unintended leaks and protects delicate components. In the next sections, you’ll see how to implement the steps with practical, safe methods.
Built-in nozzle check and cleaning routines
Most modern inkjet printers offer a nozzle check page and cleaning cycle accessible from the printer’s maintenance menu. Start with the nozzle check to identify any missing lines. If lines appear, run the cleaning cycle once or twice as recommended by the device. Allow a short rest (about 5 minutes) between cycles to let ink flow settle. These built-in features are designed to be user-friendly and reduce the need for manual intervention, aligning with Print Setup Pro’s guidance on using manufacturer-provided tools first before attempting more involved cleaning.
Keep test pages handy so you can compare results across cycles. If you observe improvement after the first cycle but imperfect results remain, proceed to slightly more involved cleaning methods described in the next sections. Avoid excessive cycles in a single session, as repeated cleaning can waste ink and potentially affect cartridge seals.
Gentle manual cleaning with damp swabs
If the nozzle check indicates stubborn clogs, you may need to perform a gentle manual cleaning with damp swabs. Use distilled water or a manufacturer-approved cleaning solution, and lightly dab, never scrub, the exposed printhead surface. Work from the center of the head outward and avoid touching copper contacts or electrical pads. Keep the swab only damp, not dripping, to prevent pooling liquid inside the printer. Remember, manual cleaning should be done with care and only when permitted by the printer’s manual.
Be mindful of residue: after cleaning, you should perform another quick nozzle check to evaluate results. If you see improvement, run one more cleaning cycle using the printer’s built-in tool to finalize the process. Print Setup Pro notes that cautious manual cleaning can resolve persistent clogs when used in tandem with official maintenance routines.
Drying, reassembly, and test printing
After cleaning, allow the printhead to dry thoroughly before reassembling or re-installing cartridges. This reduces the risk of smearing or alignment issues in the subsequent print run. Once dry, reinsert the cartridges and print a test page. Compare against the initial diagnostic to confirm improvement. If the print quality is back to normal, you’ve completed a successful cleaning without needing professional service. If issues persist, consider repeating the steps or seeking official support.
Document the steps and results for future reference. Regular maintenance using manufacturer guidance can keep print quality consistent and minimize downtime. The goal is a smooth workflow that you can repeat when necessary without risking damage to the print head or cartridges.
Troubleshooting common post-cleaning issues
If you still see streaks, lines, or color gaps after cleaning, recheck the alignment and print head calibration if your printer supports these options. Sometimes misalignment or cartridge seating problems masquerade as clogged heads. Re-run the nozzle check and cleaning cycle, and ensure the cartridges are properly installed and seated. In some cases, a defective cartridge or a damaged printhead may require replacement by a service technician. Always consult the user manual and manufacturer support resources when in doubt.
If a hardware fault is suspected, avoid repeated cleaning cycles as a workaround. Recurrent issues after a thorough cleaning may indicate a bigger problem that cannot be resolved through routine maintenance alone. Print Setup Pro recommends contacting support or scheduling a professional service in such cases.
Tools & Materials
- Lint-free swabs (foam or cotton)(Use swabs that won't shed fibers; avoid paper towels that shed lint.)
- Distilled water(Use only distilled water for dampening swabs.)
- Isopropyl alcohol 70% (optional)(Only if the printer manual approves; some printheads are sensitive to alcohol.)
- Gloves (nitrile)(Protect hands and prevent oils from transferring to printhead.)
- Soft microfiber cloth(For blotting and drying; avoid rough materials.)
- Manufacturer-approved cleaning solution(Use only if provided or recommended for your model.)
- Printer owner's manual(Keep handy for model-specific steps and warnings.)
Steps
Estimated time: 30-45 minutes
- 1
Power down and prepare the printer
Turn off the printer and unplug the power cord. Open accessible panels and remove cartridges if the manual allows. Clear a clean, dry workspace and lay out your tools within easy reach.
Tip: Keep liquids away from electrical components and work on a non-slip surface. - 2
Run a nozzle check
From the printer’s maintenance menu, print a nozzle check page. Inspect the output for missing lines or gaps. If lines appear complete, you may not need further cleaning, but monitor output over the next few prints.
Tip: Have a test page ready to compare before and after cleaning results. - 3
Run the cleaning cycle
Initiate the printer’s cleaning cycle once or twice as needed, allowing a short pause between cycles. Don’t exceed the recommended number of cycles in a single session to avoid stressing the system.
Tip: If the first cycle shows improvement but not full restoration, wait 5 minutes before the next cycle. - 4
Prepare and apply damp swabs
Moisten a swab with distilled water or a manufacturer-approved cleaning solution. Wring out excess liquid so the swab is damp, not dripping. Gently dab the printhead surface following the direction of ink channels.
Tip: Avoid scrubbing; gentle touches reduce risk of damage. - 5
Clean the printhead surface
Carefully wipe the printhead surface from the center outward with a fresh damp swab. Do not touch copper contacts or any electrical areas. If residue persists along lines, use a fresh swab and repeat once.
Tip: Keep the area around the printhead clean to prevent recontamination. - 6
Dry, reseat cartridges, and test
Allow the printhead to air-dry for several minutes. Reinstall cartridges if you removed them. Run another nozzle check and print a test page to confirm restoration of color and alignment.
Tip: If smudging occurs, run a final cleaning cycle or calibration if available. - 7
Evaluate results and seek help if needed
If issues persist after cleaning, re-evaluate alignment, cartridge seating, or consider professional service. Persistent issues may indicate a faulty printhead or cartridge.
Tip: Document steps and results to help support staff if needed.
People Also Ask
Why do printer heads get clogged frequently?
Clogs are usually caused by dried ink, air bubbles, or infrequent use. Infrequent printing can let ink dry in the nozzles, forming blockages that hinder flow. Regular use and maintenance help prevent this buildup.
Clogs happen when ink dries in the nozzles due to inactivity. Frequent use and timely cleaning prevent buildup.
Can I use tap water or household cleaners to clean printheads?
Tap water and many household cleaners can introduce minerals or chemicals that harm the printhead. Use distilled water and manufacturer-approved cleaning solutions whenever possible.
Avoid tap water and household cleaners; use distilled water or the printer’s approved fluids.
How often should I perform printhead cleaning?
Cleaning frequency depends on usage and symptoms. If you notice color gaps or streaks, run the nozzle check and a cleaning cycle. For light users, a monthly check is usually sufficient.
Check and clean when you see print quality problems, typically monthly for light use.
What should I do if cleaning doesn’t fix the problem?
If cleaning does not improve output after a couple of cycles, re-check cartridge seating and alignment. Consider professional service or cartridge replacement if the head is damaged.
If cleaning fails, check alignment and consider professional support.
Are there risks to manually cleaning printheads?
Manual cleaning carries risk of water ingress or mechanical damage if done aggressively. Follow the manual and use light, damp swabs. If in doubt, rely on built-in tools or support.
Yes, with careful, minimal manual cleaning you reduce risk of damage.
Watch Video
Quick Summary
- Begin with a nozzle check to confirm the issue.
- Use built-in tools first before manual cleaning.
- Opt for manufacturer-approved fluids and gentle cleaning.
- Test print after each cleaning cycle to measure improvement.
- Document results for future maintenance.