How to Clean Printer Nozzle: Step-by-Step Guide
Learn how to clean printer nozzle effectively with a safe, device-friendly approach. This guide covers tools, methods, step-by-step actions, and troubleshooting to restore crisp print quality for inkjet printers.

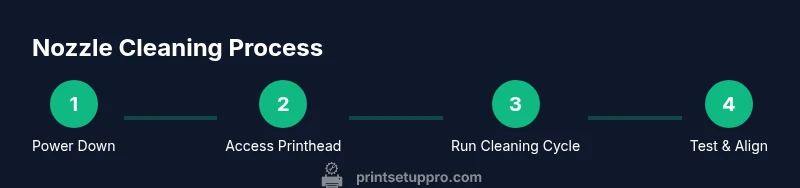
To clean printer nozzle, start by powering down and unplugging the printer, then access the printhead. Use the printer’s built‑in cleaning cycle to loosen dried ink, and run it 2–3 times if needed. Prepare distilled water or a manufacturer‑approved cleaning solution, lint‑free swabs, and absorbent paper towels. Wipe the printhead gently, reinsert cartridges, and print a nozzle test page to verify clean lines.
Why nozzle cleanliness matters for printer quality
When you manage a busy home office or student project load, the nozzle of your inkjet printer is the critical channel that deposits ink onto paper. Over time, dried ink, dust, and air bubbles can create gaps in the line, color misalignment, and streaks that ruin print quality. Learning how to clean printer nozzle is a simple maintenance habit that preserves sharp text and vibrant color. According to Print Setup Pro, regular nozzle maintenance reduces printing defects and supports longer printhead life. If you skip cleaning, small clogs can grow into stubborn bands or ghosting, requiring more aggressive actions later. This section explains the why behind nozzle cleanliness, and what a routine maintenance plan looks like in a typical home office or dorm setting. You’ll gain a practical perspective on when to clean and how often to do it for consistent results.
For most users, nozzle issues appear as faint lines, missing segments, or color smears across multiple pages. A quick glance at a page that repeats a color block is often enough to flag a potential nozzle problem. Don’t panic—cleaning is usually sufficient to restore print quality. The Print Setup Pro team emphasizes that consistent upkeep beats waiting until the problem becomes obvious and harder to fix. Start with basic cycles, then progressively try manual steps if the printer supports it. Remember: regular maintenance is cheaper than frequent cartridge replacement or professional service.
Cleaning methods: dry wipe vs wet cleaning vs built-in cycles
Printers offer several approaches to cleaning nozzles, and your choice depends on the model and the severity of the clog. Dry wipe methods involve gently removing surface dust from the printhead area with a lint-free cloth, which helps when the nozzle plate is dusty or when you see surface residue on the print. Wet cleaning methods use a small amount of distilled water or a manufacturer-approved cleaning solution on a swab or microfiber pad to dissolve dried ink. This is effective for stubborn residues but must be done carefully to avoid moisture seeping into sensitive electronics. The built‑in nozzle cleaning cycle is the safest starting point; it uses the printer’s own cleaning fluid and motion to flush out the head. Run it a couple of times if needed, then inspect a test print. Always consult your model’s manual before attempting aggressive cleaning, as some printers have printhead cartridges that should not be soaked. For most users, starting with the built‑in cycle is enough to clear minor clogs, followed by a careful wet wipe if the problem persists. When in doubt, use manufacturer guidance to avoid damaging seals or printhead components.
Safety and prep steps
Safety first: always power down and unplug the printer before touching any internal components. Work on a clean, dry surface to prevent ink from smudging onto other electronics. Remove the ink cartridges carefully if your model requires it and set them aside on a lint-free tissue, ensuring you do not tilt or spill the ink. Use only distilled water or a cleaning solution approved by the manufacturer; avoid tap water, acetone, harsh solvents, or household cleaners that can corrode printhead materials. If you must remove the printhead for manual cleaning, follow the manufacturer’s instructions precisely. Wear protective gloves if you want to minimize skin contact with cleaning fluids, and keep fluids away from the printer’s internal circuitry. After cleaning, let the printhead surface dry completely before reinstalling cartridges and reconnecting the device. Finally, run a test page to evaluate results before continuing with additional tasks.
How to choose cleaning method for your printer model
Not all methods suit every printer. Some modern inkjet printers have sealed printhead cartridges that cannot be removed for soaking; others allow a head cleaning wipe while the cartridge is out. Always start with the safest option—use the built‑in cleaning cycle and surface wipe if permitted by your model. If blockages persist, consult the manual for an approved printhead cleaning solution and recommended accessories. For stubborn clogs, you may need to perform a deeper cleaning cycle or, in rare cases, replace the printhead. If your printer supports manual cleaning, use distilled water or a manufacturer‑approved cleaner with a microfibre swab and avoid direct contact with electrical contacts. Finally, consider routine maintenance checks after every few print jobs and keep a simple log to track when cleanings were performed. This proactive approach helps you catch issues before they affect larger print runs.
Common issues and how to fix them
Even with routine maintenance, you may encounter recurring symptoms that point to nozzle problems. Some common signs include faint or missing lines in test patterns, color mismatch between jobs, or banding that disrupts gradient fills. Before escalating, re-run the built‑in cleaning cycle and print a fresh nozzle check pattern to confirm the issue persists. If lines become clearer after a few cycles but not completely clean, a light manual wipe of the printhead with a clean lint-free pad can help. Persistent defects after repeated cycles suggest the nozzle hardware might be degraded, or the clog is deeper than surface residues. In such cases, consult the printer’s support resources or a professional service. Remember to avoid aggressive disassembly; most models are protected by design to prevent users from damaging crucial components.
Maintenance routine and long-term care
A sustainable approach to nozzle cleanliness blends simple daily habits with periodic deep-clean routines. After heavy printing sessions or color work, consider performing a quick nozzle check and a single cleaning cycle. If you notice recurring streaks, schedule a deeper cleaning or a manual wipe session with the manufacturer’s recommended fluids. Store spare nozzles or cartridges in a clean, dust-free environment to minimize contamination. Keep your printer firmware up to date if the manufacturer provides maintenance updates, as some updates improve cleaning algorithms and test patterns. Finally, maintain a small maintenance log that records cleaning dates, observed print quality, and any issues encountered. This practice helps you identify patterns and optimize your workflow over time.
Tools & Materials
- Printer owner’s manual or official cleaning guidance(Consult model-specific instructions before attempting nozzle cleaning)
- Distilled water or manufacturer-approved cleaning solution(Do not use tap water or harsh solvents)
- Lint-free swabs or microfiber cloth(Soft tip to avoid scratches; use gentle, light pressure)
- Isopropyl alcohol (optional, 70%)(Only if manufacturer approves; use sparingly)
- Paper towels or lint-free wipes(For blotting and test prints)
- Shallow tray or dish(To allow gentle head soaking if model permits)
- Protective gloves(Keeps hands clean and blocks chemical contact)
Steps
Estimated time: Estimated total time: 25-45 minutes
- 1
Power down and access printhead
Turn off the printer and unplug it from the power source. Open the access panel per the manual, and locate the printhead. If your model requires cartridge removal, do so carefully and place cartridges on a clean towel. Do not touch copper contacts or film when handling the head.
Tip: Refer to the user guide for the exact access path; wrong disassembly can void warranties. - 2
Run the built-in nozzle cleaning cycle
Use the printer’s software or control panel to start the nozzle cleaning cycle. Run the cycle once, then inspect the nozzle test pattern. If lines are still faint, run a second cycle. Avoid excessive cycles in a single session to prevent head wear.
Tip: If your model supports multiple cycles, space them at least a few minutes apart to let residual ink disperse. - 3
Manual wipe for stubborn residues (where supported)
If the manual says it’s safe, lightly moisten a lint-free swab with distilled water or the approved cleaning solution and gently wipe the printhead surface. Do not apply liquid directly to the nozzle or into ink channels. Allow the head to air‑dry completely before reinstalling cartridges.
Tip: Use a fresh swab for each pass; avoid scrubbing aggressively. - 4
Test print and assess results
Reinstall cartridges if you removed them, then run a nozzle check or test page. Look for uniform lines and even color distribution. If you still see gaps or streaks, consider another cleaning cycle or a deeper cleaning method recommended by the manufacturer.
Tip: Keep a log of test results to track improvements over time. - 5
Align and finalize
After successful cleaning, run the printer’s alignment or calibration routine to ensure precise printhead positioning. Print a small set of representative pages to verify consistent quality across colors and grayscale.
Tip: Alignment often improves overall sharpness more than another round of cleaning.
People Also Ask
What causes printer nozzle clogs?
Nozzles clog from dried ink, dust, or infrequent use. Environmental humidity can also affect drying times. Regular maintenance helps prevent buildup and keeps print quality consistent.
Nozzles clog mainly due to dried ink and dust. Regular maintenance helps prevent buildup.
Can I use tap water to clean printhead?
Tap water can introduce minerals and contaminants. Use distilled water or a manufacturer‑approved cleaning solution to minimize residue and potential damage.
Avoid tap water; use distilled water or manufacturer-approved cleaner.
How often should I clean the nozzle?
Clean when you notice faint lines, color shifts, or banding on test pages. For heavy users, a routine every few weeks may be beneficial, while light users can check monthly.
Clean when you see streaks or banding on test prints.
What if cleaning cycles don’t fix the issue?
If cycles fail to restore quality, consult the printer’s manual for deeper cleaning options or consider professional service. Avoid forcing aggressive cleaning that could damage seals or the printhead.
If cycles fail, follow manufacturer guidance or seek service.
Is cleaning harmful to printer seals?
Using approved fluids and following steps minimizes risk. Avoid harsh solvents and directly exposing electronics to liquids.
Stick to approved cleaners and avoid harsh solvents.
Can I clean printheads with alcohol?
Only if the manufacturer explicitly approves it. Many printers require water-based cleaners; using alcohol can damage some printhead materials.
Check your manual before using alcohol.
Watch Video
Quick Summary
- Identify nozzle issues early with regular print checks.
- Start with built-in cleaning cycles before manual methods.
- Use distilled water or manufacturer-approved cleaners only.
- Document cleaning steps and test results for future reference.