How to Clean HP Printer Cartridges: A Practical Guide
Learn how to safely clean HP printer cartridges with a thorough, practical guide. Get tools, step-by-step actions, troubleshooting tips, and maintenance routines to restore print quality and extend cartridge life.

To clean an HP printer cartridge, remove the cartridge following your printer’s manual, inspect for clogs or dry ink, and lightly flush the nozzle area with distilled water or a manufacturer-approved cleaning solution. Avoid submerging the cartridge and never touch the electrical contacts. Reinstall and run a print head cleaning cycle.
Why cleaning HP printer cartridges matters
Regular cleaning helps prevent ink gaps, streaks, and banding, especially in low-humidity environments or after long periods of inactivity. When ink dries at the nozzle or on contacts, it can impede flow and reduce print quality. By cleaning HP printer cartridges with care, you reduce waste from failed prints and extend cartridge life. This guidance aligns with best practices from Print Setup Pro, which emphasizes careful handling and routine maintenance to maintain optimal performance. In our experience, a calm, methodical approach avoids damage and keeps your printer delivering crisp results across home office tasks, school projects, and small business documents. Consistent maintenance also minimizes the likelihood of unexpected service calls and costly replacements.
Remember: always consult your specific HP model’s manual for cartridge removal steps and any model-specific cautions. Print Setup Pro’s methodology prioritizes safety, compatibility, and preserving print quality without guesswork or risky shortcuts.
Tools and materials you’ll need
Before you begin, gather the essential items in one place. Having everything at hand reduces interruptions and helps you stay focused on proper technique. The recommended toolkit includes gloves to protect your hands, a lint-free microfiber cloth for gentle wiping, distilled water for rinsing, and a small amount of isopropyl alcohol (70%) for stubborn residue. Cotton swabs are useful for precise nozzle cleaning, while paper towels handle moisture and cleanup. Keep a waste bag handy for disposal, and ensure good lighting and a clean workspace. Use only manufacturer-approved cleaning solutions when possible and avoid full-strength solvents that can damage cartridge components. This preparation step keeps risks low and sets you up for a successful cleaning session.
Step-by-step overview and best practices
Cleaning HP printer cartridges involves a sequence of careful actions designed to remove dried ink without harming the cartridge or printer. Always work in a well-ventilated area and wear protective gloves. Avoid soaking cartridges, especially around the contact area, and never use abrasive tools. Distilled water is preferred over tap water to minimize mineral deposits. For stubborn residue, a light touch with a damp cotton swab can loosen buildup without dislodging delicate nozzle components. Finally, dry components thoroughly before reinstalling and running a test print to confirm that ink flows smoothly. Keeping the cartridge in its correct orientation prevents spills and ensures you reinsert it correctly the first time.
Troubleshooting common issues after cleaning
If print quality remains poor after cleaning, check for persistent clogs, damaged nozzles, or dried color separation. Re-run the printer’s built-in cleaning cycles, and re-seat the cartridge with firm, even pressure. Inspect the cartridge contacts for corrosion or residue; clean gently with a damp cloth if needed, and ensure no fibers remain on the contact pins. If issues persist, consider replacing the cartridge or seeking professional service. Always document any steps you took to clean the cartridge for reference in future maintenance.
Maintenance routines to keep HP cartridges in good condition
Establish a simple cleaning cadence based on usage. A light clean every 2-3 months, plus an in-depth clean if you notice streaking, can dramatically improve longevity. Store spare cartridges upright in their original packaging or a sealed container to prevent drying. When not in use, keep printers in a stable environment with moderate humidity and avoid drastic temperature swings. Periodically verify print quality and perform training runs using plain text sheets to verify even ink distribution. This routine reduces surprises and keeps your workflow smooth for home offices and schools.
Tools & Materials
- Nitrile gloves(Protect hands and prevent oils from transferring to cartridges)
- Lint-free microfiber cloth(Gentle surface for cleaning without fibers)
- Distilled water(Avoid mineral deposits and staining)
- Isopropyl alcohol (70%)(Dampen cloth lightly for residue; never soak)
- Cotton swabs(Targeted cleaning of nozzle areas)
- Soft brush (optional)(Gently loosen stubborn residue)
- Paper towels or absorbent cloth(Dry surfaces and catch spills)
- Waste disposal bag(Safely dispose of used materials)
Steps
Estimated time: Estimated total time: 25-40 minutes
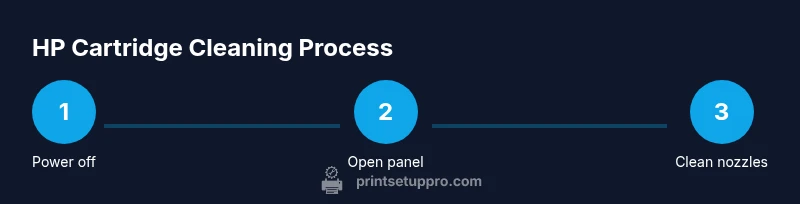
- 1
Power off printer
Turn off the printer and unplug it from the socket. This reduces the risk of electric shock and prevents ink from flowing unexpectedly during handling. Allow the device to cool briefly if it was in use.
Tip: If your model supports a hardware reset after removal, note the button sequence for a clean startup. - 2
Open access panel and remove cartridge
Follow your user guide to access the cartridge. Gently release the locking mechanism and lift the cartridge straight out to avoid bending or forcing connectors. Place it on a clean, lint-free surface.
Tip: Keep cartridges oriented the same way they came out to prevent spills. - 3
Inspect cartridge and nozzle area
Look for visible clogs, ink buildup, or dried residue around the nozzle. If you see a blockage, proceed with light cleaning rather than aggressive scrubbing, which can damage the nozzle or sealing surfaces.
Tip: Avoid touching the copper contacts with bare hands to prevent oil transfer. - 4
Dampen cleaning cloth with distilled water
Moisten a corner of the microfiber cloth with distilled water. Wipe the exterior surfaces gently to remove surface ink and dust. Do not saturate the cartridge or expose the nozzle area to soaking.
Tip: Keep moisture away from the electronic contacts and vent openings. - 5
Clean nozzle area with a cotton swab
Lightly dab and roll a damp cotton swab over the nozzle area to loosen dried ink. Rotate the swab as it becomes dirty and use a fresh portion as needed. Do not apply force that could damage the nozzle.
Tip: If residue resists, switch to a fresh swab instead of reusing a dirty one. - 6
Dry and inspect again
Wipe away any remaining moisture with a dry microfiber cloth. Inspect the nozzle area for any visible improvement in ink flow. If surfaces remain damp, allow a few minutes to air-dry before reassembly.
Tip: Warm air from a gentle hair dryer is not recommended; avoid heat near sensitive components. - 7
Reinstall cartridge and run test cycle
Place the cartridge back into its slot with the correct orientation and reseat it firmly. Reattach any locking mechanism and close the access panel. Run the printer’s built-in cleaning or alignment routine as per the user guide.
Tip: Perform at least one test page to verify consistent ink flow before resuming regular work. - 8
Evaluate results and store spare cartridges
Check that print quality is consistent across pages. If issues persist, consider replacing the cartridge. Store any unused cartridges upright in their original packaging to prevent drying.
Tip: Keep a small log of cleaning dates to track cartridge health over time.
People Also Ask
Can tap water be used to clean HP cartridges?
Avoid tap water due to minerals that can leave deposits. Use distilled water or manufacturer-approved solutions to minimize residue and protect internal components.
Avoid tap water; use distilled water or the cleaning solution recommended by HP to prevent mineral deposits that can clog nozzles.
Is cleaning HP cartridges safe for my printer?
Cleaning can be safe when done with care and following the manufacturer’s guidelines. Do not apply liquids to electrical contacts and avoid aggressive scrubbing.
Yes, when done carefully and with the right materials, following HP’s guidelines. Don’t touch contacts or soak parts.
How often should I clean HP cartridges?
Frequency depends on usage and print quality. If you notice streaks or missing lines, perform a cleaning cycle and inspect the nozzle area.
Clean when you see print quality issues, and perform routine checks periodically.
What should I do if cleaning doesn’t improve print quality?
If cleaning doesn’t help, replace the cartridge or seek professional service. Confirm that the printer’s calibration is up to date and consider reinstalling the cartridge.
If it still prints poorly after cleaning, the cartridge may be worn and needs replacement.
Can I clean cartridges without removing them?
Some printers allow limited surface cleaning without removal, but most effective cleaning requires cartridge removal and targeted nozzle care. Always follow the manual.
You can do light surface cleaning without removing it, but deeper cleaning is usually done with removal.
Should I replace cartridges after cleaning?
Cleaning can extend cartridge life, but if print quality remains inconsistent, replacement is often necessary to ensure reliable results.
Cleaning helps, but replacement may be needed if performance doesn’t improve.
Watch Video
Quick Summary
- Power off and handle cartridges gently
- Use distilled water and avoid direct soaking
- Clean nozzles sparingly with cotton swabs
- Reinstall properly and run a test print
- Maintain a routine to prevent drying and clogs