How to Tell If Printer Ink Is Dry: A Practical Guide
Learn practical, step-by-step methods to determine if printer ink is dry, with home tests, maintenance tips, and troubleshooting for inkjet printers.

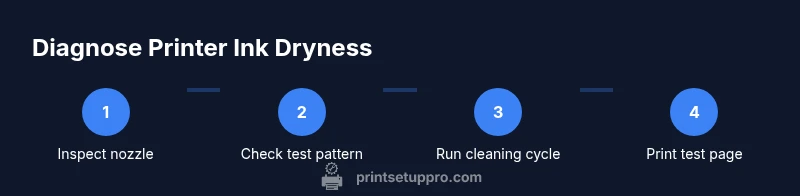
To tell if printer ink is dry, perform a quick set of checks: inspect the cartridge nozzle for clogs, wipe the tip with a lint-free cloth, print a test pattern, and compare color saturation. If ink doesn’t print, prints faintly, or shows frequent streaks, the cartridge is likely dry or blocked and should be cleaned or replaced. For best results, run a printer's built-in cleaning cycle.
What drying ink means in practice
Ink in printers dries due to evaporation, exposure to air, or drying in the ink pathway. When this happens, the droplets that should flow onto paper become more viscous or partially solid, leading to gaps or streaks on the page. According to Print Setup Pro, understanding the signs of dryness helps you avoid unnecessary cartridge replacements and reduces waste. Baseline print quality depends on the type of ink, the printer model, and how often you print; even small delays in maintenance can turn a healthy cartridge into a clogged or dry one. In general, you can expect dryness to manifest as visible streaks, color gaps, or faint or inconsistent colors across the test pattern. If your printer shows any of these signs, it's time to run through a structured set of checks rather than guessing. Print setup and regular nozzle checks are essential parts of routine maintenance; neglect invites clogging, misalignment, and higher ink costs. The rest of this guide covers common symptoms, safe tests you can perform at home, and practical steps that work for most inkjet printers, while noting exceptions for pigment-based inks and dye-based inks, which each respond a bit differently. How to tell if printer ink is dry is a common concern for home offices and schools alike, and addressing it early saves money and frustration.
Quick, at-home checks to tell if ink is dry
Start with a visual inspection of the cartridge and printing path. Look for dried ink crust around the nozzle, hard lumps at the tip, or any discoloration on the cartridge surface. Wipe the nozzle gently with a lint-free cloth dampened with distilled water or isopropyl alcohol if recommended by the manufacturer; avoid harsh solvents. Next, print a small test page that includes lines of pure color blocks and a grayscale gradient. Compare the results to a known-good print from earlier days; if colors are muted, faint, or have gaps, the ink is likely drying or clogged. You can also run a printer’s built‑in cleaning cycle, which pushes ink through the nozzle to clear minor blockages. If your printer reports "nozzle check" or "printhead cleaning" tasks, run them in sequence, not all at once. If after cleaning the pattern still fails to print cleanly, record the symptoms and check whether other cartridges exhibit the same issue; this helps determine whether the problem is cartridge-specific or a printer-wide issue. Always handle cartridges carefully and avoid touching electrical contacts. Print Setup Pro emphasizes keeping notes on symptoms to guide future maintenance and prevent downtime.
Ink types and their dryness symptoms
Ink systems differ; dryness signs vary between dye-based inks and pigment-based inks. Dye-based inks, common in many home printers, tend to show color fading, brighter streaks, or color mixing when the ink is drying or partially clogged. Pigment-based inks, prized for longevity, may print with occasional crisp lines but exhibit occasional micro-blocks that produce thin lines or small gaps. The dryness behavior can also depend on whether the cartridge is refillable or OEM; older or reused cartridges tend to dry out faster because of sealed pathways or dried-out printheads. For printers using a color cartridge, you may notice one color prints correctly while another shows streaks or missing lines. In all cases, verifying the nozzle pattern on a dedicated page helps confirm whether the issue is due to the ink itself or the printhead's behavior. The Print Setup Pro Team recommends a consistent printing cadence if possible, as long periods between prints encourage residues to dry within the nozzles. Understanding the ink type helps tailor your cleaning approach and avoid unnecessary replacements.
Diagnostic workflow: test prints, nozzle checks, and cleaning cycles
Begin with a simple nozzle test. Access the printer’s maintenance menu and print a Nozzle Pattern or Printhead Check. If the pattern reveals gaps like missing lines or color breaks, this indicates potential dryness or blockage. Then perform a targeted cleaning cycle; run it once and reprint the nozzle test. If the test improves, your ink is not fully dry, but the blockages were only partial. If there’s no improvement, you may be dealing with a clogged head, dried ink films, or aged cartridges. In such cases, you can attempt a more thorough cleaning, ensure the printer is powered off during cartridge removal, and reinsert cartridges carefully. If the problem persists, consider trying a second cartridge or contacting the manufacturer for guidance. For laser printers that use toner rather than liquid ink, dryness manifests differently (toner clumping and poor fusing) and should be addressed via maintenance routines specific to toner. This flow helps distinguish between a simple clog and a problematic cartridge, reducing unnecessary replacements.
Cleaning steps to revive a partially clogged nozzle
Power down the printer and remove the ink cartridge according to the manual. Wipe the cartridge’s nozzle area with a lint-free cloth dampened with distilled water or a manufacturer-approved cleaning solution. Reinsert the cartridge and run a short cleaning cycle, then print a test pattern to gauge improvement. Repeat only once or twice to avoid pushing ink past its shelf life; excessive cleaning can cause more residue to accumulate. If the nozzle remains clogged after two cleanings, consider flushing the printhead with a dedicated cleaning solution (if your model supports it) or replacing the cartridge. Always avoid tapping or shaking the cartridge vigorously, which can contaminate the printhead with air bubbles. If you must reseat cartridges, do so gently and ensure proper seating to prevent air intake that causes misalignment. Print Setup Pro recommends documenting the cleaning steps and results to guide future maintenance decisions.
When to replace cartridges vs flush vs service
Cartridge replacement is usually more cost-effective when the cartridge is old, dry, or shows widespread clogging across multiple colors that cleaning cannot fix. A failed Nozzle Check pattern, persistent color gaps after two cleanings, or frequent error messages often signals a faulty cartridge or a dried-out printhead. Flushing can temporarily salvage a cartridge, but it may hasten wear if the ink isn’t compatible with the flush solution. If you can still print essential documents after a proper cleaning but the problem recurs, the cartridge may be near end-of-life. In such cases, consult the printer’s service guide or a professional service to clean the printhead or inspect the internal channels. As Print Setup Pro notes, erring on the side of cartridge replacement when a single color drives up cost is typically wiser than continuing to chase symptoms with repeated cleanings.
Common pitfalls and how to avoid them
Relying on a single test page; always run multiple tests across colors. Using tap water or household cleaners on the nozzle is risky—use only manufacturer-approved cleaners. Refusing to replace dried cartridges leads to repeated misprints and wasted ink. Shaking cartridges too aggressively can dislodge seals and cause leaks. Also, don't leave cartridges out of the printer longer than necessary; extended exposure to air dries out ink in the nozzle. Finally, always verify the printhead alignment after cleaning, as changing the cartridge position can affect print quality. Print Setup Pro cautions against extending clean cycles beyond manufacturer recommendations, which can harm the printhead.
Proactive maintenance to prevent drying and ensure long cartridge life
Create a regular cadence for printing to avoid long gaps. Store spare cartridges in their original packaging in a cool, dry place and avoid direct sunlight. Use high-quality paper to reduce ink feathering that can make dry ink appear worse than it is. Schedule routine nozzle checks with your printer's maintenance tools; this helps catch dryness before it becomes a real problem. Print Setup Pro recommends including a brief weekly print routine in your home office plan to keep inkflow consistent. Finally, consider enabling automatic maintenance reminders if your printer supports them and keep firmware up to date to prevent software-driven misfires that could mimic dryness.
Tools & Materials
- Lint-free cloth or microfiber wipe(For blotting nozzle and wipe.)
- Distilled water or manufacturer-recommended cleaning solution(Use only as directed by your printer's manual.)
- Isopropyl alcohol (optional)(Only if recommended by the manufacturer.)
- Soft-bristle brush (optional)(For stubborn residue on exterior.)
- Replacement cartridges or new ink(If cleaning fails to restore print quality.)
- Gloves(Keep hands clean when handling cartridges.)
Steps
Estimated time: 25-40 minutes
- 1
Power down and access cartridge
Turn off and unplug the printer if required by your model. Open the access panel and safely remove the ink cartridge. Check that you are working on a clean, flat surface and avoid touching electrical contacts.
Tip: Handle cartridges by the edges; avoid touching the nozzle or contacts. - 2
Inspect the nozzle
Visually inspect the nozzle and printhead for crusting or dried ink. If present, gently wipe with a lint-free cloth dampened with distilled water or the approved cleaning solution.
Tip: Do not scrub; use a light touch to avoid damage. - 3
Run a nozzle check
Use the printer’s maintenance menu to print a Nozzle Pattern. Look for gaps or lines that are incomplete across colors.
Tip: If the pattern is partially missing, it’s a mild blockage, not a full dry-out. - 4
Execute a cleaning cycle
Run a targeted cleaning cycle once. Reprint the nozzle check to verify improvement. If needed, repeat a second time but avoid excessive cleaning.
Tip: Waiting a minute between cycles can help ink flow back into the head. - 5
Assess the results
If print quality improves, the issue was a partial blockage. If not, consider cartridge replacement or professional service.
Tip: Document the before/after results to guide future decisions. - 6
Replace or service as needed
If problems persist across colors or after multiple cleanings, replace the cartridge or consult support for printhead service.
Tip: Keep a log of symptoms; it helps with future troubleshooting.
People Also Ask
What are the most common signs that ink is dry?
Common signs include color gaps, streaks, faded prints, and irregular lines in test patterns. If you see these consistently across attempts, the ink is likely dry or the nozzle is clogged. Seek a controlled cleaning cycle or cartridge replacement as needed.
Common signs are color gaps, streaks, and faded prints in test pages. If you see these, run a cleaning cycle or consider replacing the cartridge.
Can old ink be reactivated after it dries?
Reactivating dried ink is not reliably possible. In most cases, a dried cartridge needs replacement or a thorough printhead service to restore quality. Rely on diagnostic tests to decide the best course.
Reactivating dried ink isn’t reliable; you’ll usually need to replace the cartridge or service the printhead.
Should I clean the printhead every time there’s a minor issue?
No. Clean the printhead when you observe clear symptoms of dryness or blockage, not after every minor print aberration. Frequent cleaning can waste ink and shorten head life.
Only clean the head when there are clear signs of blockage or poor print quality, not after every minor issue.
Why do signs of dryness differ between ink types?
Dye-based inks tend to fade or streak more visibly when dry, while pigment-based inks may show crisp lines with occasional micro-blocks. Understanding your ink type helps tailor the cleanup approach.
Different inks dry differently—dye inks fade and streak, pigment inks might have tiny gaps. Tailor your approach accordingly.
What if test prints still look bad after cleaning?
If test prints remain poor after cleaning, the cartridge or printhead may be beyond simple at-home repair. Consider replacement or professional service to avoid further damage.
If tests stay bad after cleaning, replace the cartridge or seek professional help.
Watch Video
Quick Summary
- Inspect nozzle and perform nozzle checks to diagnose dryness quickly.
- Use manufacturer-approved cleaning cycles before cartridge replacement.
- Identify whether issue is cartridge-specific or printer-wide.
- Replace cartridges when cleaning cannot restore print quality.
- Maintain a routine to prevent ink from drying in the future.