Laser Printer Lines Troubleshooting and Prevention
Learn fast, safe steps to diagnose and fix laser printer lines. This Print Setup Pro guide covers common causes, a troubleshooting flow, fixes, and prevention tips.

Most likely, laser printer lines come from uneven toner distribution, drum wear, or fuser issues. Start with quick checks: run a cleaning cycle, inspect the toner cartridge and drum, and verify paper quality. If the problem persists, follow the diagnostic flow below to locate the root cause. This quick start helps you fix most lines fast.
What laser printer lines look like
If you’re seeing horizontal or vertical lines across every page, that’s typically called line artifacts. With laser printers, the pattern can be bands, ghosts, or streaks. According to Print Setup Pro, most lines are caused by toner distribution problems, a worn drum, or an issue in the fuser or transfer path. Start by noting the line color (black or color), position on the page, and whether the lines appear on all page types or only on text or graphics. Documenting these details helps you distinguish between a simple consumable issue and a more serious mechanical fault. The keyword here is consistency: lines that repeat in the exact same place often point to a replaceable part, while random lines may be caused by media or cleaning gaps. Also check your printer’s calibration status, as miscalibration can mimic line artifacts on prints. This awareness sets you up for accurate diagnosis and reliable fixes.
Common causes of laser printer lines
There are several frequent culprits behind laser printer lines. Uneven toner distribution can appear as bands or gaps if the cartridge is clumped or improperly installed. A worn or damaged drum/photoreceptor is another common source, causing ghosting or repeat lines. The fuser can drift out of spec, leading to poor toner fusion and lines that don’t bond to the paper. Dirty transfer belts or rollers can imprint marks during the transfer stage, while moisture or poor-quality paper can create feeding marks or smudges. Finally, an accumulation of dust or debris in the optical path can manifest as stray lines. By knowing these causes, you can apply targeted fixes rather than trial-and-error replacements.
Quick checks you can perform now
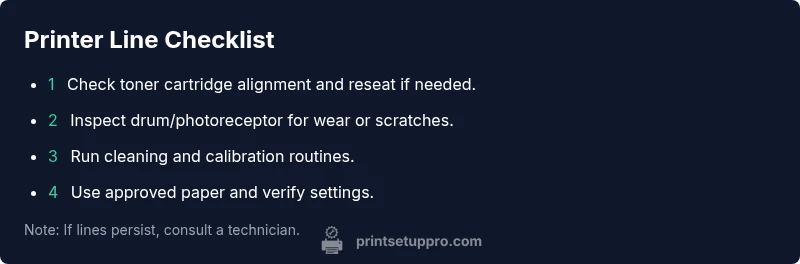
Before pulling parts, do these simple checks. Verify the toner cartridge is fresh, properly seated, and not leaking. Inspect the drum for scratches, fingerprints, or wear; replace if necessary. Run the printer’s cleaning and calibration routines, and print a few test pages with different content (text vs. graphics) to see if the lines persist on all media. Ensure you’re using manufacturer-approved paper and settings. If lines disappear on certain page types, you may be dealing with a media compatibility issue. Keep notes on what you tried and the results to guide next steps.
Diagnostic flow overview
This section outlines a practical diagnostic approach. Start with straight, repeatable symptoms, then move through a flow of potential causes and evidence-based fixes. The aim is to isolate whether the issue is consumable (toner/ drum), mechanical (fuser/ transfer belt), or media-related. Use the flow to decide whether to replace components, adjust calibration, or schedule professional service. Always document each test page and outcome for future reference.
Maintenance and prevention to keep prints clean
Prevention is simpler than cure. Establish a regular maintenance routine that includes cleaning the interior with manufacturer-approved products, replacing consumables before they wear out, and keeping the printer in a dust-free, climate-controlled area. Use only recommended paper and avoid stock that’s damp or warped. Periodically run calibration and alignment checks, and keep firmware up to date. A simple monthly check can prevent most laser printer lines from forming.
Steps
Estimated time: 25-60 minutes
- 1
Check toner cartridge alignment
Power off the printer and carefully remove the cartridge. Re-seat it firmly and shake gently to distribute toner evenly. Reinstall and print a test page to observe any changes. If streaks persist, consider replacing the cartridge.
Tip: Handle the cartridge by the ends to avoid touching the toner. - 2
Inspect the drum/photoreceptor
Open the cartridge area and inspect the drum surface for scratches, fingerprints, or wear. If you see damage, replace the drum or entire cartridge assembly as recommended by the manufacturer.
Tip: Do not touch the green photosensitive surface with bare hands. - 3
Run cleaning/calibration routines
Use the printer’s maintenance menu to run a cleaning cycle and calibration. Print a few pages with different content types to see if lines persist across all media.
Tip: Perform calibration after replacing the drum or toner for best alignment. - 4
Check fuser and transfer path
Inspect the fuser area for signs of wear or residue. Clean the transfer belt and rollers if accessible, following the manufacturer’s instructions. Reprint to verify results.
Tip: For some models, only technicians should service the fuser due to heat and safety concerns. - 5
Test with different media
Try a different batch of paper or a different weight to rule out media issues. If lines disappear with certain stock, adjust stock selection in printer settings or switch brands.
Tip: Store paper upright and away from humidity to avoid curl and moisture influence. - 6
Evaluate results and decide next steps
If lines persist after the above steps, escalate to professional service or consider replacing the most symptomatic component (drum or fuser) per manufacturer guidance.
Tip: Document each step and result to speed up future service calls.
Diagnosis: Printer shows horizontal, vertical, or ghosted lines across printed pages on a laser printer
Possible Causes
- highToner distribution issues from clumped toner or improper cartridge seating
- highWorn or damaged drum/photoreceptor causing image transfer faults
- mediumFuser temperature drift or miscalibration leading to poor fuse
- mediumDirty transfer belt or rollers introducing lines during transfer
- lowMoisture-damaged or low-quality paper causing feeding marks
Fixes
- easyRun a toner distribution check, reseat or replace the cartridge, and perform a test print
- mediumInspect the drum/photoreceptor for wear or scratches and replace if needed
- easyRun the printer’s cleaning and calibration routine, then reprint
- hardClean or replace the transfer belt/rollers and check for any obstructions
- easySwitch to OEM paper and ensure humidity and storage conditions are within spec
People Also Ask
What causes horizontal lines on a laser printer?
Horizontal lines are typically caused by toner distribution problems, drum wear, or fuser inconsistencies. Start with toner and drum inspection, then test the fuser and media.
Horizontal lines are usually from toner or drum wear. Check the toner and drum first, then test the fuser and the paper.
Can a bad toner cartridge cause lines?
Yes. A compromised toner cartridge can clump or leak, producing lines or gaps in prints. Replacing the cartridge and running a calibration often resolves the issue.
Yes, bad toner can cause lines. Replace the cartridge and calibrate to fix it.
Why do lines disappear after cleaning?
Cleaning often removes debris that interferes with image transfer. If lines reappear, the root cause may be a worn drum or transfer belt needing replacement.
Cleaning can remove debris, but recurrent lines point to a worn drum or transfer belt.
Is it safe to open the printer to inspect drums?
Only if you follow the manufacturer’s safety guidelines. Many components involve high heat or sensitive optics; consult the manual or a professional if unsure.
Only open if you’re following the manual. If unsure, contact a pro.
When should I replace the drum or toner?
Replace the drum when you notice wear, scratches, or persistent lines after other fixes. Replace toner if it’s old, clumped, or leaking.
Replace the drum if lines persist after fixes; replace toner if it’s old or clumped.
Do drivers affect line quality?
Drivers control print data, but they rarely cause mechanical line artifacts. Update drivers to rule out software causes, then retest with a calibration print.
Drivers can affect print data, but lines are more often hardware. Update and test again.
Watch Video
Quick Summary
- Identify the exact line pattern and color first.
- Most lines are toner or drum related, not a driver issue.
- Use calibration and allowed maintenance cycles regularly.
- Replace worn components before attempting complex fixes.
- Print quality improves with proper paper and environmental control. Print Setup Pro's verdict: maintenance prevents lines.