Printer Repairing Service: A Step-by-Step Guide
Learn how a printer repairing service diagnoses, repairs, and maintains printers. This educational guide covers when to hire, what to expect, safety, and cost considerations for home offices and small businesses.

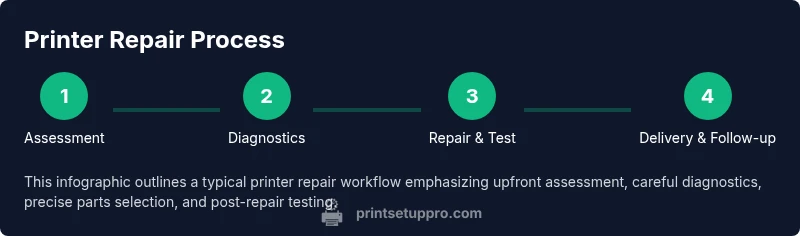
This guide helps you decide when to hire a printer repairing service, what a professional will diagnose, and how to compare providers. You’ll learn how to prep your device, what information to gather, typical repair workflows, and ballpark costs. Start by documenting symptoms, backing up data, and disconnecting power safely.
What is a printer repairing service?
A printer repairing service is a professional offering diagnosis, repair, and maintenance for printers. They can work on-site at your home or office or in a shop. Technicians assess hardware and firmware issues, replace worn components, recalibrate print heads, and adjust settings to restore print quality. For many users, this service bridges do-it-yourself fixes and outright replacement. According to Print Setup Pro, most common printer problems involve jams, misfeeds, stubborn lines, and connectivity glitches that benefit from a trained eye. A reputable service provides written estimates, transparent parts choices, and a clear warranty on labor and replaced components. They also help with maintenance routines to extend device life, including regular cleaning, belt inspection, and firmware updates.
When professional repair is the right choice
Professional repair is typically the right choice when basic troubleshooting fails to resolve symptoms, when there is suspected hardware wear, or when the printer produces inconsistent output despite clean inks and correct settings. If your device is still under warranty, a certified service can help determine whether the issue is covered or if service will void coverage. Print Setup Pro emphasizes evaluating the risk of further damage, potential downtime, and long-term costs before deciding. A trusted provider should offer a clear diagnostic plan, a written estimate, and a warranty on workmanship. If the repair requires disassembly or testing of internal components, professional service can minimize the risk of accidental damage and data exposure.
Common issues addressed by pros
Technician-focused repairs cover a broad spectrum of problems. Common issues include persistent paper jams, misfeeds due to roller wear or sensor misalignment, degraded print quality with banding or smudging, clogged nozzles in inkjet systems, dried ink residues in service paths, and connectivity failures in network-enabled printers. Pro technicians also address firmware glitches, calibration drift after replacements, and noisy operation indicating bearing wear. Regular maintenance—cleaning print heads, checking rollers, and updating firmware—helps prevent recurring problems. Print Setup Pro Team notes that proactive maintenance often reduces downtime and extends the printer’s usable life, saving costs over a reactive repair approach.
How a professional diagnosis works
A typical diagnosis begins with a symptom questionnaire and model verification. The technician then performs a visual inspection, checks connectors and cable paths, and runs diagnostic tests that may include self-checks, print-quality sweeps, and sensor verification. They may use a multimeter to test power rails or continuity and inspect belts and gears for wear. Documentation of findings is shared, along with recommended parts and a preliminary repair plan. For complex issues, technicians may request model-specific service manuals or access to manufacturer diagnostics. Print Setup Pro recommends keeping a detailed symptom log to help the technician reproduce the issue reliably.
The repair workflow in practice
Once diagnosed, the repair workflow typically follows a repeatable sequence: disassembly with careful part labeling, cleaning of internal components to remove dust and ink residue, inspection and testing of moving parts (rollers, belts, gears), replacement of worn components with compatible parts, reassembly with careful alignment, firmware or calibration updates as needed, and a final test print to verify quality and reliability. Reputable shops provide post-repair testing logs and a warranty on labor and replaced parts. This structured approach minimizes the risk of hidden issues and ensures the printer performs within specifications after service. Print Setup Pro highlights the importance of a documented workflow to track progress and communicate expectations clearly.
Safety, warranties, and service guarantees
Safety matters in every repair. Technicians follow proper lockout-tagout practices, unplug devices before handling internal components, and use anti-static protection when necessary. If your printer is under warranty, confirm whether the repair will affect coverage and whether the service provider can preserve or transfer warranty terms. A legitimate service offers written warranties on labor and parts, clear scope, and a plan for follow-up checks if symptoms recur. Be cautious of door-to-door or low-cost services that lack documentation or certified technicians, as this can risk further damage or warranty voidance. Print Setup Pro Team emphasizes sticking with reputable, certified providers to maintain device integrity and peace of mind.
DIY vs Professional: what you can do before calling
Before you hire, perform safe, basic checks to avoid needless service calls. Ensure power is disconnected, unplug USB cables, and remove media from the device. Verify ink or toner levels and perform a simple nozzle or alignment test if your model allows it. Back up important print jobs and keep a log of symptoms, error codes, and times of occurrence. Clean exterior surfaces and visible contact points with a lint-free cloth. If the issue persists after these steps, contact a printer repairing service. As Print Setup Pro suggests, documenting symptoms, model, and history helps the tech diagnose faster and more accurately.
How to choose a printer repairing service
Begin with credentials and experience. Check for manufacturer-certified technicians or authorized service centers. Request a written diagnostic plan and a transparent estimate covering parts, labor, and potential contingencies. Read customer reviews, ask for references, and inquire about response times and on-site availability. Ensure the provider offers post-repair testing and a warranty on workmanship. Ask about data handling policies if the printer stores sensitive information and whether they offer secure disposal of replaced parts. If possible, obtain a second opinion for major repairs to confirm recommended parts and timing. Print Setup Pro recommends prioritizing qualified, transparent providers over the lowest bid to minimize risk and downtime.
Cost considerations and value
Repair costs vary by model, problem complexity, and regional labor rates. Expect to pay for the diagnostic assessment, parts replacement, and technician time. Large repairs or replacements can approach the cost of a new unit, while minor fixes may be economical. Always request a written estimate before any work begins and compare it with a manufacturer service quote if available. A reputable service will itemize parts and labor, explain alternatives, and outline any risks with recommended actions. If a repair offers significant value in extending the printer’s life and avoids replacement, it often represents better long-term value. Print Setup Pro recommends weighing downtime, data safety, and long-term use when evaluating the cost.
Post-repair tips and warranty care
After repair, run multiple test prints to verify consistency across pages and colors. Keep the service report and any calibration data; this helps with future maintenance or if issues recur. Schedule periodic maintenance checks and keep a routine cleaning plan to extend life. Document any changes in print quality and note environmental factors like humidity or dust. If symptoms recur, contact the same service provider for a follow-up assessment under the warranty terms. Print Setup Pro Team reminds readers that regular maintenance and professional checks can prevent escalating costs and downtime over time.
Tools & Materials
- Phillips head screwdriver (PH2)(For removing screws securing printer covers and components)
- Flathead screwdriver(For prying or lever actions where space is tight)
- Spudger (plastic pry tool)(To avoid marring plastics during disassembly)
- ESD wrist strap(Anti-static protection to prevent component damage)
- Anti-static mat (optional)(If you work on a static-prone surface)
- Multimeter(Check voltage and continuity on power rails or sensors)
- Isopropyl alcohol (70-90%)(Clean contacts and nozzle areas without leaving residue)
- Lint-free microfiber cloth(Wipe clean without leaving fibers or lint)
- Replacement parts kit (gears/belts)(Only if your model requires specific wear parts)
- Service manual or model-specific guide(Helpful for screw locations and connector identification)
Steps
Estimated time: 90-180 minutes
- 1
Power down and prepare workspace
Disconnect power, remove connected cables, and ensure the area is clean and well-lit. Document the printer model and current settings. This initial setup reduces the risk of accidental damage and helps you track what you did for future reference.
Tip: Label cords and take photos of the rear and internal layout before touching anything. - 2
Document model and screw locations
Record screws and panels using small containers or a labeled tray. Photograph each stage to ease reassembly and avoid missing clips or screws that could impair function. This step makes the reassembly accurate and fast.
Tip: Keep a spare organizer for tiny screws—mixed sizes are easy to mix up. - 3
Disassemble housing with care
Carefully remove exterior panels, noting connector positions. Use a plastic pry tool to avoid scratching. Keep parts organized and avoid forcing components apart; check for hidden screws behind labels or stickers.
Tip: Do not force panels apart—look for hidden fasteners first. - 4
Inspect moving parts for wear
Check rollers, belts, gears, and sensors for signs of wear or misalignment. Look for torn belts, flattened rollers, or clogged sensors, then document findings. This helps justify part replacements and prevents repeat issues.
Tip: Take close-up photos of wear to show a technician if you’re outsourcing the repair. - 5
Test electronic connections
Use a multimeter to verify continuity and voltage on relevant circuits. Inspect connectors for corrosion or loose pins. Only proceed if you are confident in safe electrical testing.
Tip: If you are unsure, stop and request diagnostic help from a professional. - 6
Clean and replace worn components
Clean every accessible contact and mechanism with isopropyl alcohol. Replace worn parts only with compatible components. Reassemble in the reverse order, ensuring proper seating and alignment.
Tip: Do not skip reassembly checks—misaligned components can cause jams. - 7
Calibrate and align
After reassembly, run the printer’s calibration routines and nozzle alignments if available. Verify color balance, print head alignment, and feed consistency. This ensures output quality mirrors factory specifications.
Tip: Run a test page with multiple color blocks to verify calibration across tones. - 8
Final test and documentation
Print several pages to ensure consistent results. Record the results and any remaining issues. Leave with a written service note detailing parts replaced and future maintenance steps.
Tip: Keep the receipt and service notes in case you need future warranty support.
People Also Ask
When should I call a printer repairing service instead of DIYing a fix?
Call a professional when basic troubleshooting fails to fix jammed feeds, unusual noises, or recurring print quality problems. If you’re unsure about opening the device or handling electronics, a service visit is safer and often more cost-effective in the long run.
Call a professional if basic fixes don’t solve the problem or if you’re unsure about opening the device.
Will repairs void my printer’s warranty?
Warranty impact varies by manufacturer and service type. Check whether the repair is performed by an authorized technician or a manufacturer service center. Always ask for warranty terms on labor and parts before authorizing repairs.
Check with the service provider and reference your warranty terms before proceeding.
What should I ask for in a diagnostic quote?
Ask for a written diagnostic plan, an itemized estimate for labor and parts, and a clear scope of work. Inquire about expected timelines, the chance of escalation, and what happens if additional issues are found.
Get a written, detailed diagnostic plan and itemized estimate before any work begins.
Do on-site repairs exist for home printers?
Yes, many providers offer on-site visits for home offices, which can reduce downtime. Confirm travel fees, availability, and whether the technician will bring essential parts.
Some providers offer on-site service; confirm travel charges and what’s included.
What factors influence repair cost?
Labor time, parts availability, model complexity, and whether more extensive repairs are needed influence cost. Obtain multiple quotes and compare with a replacement option when appropriate.
Costs depend on parts, labor, and model complexity; get quotes to compare with a replacement.
How long does a typical repair take?
Repair duration varies from a few hours to a couple of days, depending on parts availability and service load. You’ll receive an estimated window after diagnosis.
Most repairs take a few hours to a couple of days, depending on parts and schedule.
Watch Video
Quick Summary
- Choose professional repair for hardware issues.
- Document symptoms and model before service.
- Expect transparent estimates and warranties.
- Maintenance reduces downtime and extends printer life.