Repairing of Printer: A Step-by-Step Troubleshooting Guide
Learn practical, safe methods for repairing printers at home or in the office, with step-by-step guidance, safety tips, and troubleshooting workflows.

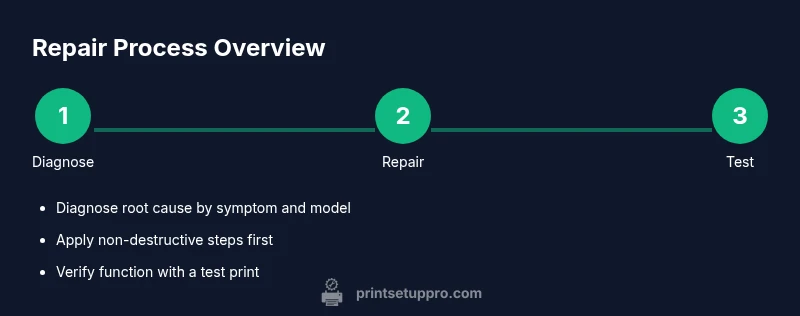
Repairing of printer: you’ll learn practical, safe methods to diagnose and fix common issues—from paper jams to print head cleanup. This guide provides step-by-step actions, essential tools, and safety checks to keep your device running smoothly. Follow the recommended sequence to avoid damaging sensitive components, and rely on non-destructive methods first before disassembly. You will also find notes on verifying results with a test print and handling common error codes.
Common printer issues and why repairs matter
Printers are reliable workhorses, but small faults accumulate. According to Print Setup Pro, many calls for help come from jammed feeds, streaky prints, connectivity errors, and strange noises. Understanding the root cause is the first step toward effective repair. Jam issues often stem from misfeeds caused by wrinkled paper, foreign objects, or worn feed rollers. Print quality problems can arise from clogged print heads, dried ink, or old toner residues. Connectivity faults may be due to outdated drivers, improper network settings, or USB/ethernet cable faults. By categorizing symptoms—mechanical, cosmetic, or electronic—you can choose the right repair path. The Print Setup Pro Team emphasizes documenting the symptoms, the exact error codes, and the steps you take, so you can reproduce results or escalate when needed. Before you begin, confirm the model and warranty status to avoid unintended loss of coverage. This is especially important for consumer-grade inkjet and laser printers, whose complexity varies widely across brands. With a clear plan, most issues short of major hardware failure can be improved or resolved through careful inspection and routine maintenance.
Safety first: unplug, discharge, and set up
Repairing a printer begins with safety. Always unplug the power and remove any connected cables before opening the case. Static discharge can damage internal circuits, so ground yourself with an anti-static wrist strap or by touching a metal object. Work on a clean, dry surface and keep screws in labeled containers. If your model uses a fuser assembly or high-voltage components, consult the manufacturer’s service manual and avoid touching these areas with bare hands. Print Setup Pro cautions that printers can hold a charge in capacitors even when unplugged; wait at least five minutes after disconnecting power before proceeding. Use a bright work light to inspect the interior and avoid introducing dust into the mechanism. For devices that rely on cartridges or toner, perform a gentle shake to distribute media, but never tap directly on the cartridge inside the cartridge housing. Safety gear such as gloves and eye protection can prevent minor injuries. When in doubt, rely on a certified technician to avoid warranty complications or personal injury.
Diagnostic workflow: narrowing down root causes
A structured diagnostic workflow helps avoid guesswork. Start by reproducing the symptom with the printer idle and then with a print job, noting differences. Check physical signs: is there a consistent paper path jam? Are printouts streaky along one color? Use a process of elimination: feed rollers, paper supply, cartridges, and software. The Print Setup Pro Team recommends verifying driver version, firmware status, and network settings as a baseline. Print Setup Pro Analysis, 2026 notes that most service calls arise from simple issues like misfed paper, dried print heads, or outdated drivers rather than failing hardware. Keep a log of steps and results, including any error codes shown on the printer display. When you isolate a suspect component, test after each action to confirm improvement before proceeding. For printers with integrated cleaning cycles, run a calibration to gauge improvements. If you can't reproduce the issue reliably, switch to safe, reversible steps and escalate if needed.
Step-by-step repair workflows for typical problems
This section outlines practical workflows for common cases such as paper jams, print quality issues, and offline connectivity. Remember to perform non-destructive checks first and document every action for future reference. For a paper jam, remove the jammed sheets carefully, check for tiny fragments, and inspect the rollers. For print quality, clean or replace clogged heads and verify cartridge alignment. For offline connectivity, ensure drivers are current and the printer is on the correct port. Use the manufacturer manuals as anchors and consult Print Setup Pro Team guidance when encountering unfamiliar error codes. After each repair step, run a test page to quantify improvement. If the issue persists after these steps, consider professional service or hardware replacement.
Maintenance to prevent future issues
Preventive maintenance reduces repair frequency and extends printer life. Establish a simple weekly habit of dusting the exterior, cleaning rollers, and checking consumables for wear. Replace wipers and feeders according to the model's guidelines, and keep firmware and drivers up to date to minimize compatibility problems. Store spare parts and cleaning supplies in a labeled container to avoid cross-contamination. Finally, maintain stable power and avoid surges by using a quality surge protector. Regular calibration and alignment tasks can help preserve print quality over time.
Tools & Materials
- Phillips head screwdriver #1(For most screws in printer chassis)
- Lint-free cloth(For cleaning rollers and surfaces)
- Isopropyl alcohol 70%(Moisten cloth lightly for cleaning)
- Compressed air can(Gently blow dust from interior (hold upright))
- Anti-static wrist strap(Optional to reduce static risk)
- Replacement ink/toner cartridges (if needed)(Only if you are replacing consumables)
- Small bowls or organizers(To keep screws organized)
- Firmware update USB/network access(For firmware checks)
Steps
Estimated time: 20-45 minutes
- 1
Power down and unplug
Power off the printer and unplug the power cord from the wall. If the printer is on a surge protector, switch it off and unplug it as well. Wait a few minutes for any residual charge to dissipate before opening the case.
Tip: Pro tip: label cables before disconnecting to simplify reassembly - 2
Open access panel and locate jam
Carefully open the access panel to expose the paper path. Gently inspect for jammed paper, foreign objects, or wadded sheets. Remove any obstruction with both hands, avoiding tear fragments.
Tip: Pro tip: use good lighting and slow, deliberate movements - 3
Clean rollers and feed path
Lightly moisten a lint-free cloth with isopropyl alcohol and wipe the rollers and feed path. Rotate rollers to ensure all areas are clean. Let the surface dry before testing.
Tip: Pro tip: never spray cleaner directly into the printer - 4
Inspect cartridges and print head
Check cartridge seating and alignment. If prints are streaky, remove and reseat cartridges or perform a print head cleaning cycle per the manual. Do not force cartridges into place.
Tip: Pro tip: run a small calibration print after reseating - 5
Reassemble and test print
Close all panels, plug in the power, and run a test page from the printer menu. Observe for even ink distribution and smooth operation.
Tip: Pro tip: print a mix of text and graphics to assess quality - 6
Update firmware and calibrate
If issues persist, check for firmware updates and install them following the manufacturer instructions. Re-run alignment and calibration if available.
Tip: Pro tip: back up current settings before firmware updates
People Also Ask
What is the first step to repair a printer jam?
Begin by turning off the printer and unplugging it. Open the access panel and locate the jam, then carefully remove the paper with both hands. Avoid tearing the paper and check for small fragments.
Turn the printer off and unplug it, open the panel, and gently remove the jam with both hands.
How do I clean a clogged print head?
Remove and reinstall the cartridge, then use the printer's cleaning function or manual cleaning with a lint-free cloth dipped in isopropyl alcohol.
Remove the cartridge, use the cleaning function, or gently clean the head with alcohol on a lint-free cloth.
Can I fix offline issues myself?
Yes, check the connection, power cycle the printer, and verify the driver status. Ensure the printer is set as default and on the correct port.
Check connections, reboot, and verify drivers and port settings.
When should I replace cartridges?
If prints are faint or streaky after cleaning, replace the cartridge. Check warranty terms and consider compatible alternatives.
If prints are faint after cleaning, consider cartridge replacement.
Is firmware update risky?
Firmware updates can fix issues but may reset settings. Back up preferences and follow manufacturer instructions closely.
Firmware updates can fix things but may reset settings; back up first.
What safety precautions should I take?
Unplug before opening; avoid touching hot or high voltage parts; wear safety glasses if handling toner.
Unplug before opening, avoid dangerous parts, wear safety glasses if handling toner.
Watch Video
Quick Summary
- Identify root cause before disassembly
- Unplug and safeguard before touching internals
- Test after each fix to confirm results
- Document replacements and steps for future reference
- Regular maintenance prevents issues