How to Bring a Printer Online on Mac
Learn how to bring a printer online on Mac with a practical, step-by-step guide. Troubleshoot connectivity, add printers, and ensure a stable print workflow.

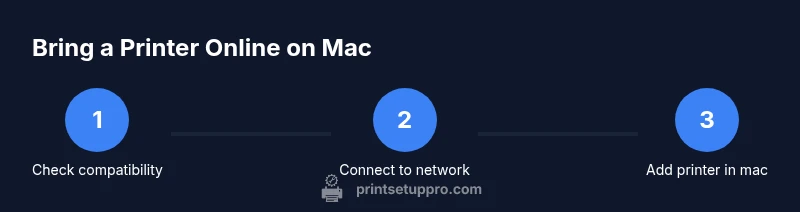
By following this guide, you will bring a printer online on your Mac using a mix of AirPrint and driver-based setup. You’ll verify compatibility, connect the printer to the same network, add the device in System Settings, and run a test print to confirm success. This process covers both wireless and USB-connected printers and addresses common offline issues.
Understanding the goal: bring printer online on Mac
In a typical home office setup, 'bringing a printer online' means ensuring the Mac can locate the device over the network or via USB, and that it can communicate using the appropriate driver or built-in protocol. macOS supports two primary pathways: AirPrint, which is no-fuss and driverless for many printers, and traditional vendor drivers that unlock advanced features. Print Setup Pro notes that understanding these pathways helps you pick the right approach for your model and network. If your printer is new and supports AirPrint, you can often complete setup with minimal configuration. If not, you’ll rely on the manufacturer-supplied driver or a universal printer driver. Either way, the goal is a stable connection that persists after restarts and network changes. This section sets the stage for a reliable, repeatable process rather than a one-off fix.
Confirm your printer compatibility with macOS
Not every printer plays nicely with every macOS version. The quickest path is to check whether your model is AirPrint-compatible, which typically means macOS will present it as a native option without added drivers. If AirPrint isn’t listed, locate the printer’s official support page to verify driver availability for your macOS version. Some devices rely entirely on built-in PostScript or AirPrint; others require a vendor-provided driver package. When in doubt, Print Setup Pro recommends starting with AirPrint and only installing a driver if the print queue lacks certain features (like duplex printing or color calibration). Additionally, ensure you have the latest macOS updates installed, since system printers and drivers improve with each update.
Check the network connection and printer status
Start by powering on the printer and confirming its network indicators show an active connection. If you’re using Wi‑Fi, verify the printer is connected to the same router as your Mac. Print a network configuration or status page from the printer’s control panel to capture its IP address. On macOS, ping the printer IP from Terminal to confirm reachability, then check the print queue for any jobs stuck in a non-printing state. If the printer changes its IP frequently, set a reserved DHCP address (static lease) on your router. When all network checks pass, you should see the device appear in macOS printer listings during setup.
Prepare your Mac: updates and prerequisites
Before adding a printer, ensure your Mac is current with macOS updates and security patches. Open System Settings, go to Software Update, and install any pending updates. Check that your firewall settings permit printer sharing and printing services, especially if you have a strict network policy. If you previously had a stalled print job history, clear it to prevent a ghost queue from interfering with new jobs. Having up-to-date fonts and printer-related plist files can also reduce spurious errors. Finally, confirm you have the printer’s model name and any required credentials for downloading drivers.
Enable AirPrint or printer sharing on macOS
If your printer supports AirPrint, macOS will usually discover it automatically. If not, you can enable printer sharing on the host Mac to allow other devices on the same network to use the printer. Go to System Settings > Sharing and enable Printer Sharing, selecting the specific printer. For AirPrint-enabled devices, skip this step, since AirPrint uses a built-in protocol. If you are sharing a printer, ensure other devices are on the same local network and that access controls permit printing. These steps create a reliable bridge between your Mac and the printer without requiring manual driver installs on every device.
Add the printer to macOS using System Settings
Open System Settings (or System Preferences on older macOS) and navigate to Printers & Scanners. Click the Add button (+) and wait for the system to search for available printers. If your printer is on the same network, it should appear with either its network name or IP address. Select the printer and choose AirPrint if available; otherwise, pick the appropriate vendor driver. Complete the installation by following on-screen prompts, then test printing from a document. If you connect via USB, choose the USB option in the Add dialog.
Install or update printer drivers if needed
Some printers work flawlessly with AirPrint, while others require vendor-specific drivers for advanced features like duplex printing, scan-to-email, or color calibration. If the printer isn’t offered as AirPrint, download the latest driver package from the manufacturer’s official site and install it on your Mac. After installation, restart the Mac and re-add the printer to ensure macOS recognizes the new driver. If you previously installed a driver and still encounter problems, try removing the printer from the list, restarting the print service, and re-adding it. Always prefer factory-provided drivers for optimal compatibility.
Test printing: print a test page and check for issues
With the printer added, print a simple test page from TextEdit or a PDF to confirm proper communication. If the test page prints correctly, move on to printing a more complex document to verify margins, color, and duplex settings. If the test fails, check the error message for clues, re-check the network status, and confirm the selected printer in the application is correct. If the page is blank or garbled, inspect the paper type settings, print quality preferences, and ink or toner levels. Finally, ensure the printer queue is not paused and there are no stuck jobs that could block new tasks.
Troubleshooting common connectivity problems
Connectivity issues are most often caused by mismatched network settings or outdated software components. Start by confirming the printer is powered on and connected to the correct network. Ensure both devices are on the same subnet and that the printer’s IP address hasn’t changed. If the Mac still cannot locate the printer, reset the printing system from the Printers & Scanners preferences (this removes all printers and resets queues). Re-add the printer and test again. If problems persist, temporarily disable any firewall rules that might block printer ports, re-enable them, and test. For USB printers, try a different USB port or cable, and update the USB controller drivers if necessary.
Common gotchas: USB vs network printers and firewall settings
A common mistake is assuming a USB printer will automatically appear over the network. If you want to share a USB-connected printer on the network, you must enable printer sharing on the host Mac and ensure the other devices have permission to access it. Another frequent issue is overly aggressive macOS firewall settings blocking printing services. Ensure the firewall allows inbound connections for print services or briefly disable it to test printing. Also verify that any VPN or corporate security software isn’t isolating devices from your local network.
Best practices for maintaining a reliable Mac printer connection
Establish a routine to keep printing smooth. Regularly check for macOS and driver updates, review network settings, and keep the printer firmware current. Avoid changing network configurations during critical printing tasks, and set a static IP for the printer to prevent IP drift. Maintain a small list of step-by-step recovery actions in case the printer goes offline, such as re-adding the device or resetting the print system. Finally, document the steps you take for future reference, so you can repeat the process quickly if the connection drops again.
Tools & Materials
- Mac computer (macOS up to date)(Ensure macOS version is supported by your printer (AirPrint is ideal))
- Printer(Model and manual handy for driver choices)
- Wi-Fi network or Ethernet access(Printer and Mac must be on the same network)
- Power cable and network cables(Power the printer and connect to network if needed)
- USB cable or USB-C adapter(Optional for USB setup or direct connection)
- Printer drivers (manufacturer website)(Install if AirPrint is unavailable or for advanced features)
- Access to printer's IP address(Useful for network checks and static addressing)
Steps
Estimated time: 25-35 minutes
- 1
Prepare your Mac and printer
Power on both devices and confirm the printer is in a ready state. Gather model numbers, network details, and any credentials needed for driver installation. This upfront check prevents mid-process twists and ensures a smoother setup.
Tip: Have the printer manual handy to confirm supported connection methods (AirPrint vs. driver-based setup). - 2
Connect printer to the network
Join the printer to the same Wi-Fi network as your Mac or connect it via Ethernet to the router. Use the printer’s control panel to select the correct SSID and enter the network password if prompted. After connecting, print a network configuration page to confirm the IP address.
Tip: For Wi‑Fi, a strong signal near the router reduces setup hiccups. - 3
Verify network reachability
From your Mac, ping the printer’s IP address in Terminal or Test the printer’s discovery in System Settings. Confirm the device responds and shows as reachable. If not, double-check the IP address and your router’s DHCP settings.
Tip: Reserve a fixed IP address for the printer to avoid IP changes after reboots. - 4
Open macOS printer settings
Open System Settings > Printers & Scanners (or System Preferences > Printers & Scanners on older macOS). If the printer isn’t listed, use the + button to add it. Choose the appropriate connection (AirPrint or USB).
Tip: If you see only offline printers, reset the printing system to clear stale queues. - 5
Add the printer in macOS
Select your printer from the list or enter its IP address. If AirPrint is available, select it to minimize driver steps. If not, choose the vendor driver as needed and complete the installation prompts.
Tip: For USB-connected printers, choose the USB option in the Add dialog. - 6
Install or update drivers if needed
If macOS can’t find AirPrint-compatible drivers, download the latest package from the manufacturer and install it. Restart the Mac and re-add the printer to ensure the new driver is loaded.
Tip: Prefer manufacturer drivers only when AirPrint lacks required features. - 7
Print a test page
From a document, print a test page to verify correct communication, print quality, and color accuracy. If the test page fails, recheck the printer's queue, paper settings, and driver configuration.
Tip: Start with a simple document to isolate issues quickly. - 8
Tackle common issues
If problems persist, reset the printer system, re-add the device, or temporarily disable the firewall to test for blocking. Check for stuck jobs and verify port configurations for network printers.
Tip: Document each step you take to avoid repeating steps on future issues. - 9
Finalize and maintain
Set a default printer if you print frequently, and schedule routine driver and firmware checks. Keep a quick-reference guide for your specific model to simplify future re-setup.
Tip: Static IP assignment reduces recurring offline incidents.
People Also Ask
Why isn't my printer showing up on macOS?
Common causes include network issues, AirPrint limitations, or missing drivers. Start by ensuring the printer is on the same network and that AirPrint or the correct driver is available. If needed, reset the printing system and re-add the device.
Make sure the printer is on the same network and that AirPrint or a driver is available, then remove and re-add the printer if necessary.
Do I need drivers for AirPrint printers?
AirPrint printers typically work with no extra drivers on macOS, but some features may require vendor-specific drivers. If printing issues persist, try installing the vendor driver as a fallback.
AirPrint usually doesn’t need drivers, but you may need the vendor driver for extra features if issues occur.
Can I use USB instead of a network connection?
Yes. Connect the printer via USB and add it using the USB option in the Add Printer dialog. USB setups are often simpler but lack network sharing functionality.
Yes—connect with USB and add it as a USB printer in macOS.
What should I do if the printer is offline?
Power cycle the printer, router, and Mac, then re-check network connectivity. Remove and re-add the printer in System Settings if needed and verify the correct port and driver are selected.
Power cycle devices, then re-add the printer and verify the driver.
How do I set a default printer on macOS?
Open Printers & Scanners in System Settings, select your printer, and click Set as default. On older macOS, choose the default printer from the Print dialog.
Set your preferred printer as default in System Settings.
Can I share a printer across multiple Macs?
Yes. Enable Printer Sharing on the host Mac and ensure other devices on the network have access permissions. This works best with AirPrint-capable devices.
Yes—enable Printer Sharing on the host Mac and allow access.
Watch Video
Quick Summary
- Verify macOS compatibility before proceeding
- AirPrint first, driver second for simplicity
- Add printer in System Settings and run a test print
- Update drivers only if necessary to access advanced features