How to Install a Printer on Mac: A Practical Guide
Learn how to install a printer on your Mac, covering USB and wireless setups, AirPrint tips, driver installation, and troubleshooting. A practical, tested approach for home offices and students.

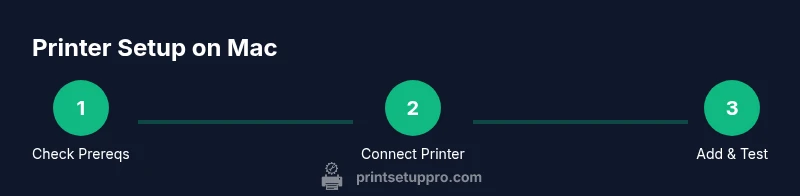
To install a printer on a Mac, connect the printer via USB or Wi‑Fi, then add it in System Settings > Printers & Scanners. Install any required drivers if prompted, or use AirPrint for a driver-free setup. Finally, print a test page to confirm success. If your device supports AirPrint, you may avoid installing extra software; for non-AirPrint printers, download the latest driver from the manufacturer.
Prerequisites for Mac printer setup
Before you start, confirm that you have a compatible printer, a Mac running macOS 11 or newer, and reliable network access (for wireless setup). Ensure the printer is powered on and within reach, and gather essential details like model number and any setup CD or download link. Check if the printer supports AirPrint, which can simplify the process by avoiding driver installation. If you plan to use USB, confirm that the cable length is sufficient and that your Mac has an available USB port. Finally, decide whether you will connect via USB or Wi‑Fi, as this choice will influence the steps that follow. This planning stage helps prevent backtracking and ensures you meet all prerequisites before installation. By anticipating potential issues (like missing drivers or a slow network), you set yourself up for a smoother setup experience.
Connection options at a glance: USB, Wi‑Fi, and AirPrint
There are three main paths to connect a printer to a Mac: USB, Wi‑Fi, and AirPrint. USB is the simplest path: plug the printer into a Mac using a USB cable, power on the device, and let macOS detect it automatically in most cases. For wireless printing, ensure the printer is connected to the same Wi‑Fi network as your Mac. Many modern printers support onboard Wi‑Fi setup via control panel or a mobile app, after which the printer appears on macOS as a discoverable device. AirPrint is Apple’s built‑in standard that requires no vendor drivers; if the printer supports AirPrint, you can add it quickly without downloading software. If your printer lacks AirPrint or modern wireless support, you may need to install manufacturer drivers for full functionality (scan, fax, duplex printing). Evaluate your environment and long‑term needs to choose the best path. The goal is a reliable, repeatable setup that you can reproduce if you switch computers or networks.
Drivers vs AirPrint: understanding your options
AirPrint offers a driver‑free experience with basic printing capabilities and minimal maintenance. It’s ideal for home offices and students who want simplicity. Driver‑based printing can unlock advanced features such as duplex scanning, color calibration, and multi‑user sharing; however, it adds a layer of complexity and requires keeping drivers up to date. If you plan to use advanced scanning features, you may need the vendor’s full software suite. In practice, start with AirPrint if available; if you need more features or encounter compatibility quirks, install the official driver from the printer maker’s website. Always download drivers from the manufacturer’s site rather than third‑party sources to avoid malware. Finally, after installation, verify that the driver or AirPrint entry offers the required features and remains up to date.
System prerequisites and macOS versions you should know
Apple continuously updates printer support with each macOS release. In macOS Monterey, Ventura, and later, printers are managed in System Settings > Printers & Scanners. If you’re using an older macOS version, you may see “Print & Scan” in System Preferences. The exact path can vary slightly between releases, so if you’re unsure, use the search function (press Command‑Space and type ‘Printers’). After adding a printer, macOS may offer you to set it as default or share it across devices on the same network. Keep an eye on the macOS updates for the latest compatibility improvements and security fixes that affect driver installations and AirPrint recognition.
USB setup path: connection, detection, and first test
To install via USB, connect the printer to your Mac using the appropriate cable and power up the device. macOS will usually detect the printer automatically and prompt you to install drivers if needed. If macOS does not prompt, go to System Settings > Printers & Scanners and click Add Printer. Select your printer from the list; if it doesn’t appear, try unplugging and replugging the USB cable or using a different USB port. Follow the on‑screen prompts to complete the installation; this often includes agreeing to a license or choosing a driver. After installation, print a test page to verify connectivity and alignment. If the test page fails, save a screenshot of the message for reference when seeking support.
Wireless setup and AirPrint discovery: effortless network printing
With wireless printing, the printer should appear in macOS’s Add Printer dialog once the printer is on the same network. If your printer supports AirPrint, macOS will typically recognize it without any driver installation. Access System Settings > Printers & Scanners > Add Printer, then select the AirPrint entry or the printer’s name. In some cases, you may need to temporarily disable firewall settings or verify that the printer’s IP address is reachable (ping from Terminal). After installation, set preferences such as default printer, print quality, and page range. For multi‑user environments, enable sharing so others can print from their Macs.
Adding the printer in macOS: exact steps you’ll follow
The exact steps can vary by macOS version, but the core flow remains the same. Open System Settings, navigate to Printers & Scanners, choose Add Printer, and wait for the system to scan. When your printer appears, select it and choose the appropriate driver or AirPrint option. Complete any on‑screen configuration prompts (such as default paper size and printer name). If prompted to download a driver, confirm the choice and allow the installer to run. After setup, print a test page and adjust alignment as needed. If you use a network printer with a static IP, consider adding it with a printer name and IP to stabilize discovery.
Troubleshooting common issues you’ll encounter
If your printer doesn’t show up, verify that the printer is powered, connected to the same network, and not blocked by a firewall. Restart both devices and try the Add Printer flow again. If you receive a driver prompt but the printer prints with poor quality, update or reinstall the driver from the manufacturer’s site. For AirPrint issues, ensure macOS is up to date and the printer supports the AirPrint protocol. If the printer prints blank pages or colors are off, check ink levels, cartridge seating, and calibration settings on the printer itself. Keeping firmware up to date on the printer can address many connectivity quirks. Document any error codes and search official support pages for model‑specific guidance.
Verdict: practical recommendations for a smooth Mac printing experience
For most home users, start with AirPrint to minimize setup steps and driver management. If AirPrint is unavailable or you need advanced features, install the manufacturer’s driver and keep it updated. Always verify the connection with a test print after adding or switching printers, and maintain the printer with regular firmware checks. With this approach, you can achieve reliable printing from your Mac without repeated troubleshooting.
AUTHORITY SOURCES
To support the guidance in this guide, refer to authoritative sources that explain printer setup on macOS. Apple’s official support articles provide the canonical workflow for adding printers and managing devices on macOS. Reputable tech publications offer practical explanations and troubleshooting tips that are easy to follow in real-world scenarios. Examples include:
- https://support.apple.com
- https://www.macworld.com
- https://www.howtogeek.com
Tools & Materials
- Printer (USB or network-capable)(Ensure power is on and printer is ready)
- Mac computer(macOS 11+ recommended)
- USB cable(Length 1.5–2 meters for flexibility)
- Wi‑Fi network access(Printer and Mac must be on the same network)
- AirPrint-compatible printer(Saves driver installation when available)
- Printer driver/installer(Only if AirPrint is not available or features required)
- Printer manual or model number(Needed for model-specific steps)
- Power outlet nearby(Ensure stable power supply)
- Ethernet cable (optional)(For wired network setup)
Steps
Estimated time: 25-40 minutes
- 1
Unpack and prep the printer
Begin by removing the printer from its box, confirming all components are present (power cord, test page, ink or toner, user manual). Power on the printer and let it boot for roughly 60 seconds while you review the model number for driver needs. This stage prevents missing cables or accessories later.
Tip: Keep the box and contents until you complete testing; you may need it for returns or warranty. - 2
Connect power and initialize
Plug the printer into a power outlet and press the power switch. Wait 30–60 seconds for the printer to initialize and display ready status. If there are alignment or carriage messages, follow the on‑screen prompts to complete any quick setup tasks.
Tip: If the printer seems stuck, unplug and replug the power cord to reset the state. - 3
Choose connection method (USB or Wi‑Fi)
Decide whether to use USB for a direct connection or Wi‑Fi for network printing. For USB, connect the cable to your Mac first, then power on the printer. For Wi‑Fi, use the printer’s onboard setup or a companion app to join your network, then ensure it appears on the network.
Tip: If you’re unsure about the network, start with USB for the quickest path to printing. - 4
Add the printer in macOS
Open System Settings > Printers & Scanners > Add Printer. Wait for the system to detect the printer; select it from the list. Choose AirPrint if available, or the manufacturer driver if you need advanced features. Complete prompts to finalize installation.
Tip: If your printer doesn’t appear, unplug/replug USB or restart the Mac and printer, then retry. - 5
Install drivers if required
If prompted, download and install the official driver from the manufacturer’s site. Approve any security warnings and restart the printer if advised. Verify that the driver provides the features you need (scan, color management, duplex printing).
Tip: Use the official site to avoid malware; avoid third‑party installers. - 6
Print a test page
Open a document and select Print to send a test page to the printer. Check for alignment, color accuracy, and page margins. If the test page fails, recheck connections and settings, then try again.
Tip: If colors look off, run printer calibration from the printer menu or vendor software.
People Also Ask
Do I need to install a driver on Mac for most printers?
Many printers support AirPrint which requires no extra drivers. If your printer lacks AirPrint, you’ll usually need the vendor’s driver to enable full features. Always start with AirPrint if available, and install drivers only if features are missing.
Most users can start with AirPrint since it doesn’t require extra software. Install the manufacturer driver only if you need advanced features.
What should I do if my printer is not detected?
First confirm the printer is powered and on the same network (for wireless) or properly connected via USB. Use Add Printer in System Settings and refresh the list. Restarting both the printer and Mac can resolve many detection issues.
Make sure the printer is on and connected, then try adding it again in System Settings. If needed, reboot both devices.
Can I print from iPhone or iPad to the same printer?
Yes. If the printer supports AirPrint or is on the same network with a compatible driver, you can print from iPhone or iPad via AirPrint. No additional setup on the Mac is required for a networked device.
Yes, AirPrint makes printing from iPhone or iPad straightforward when the printer supports it.
How do I set a default printer on macOS?
Go to System Settings > Printers & Scanners, select the preferred printer, and choose 'Set as default printer' (or similar option). Some macOS versions apply this automatically when you print from apps.
In Settings, pick a printer and set it as default so printing is consistent.
How do I remove a printer from macOS?
Open System Settings > Printers & Scanners, select the printer, and choose 'Remove' or 'Delete.' After removal, you can re-add it later if needed. Restarting the Mac can help finalize removal.
In Printer settings, delete the printer and restart if needed.
Watch Video
Quick Summary
- AirPrint minimizes setup time and driver management
- USB offers the simplest single‑device setup
- Keep macOS and printer firmware up to date
- Always test print after setup to verify success
- Use official drivers only when required for features