How to Install a Printer in PC: A Complete Step-by-Step Guide
Learn how to install a printer in PC with this in-depth, practical guide. From USB to Wi-Fi, driver setup, adding the printer to Windows or macOS, to troubleshooting and maintenance.

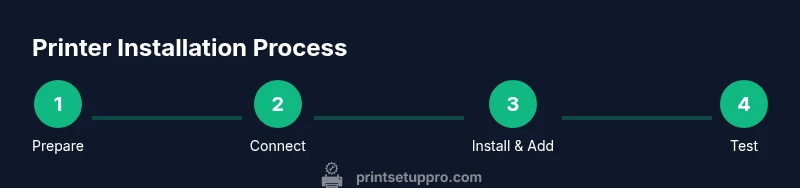
By the end of this guide you’ll install a printer in PC using USB, Wi‑Fi, or Ethernet, confirm driver compatibility, and complete a test print. Start by selecting a connection type and verifying your OS supports the printer. You’ll install drivers, add the printer to your devices, and run a quick test to confirm success.
Prerequisites for a Smooth Installation
Before you embark on the journey of how to install printer in pc, take a moment to verify basic compatibility and gather the essentials. Confirm your printer model is supported by your operating system, check for any firmware updates, and ensure you have a reliable internet connection to download the latest drivers. Having the right cables available (USB, Ethernet) and a network prepared (for Wi‑Fi setups) reduces back-and-forth troubleshooting. From a practical perspective, ensure your PC has an available USB port or is connected to the same network as the printer. According to Print Setup Pro, starting with a clear plan and required cables helps avoid common setup pitfalls. This stage lowers the risk of driver mismatches and misconfigured defaults once you reach the driver installation phase. Finally, note your printer’s model number and exact OS edition, as these details help you locate the correct driver package quickly.
In the broader context of printer setup, the goal is to match the printer to your PC’s environment and to minimize driver conflicts. If you’re unsure about compatibility, visit the manufacturer’s support page or Print Setup Pro’s guidance for contemporary recommendations. A solid prerequisites check sets you up for a smoother installation and reduces post-installation support needs.
USB, Wi‑Fi, or Ethernet: Choosing the Right Connection
One of the first decisions when learning how to install printer in pc is how you’ll connect the device. USB is typically the simplest and most stable option, ideal for single-user desks or on a wired laptop setup. Wi‑Fi enables wireless printing from multiple devices and is great for shared spaces, but you may experience occasional latency or driver conflicts if the network has traffic or interference. Ethernet offers reliable, wired network access suitable for office environments with multiple users. The right choice often depends on your space, the number of devices, and whether you need mobility.
If you’re setting up a printer on a small home network, a mixed approach can work well: USB for desktop use and Wi‑Fi for smartphones and tablets. Print Setup Pro emphasizes validating the chosen connection type by testing printing from at least two devices after installation. For many readers, starting with USB can simplify the initial setup, then expanding to a wireless connection once drivers are installed and the printer is recognized by the PC. In all cases, ensure the printer is powered on and has a stable power source during configuration. For residents with shared networks, avoid placing the printer behind restrictive firewall settings or VPNs that could block printer discovery. This practical approach reduces setup friction and accelerates getting to a working test page.
Prepare the Printer and Your PC for Setup
With the connection type in mind, prepare both devices for the installation process. Place the printer on a stable surface near your PC or network router, ensuring there’s enough space for paper input and output. If you’re using USB, confirm that the cable is in good condition and that the port on both ends is clean. For wireless setups, verify the printer is connected to the same network as the PC and that your router supports basic printer discovery features. Before starting driver installation, power the printer on and allow it to initialize. In this phase, verifying the printer’s onboard display (if available) for any error messages can save time later. Print Setup Pro’s guidance stresses documenting the exact steps you take during this phase to facilitate future driver updates or printer replacements. Small steps here—like reconnecting cables or restarting devices—often resolve common misconfigurations quickly.
Install or Update Printer Drivers and Software
The core of how to install printer in pc is installing the correct drivers or software package from the printer manufacturer. Always download the latest version from the official site rather than using a bundled CD, as modern operating systems often require up-to-date drivers for full feature support. Once downloaded, run the installer and follow on-screen prompts. You may be asked to choose between a standard driver, a full feature software package, or a basic printer driver—opt for the full package if you want advanced options like duplex printing or color management. If you’re upgrading an existing driver, consider creating a system restore point first. Print Setup Pro notes that driver issues are the most common installation hurdle, so taking a minute to remove any old drivers and reboot can prevent conflicts. After installation, restart the PC and, if prompted, reconnect the printer to ensure the new software registers correctly.
Windows: Add the Printer to Your PC
For Windows users, adding a printer after you’ve installed the necessary drivers is straightforward. Open Settings > Devices > Printers & scanners, then click Add a printer or scanner. Windows will search for available printers. If detected, select your printer and continue with the on-screen prompts to complete installation. In some cases, Windows may require you to choose a driver from a list or browse to the downloaded driver file. Make sure to set the new printer as the default if that’s part of your workflow. If Windows cannot find the printer, try disconnecting and reconnecting the USB cable or reattempting the network discovery. Always run a test print after setup to verify the connection is stable and the printer is printing correctly.
macOS: Add the Printer to Your Mac
Mac users should access System Settings (or System Preferences on older macOS) > Printers & Scanners and click the plus button to add a printer. macOS will typically locate the printer automatically if it’s on the same network or connected via USB. If the printer doesn’t appear, choose the IP tab to connect with a static IP address or use the manufacturer’s driver package from their site. When adding a printer, ensure you select the appropriate driver and check the Print Queue for any stalled jobs. After installation, print a test page from a simple document to ensure the Mac recognizes print data correctly. Print Setup Pro highlights that system-level permissions matter—grant access to the printer in firewall settings if required.
Test Print, Troubleshooting, and Final Checks
The true test of a successful installation is a reliable test print. Start with a basic text document to confirm clarity and alignment, then try a color image if your printer supports it. If the test print fails, check that the printer is online, the correct driver is in use, and the printer queue is not paused or blocked. Common issues include misconfigured defaults, network discovery problems, and driver conflicts with other devices. Use built-in troubleshooters (Windows Troubleshooter or macOS Printer Setup Assistant) as a first pass, then consult the manufacturer’s support resources for model-specific guidance. Print Setup Pro stresses documenting any persistent issues and noting the exact error messages, which helps when contacting support or repeating the setup in the future.
Maintenance Tips and Best Practices After Installation
To ensure long-term reliability, schedule regular maintenance after installation, such as keeping drivers up to date, periodically cleaning paper paths, and monitoring ink or toner levels. Establish a simple routine for firmware checks and printer reboots after significant OS updates to avoid compatibility issues. If the printer will be unused for extended periods, consider practices like running a small maintenance page to prevent nozzle clogging or head drying. Print Setup Pro recommends keeping spare consumables and a backup USB drive with essential driver files for quick recovery. Finally, document your setup steps in a local note so you can repeat or adjust configurations in the future without starting from scratch.
Tools & Materials
- Printer power cable(Plugged into a working outlet; ensure printer is powered on during setup)
- USB cable(Direct connection to PC; avoid USB hubs during initial setup)
- Ethernet cable(Use if connecting via wired network; connect printer and router/switch)
- Wi‑Fi network access(Stable home or office network for wireless setup)
- Computer with internet access(To download the latest drivers and firmware)
- Printer drivers/software from the manufacturer(Always download the official latest version)
- Paper for test prints(A small stack for quick test pages)
Steps
Estimated time: 25-40 minutes
- 1
Prepare your PC and printer
Power on both devices and place the printer within easy reach of cables. Verify you have the correct OS version and note the printer model. If you’re on a network, ensure the router is functioning. This initial synchronization reduces later disconnections or discovery failures.
Tip: Keep the printer's manual handy and note any error indicators on the device. - 2
Connect the printer to the PC
Choose a direct USB connection for simplicity, or connect the printer to the same network if using Wi‑Fi or Ethernet. Ensure cables are securely plugged in and not damaged. Turn the printer to a ready state so it can be detected during driver installation.
Tip: For USB, use a dedicated port on the computer rather than a shared hub. - 3
Install or update printer drivers
Download the latest drivers from the official manufacturer site and run the installer. If prompted, allow system changes and restart the computer if required. This step ensures full compatibility with your OS and access to all printer features.
Tip: Delete any old drivers first to avoid conflicts; create a system restore point before major installs. - 4
Add the printer in Windows
Open Settings > Devices > Printers & scanners and select Add a printer. Choose the detected printer and complete the on-screen prompts. Set as default if preferred and print a test page to verify success.
Tip: If Windows can't locate the device, try reconnecting cables or restarting the printer and PC. - 5
Add the printer on macOS
Go to System Settings > Printers & Scanners, click the plus sign, and select your printer. If needed, install the recommended driver package from the vendor. Print a test page to ensure print data is correctly interpreted by macOS.
Tip: Use the IP tab for network printers if automatic discovery fails. - 6
Test print and finish setup
Print a simple text page first, then a color image if supported, to ensure color management and alignment are correct. Check the print queue for stalled jobs and inspect print quality. Keep the driver and firmware up to date for continued compatibility.
Tip: Document any issues and notes for future reference or support.
People Also Ask
Do I need administrator rights to install a printer in PC?
Yes, most printer installations require administrator access to install drivers and modify system settings.
Yes—admin rights are usually needed to install printers.
What if the printer isn’t detected by Windows?
Check cables or network connections, ensure the printer is powered on, run the Windows troubleshooter, and verify the correct driver is installed.
First check connections, then run Windows troubleshooter.
Can I install using drivers from the manufacturer’s site instead of the included CD?
Yes, download the latest driver from the official site for best compatibility and access to full features.
Yes—download the latest driver from the official site.
How do I share a printer on a network?
Enable printer sharing in your OS settings and add the printer from other devices on the network.
Enable sharing and add on other devices.
Do I need internet during installation?
Internet helps for driver downloads and updates; some setups can use offline installers if provided by the manufacturer.
Internet helps for driver downloads, but offline options exist.
What should I do if Windows cannot find a driver?
Double-check the printer model, try Windows Update, and download the compatible driver from the manufacturer's site.
Check the model and try Windows Update or vendor site.
Watch Video
Quick Summary
- Choose the best connection type for your setup and hardware.
- Install the correct, latest drivers from the official source.
- Add the printer to your OS and perform a test print.
- Troubleshoot with basic checks before seeking advanced support.