3d Printer for Starters: A Complete Beginner Guide
A comprehensive beginner-friendly guide to selecting, setting up, and troubleshooting a 3d printer for starters. Learn how to evaluate features, calibrate safely, and print your first parts with confidence.

By following this guide, you will pick a beginner-friendly 3d printer for starters, set it up correctly, and begin your first prints with confidence. You’ll learn how to evaluate features, establish safe operation, calibrate the bed, and troubleshoot common issues. The goal is a smooth, reliable start that minimizes wasted filament and frustration.
Why a beginner-friendly 3d printer matters
For someone starting with 3d printing, the printer you choose can make or break your learning pace. Beginner-friendly features such as straightforward assembly, guided calibration, and dependable automatic bed leveling remove friction in early sessions. According to Print Setup Pro, choosing a model with reliable mechanics and broad community support helps you avoid common frustrations and accelerates skill-building for home offices, students, and DIY enthusiasts. A well-chosen machine also reduces belt squeaks, sudden jams, and misprints, which are typical stumbling blocks for novices. In practice, look for printers with accessible parts, a decently documented user interface, and a chassis that stays cool during operation to minimize overheating warnings. You’ll benefit from a printer designed with safety-minded defaults, such as enclosed bays and stable power supplies. Finally, verify that spare parts and replacement components are easy to source, since wear parts like belts, bearings, and nozzles are part of the ongoing cost of ownership.
Core features for starters
Modern 3d printers for starters offer a blend of reliability, ease of use, and community support. The right model usually features an intuitive touchscreen or straightforward web interface, a bed that is easy to level, and a build surface that provides dependable adhesion. Look for an enclosure or at least robust safety features that minimize accidental contact with hot surfaces. A printer with auto bed leveling can save time during setup, while a reliable extruder and smooth motion system reduces wobble that spoils prints. Supported filaments like PLA and PETG are commonly recommended for beginners due to forgiving extrusion and wide availability. Open-source firmware can be a plus for troubleshooting and customization, but a clear, user-friendly manual is essential for fast onboarding. Finally, verify that spare parts and replacement components are readily available from reputable vendors, since maintenance is a fact of life with any FFF printer.
Budget considerations and entry-level models for starters
Budgeting for a 3d printer for starters means balancing cost with reliability. In general, beginners benefit from models that are easy to assemble, ship with good documentation, and have a lively user community. Instead of chasing the latest feature, prioritize stability, consistent bed adhesion, and quiet operation. Expect to encounter a low-to-mid price range for a solid first machine, with room to upgrade or expand later. It’s worth considering a model that ships with a few beginner-friendly presets, a simple slicer, and straightforward firmware updates. Remember that ongoing costs include filament and spare parts, so choose a printer with widely available consumables and optional upgrades that don’t require deep mechanical knowledge to install.
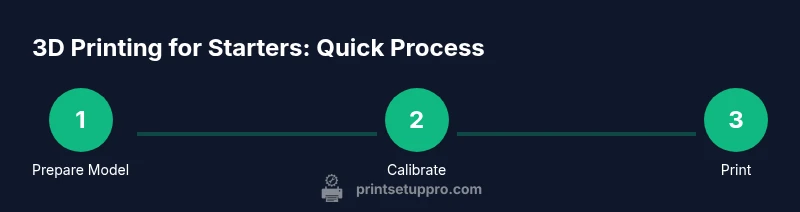
Getting started: setup, calibration, and first prints
The initial setup is a critical foundation for long-term success. Start by placing the printer on a sturdy surface away from direct sunlight and dust. Power it on, install any necessary drivers, and verify connectivity to your computer or mobile device. Calibrate the bed using the printer’s leveling routine or manually as needed, paying attention to a consistent first layer. Load PLA and print a simple calibration cube to test flow, adhesion, and layer quality. Use a modest print speed and conservative temperatures at first, then iteratively tune settings based on observed results. Maintaining a routine—check belt tension, clean the bed, and inspect nozzles—will keep your beginner 3d printer performing reliably over time.
Your first prints: from model to finished part
Begin with a simple, well-documented model that has forgiving tolerances. Ensure your model orientation and supports are appropriate for the build volume. Slice the model with conservative layer height and infill to minimize material usage while you learn. Observe bed adhesion, extrusion consistency, and surface finish. If necessary, adjust retraction, cooling, and extrusion multiplier gradually. Post-processing steps like gentle sanding or light curing (for resin-based prints) can improve final appearance. As you gain experience, gradually increase complexity and try different filaments, always documenting successful settings for future prints.
Troubleshooting common beginner issues
First-layer adhesion problems, warping, stringing, and inconsistent extrusion are the most frequent concerns. Start with a clean, level bed and ensure the nozzle is clean and properly heated. If prints corner up, try a brim or raft and adjust first-layer height. Reducing print speed and enabling adequate cooling often helps with bridging and overhangs. If you encounter filament jams, recalibrate extrusion steps and inspect the drive gears for debris. For persistent issues, consult the printer’s community forums or the manufacturer’s support resources, as many common problems have well-documented fixes.
Tools & Materials
- PLA filament (1.75mm)(Choose a common color and bulk spool for costs.)
- Power supply and mains cable(Ensure compatibility with your region's voltage.)
- Glass build surface (or PEI sheet)(A good bed surface improves adhesion.)
- Calipers or ruler(For measuring prints and calibrations.)
- Isopropyl alcohol (at least 70%)(For cleaning surfaces.)
- Allen keys set(Use to tighten frame and bed screws.)
- Spatula/ scraper(Careful when removing prints.)
- SD card or USB drive(For firmware updates or slicing files.)
- Printer owner’s manual(Essential reference for setup.)
- Glue stick or painter's tape(Optional bed adhesion aid.)
Steps
Estimated time: 1-2 hours
- 1
Unbox and position the printer
Carefully remove the printer from its packaging and place it on a stable, level surface away from heat sources. Check that all parts are present and tighten any loose screws.
Tip: Take time to clean the workspace and keep cables tidy to avoid accidental snagging. - 2
Power on and connect to your computer
Plug in, switch on, and connect to your computer or mobile device as instructed in the manual. Install any required drivers or companion apps for monitoring prints.
Tip: Use a dedicated USB cable or network connection for stable communication. - 3
Load filament and prime the nozzle
Feed PLA through the extruder until it flows smoothly from the nozzle. Clean the nozzle if any debris appears before attempting a test print.
Tip: Cut the filament end at a 45-degree angle to prevent snagging. - 4
Home axes and perform bed leveling
Initiate homing and run the bed leveling routine. If your printer has auto-leveling, run it; otherwise level manually with a feeler gauge or equivalent.
Tip: Take your time; small inaccuracies compound in early layers. - 5
Print a calibration model
Load a standard calibration model (like a cube) and start the first test print. Observe layer adhesion and surface finish, noting any adjustments needed.
Tip: Start with a small, simple model to minimize wasted filament. - 6
Tune basic settings and test again
Adjust temperatures, print speed, and first-layer height based on the results of the test print. Run a second small model to confirm improvements.
Tip: Document your settings for future reference.
People Also Ask
What is the best 3d printer for beginners?
A beginner-friendly printer with strong community support and easy-to-follow setup is ideal for starters.
For beginners, look for a printer with good community help and clear setup documentation.
Is auto bed leveling necessary for starters?
Auto bed leveling helps consistency, but manual leveling works if you follow a careful calibration routine.
Auto leveling is helpful but not mandatory if you’re comfortable leveling by hand.
What filament should I start with?
PLA is the most forgiving for beginners due to lower heat and easier extrusion.
PLA is the easiest material to start with for learning basic printing.
How long does it take to learn basic printing?
Most beginners reach a comfortable baseline after a few focused sessions spanning several days.
With steady practice, you’ll begin printing reliably after a week or two.
Do I need to assemble the printer or buy preassembled?
Preassembled or quick-assembly kits are ideal for beginners who want quick setup.
If you’re new, choose a model with straightforward assembly or preassembled.
Watch Video
Quick Summary
- Choose a beginner-friendly printer to reduce learning friction.
- Calibrate bed and flow early for reliable starts.
- Use PLA for forgiving first prints.
- Document settings for repeatable results.
- Maintain the printer to prevent common failures.