Business Card Printing: A Practical How-To Guide
Learn to plan, design, print, and finish professional business cards for home offices and small businesses with Print Setup Pro. A comprehensive, step-by-step guide to achieve high-quality results.

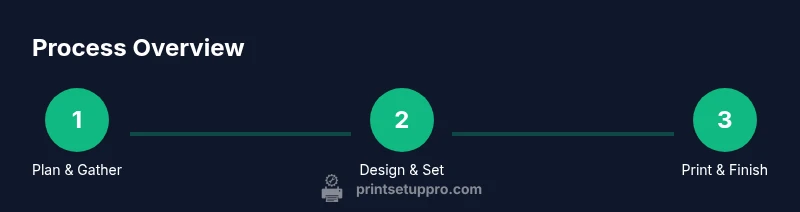
According to Print Setup Pro, you can master business card printing by following a clear, step-by-step workflow—from defining your audience and choosing stock to designing the card and validating proofs. This guide outlines practical actions you can take in real-world home-office setups to produce professional cards that reflect your brand. By the end, you’ll have a ready-to-print workflow with recommended tools and finishes.
What is business card printing and why it matters
In the arena of professional branding, business card printing turns your contact details and visual identity into a tangible, take-away piece. For home offices and small businesses, cards are a portable ambassador for your brand. Print Setup Pro emphasizes that the perceived quality of a card—driven by design, stock, and finish—speaks before you speak. A well-crafted card can open doors at meetings, conferences, and even casual encounters like a coffee shop encounter. The modern marketplace offers a spectrum of options, from basic, budget-friendly designs to premium stock with specialty finishes. This section sets the foundation: your card should align with your brand story, be legible at quick glance, and print reliably with your available equipment. By understanding the purpose behind each element, you can plan more effective cards that support your business goals.
Design considerations for business cards
Your card’s design is the first impression anyone will have of your brand. Prioritize readability by choosing a typeface that scales well at small sizes and pairing it with strong contrast against the background. Place essential information—name, title, company, phone, and website—where eyes land naturally: typically the upper left quadrant or the center of the card. Include a logo, color palette, and a consistent brand treatment that remains legible in black-and-white proofs. For Print Setup Pro readers, a balanced layout with ample white space often beats a crowded design. Ensure logos are vector-based to maintain sharpness during scaling. Finally, settle on a consistent card size and include a bleed area to prevent white edges after trimming.
Card stock and finishes you should know
Stock choice dramatically influences perceived quality. Heavier card stock feels substantial and projects professionalism, while lighter stocks may be ideal for ultra-budget runs. Typical ranges fall around 14-18 pt for business cards, with gsm values roughly between 350 and 324 depending on regional standards. Finishes like matte, glossy, or soft-touch each convey a different mood—matte is easy to read and professional, gloss enhances color vibrancy, and soft-touch adds a premium tactile feel. Consider your brand personality and choose a finish that complements imagery and typography. Don’t overlook edge effects like rounded corners or foil accents, which can make your card stand out without sacrificing clarity.
Print methods and equipment explained
Digital printing is common for small batches, quick turnarounds, and iterative designs. Offset printing shines on larger runs with tighter color control and consistency. Color management begins with a calibrated monitor and properly profiled printer to minimize color shifts between screen and print. If you print in-house, test on your stock to confirm alignment and color reproduction before committing to a full run. For professional results, maintain a clean print path, use ICC profiles, and verify that the printer can handle the chosen stock without jams or misfeeds. Print Setup Pro recommends starting with a single, controlled run to validate results before scaling up.
Artwork preparation and file setup
Prepare files with precise dimensions, including bleed and safe margins. Always export in a print-ready format such as PDF or TIFF with vector elements preserved where possible. Convert text to outlines to avoid font issues and ensure the final look is faithful to the design. Include crop marks to aid trimming, and verify that the color mode matches your printing method (CMYK for most printers). A well-structured folder system—design files, fonts, linked images, and proof copies—saves time and reduces the risk of missing assets during production.
Color management and calibration basics
Color consistency is less mysterious when you follow a disciplined workflow. Calibrate your monitor regularly and use consistent lighting when evaluating proofs. Use ICC profiles that match your stock and printer capabilities, and always soft-proof on-screen before printing physical proofs. If you’re coordinating with a printer, share the exact stock, finish, and color profile to align expectations. This step minimizes costly reprints and helps you hit your brand’s color accuracy goals. Print Setup Pro notes that even small color shifts can alter perceived vibrancy and readability.
Proofing and quality control steps
Proofing is the last line of defense before mass production. Start with a single, real-world proof on your chosen stock to assess color, density, edge trim, and readability. Check alignment by measuring margins and crop marks against a ruler, and verify that the text remains legible when scaled to various viewing distances. Have at least one other person review the card for readability and branding consistency. Capture notes from the proof and apply the necessary changes before final approval.
Finishing options and how they affect cost and durability
Finishing choices can dramatically impact both appearance and longevity. Lamination, matte or gloss coatings, and spot UV can enhance durability and visual appeal, but each adds cost and may affect tactile experience. For round-cornered cards, ensure your cutter or finisher has adequate accuracy to prevent uneven edges. If you plan to mail or mail-merge cards, consider perforated sheets or fold lines only if you’re integrating the card into a larger mailer. Always test finishing options on a sample run before committing to a full batch.
Cost considerations and budgeting for card runs
Budgeting for business card printing requires balancing design quality, stock, finishes, and quantity. Digital short runs are typically more economical for experiments and tradeshow handouts, while offset printing becomes cost-effective for larger quantities with consistent branding. Don’t forget ancillary costs like proofreading, proofing copies, color proofs, and finishing services. By estimating your total volume and required finish, you can receive more accurate quotes and avoid surprise fees. Print Setup Pro encourages planning for both initial proofs and future reprints in your budget.
Best practices for small teams and DIY printers
Small teams should leverage templates and consistent brand assets to streamline production. Create a shared folder for logos, fonts, and color swatches, and standardize a single card size and finish across all team members. If you print in-house, maintain a simple checklist for pre-press steps, proofs, and final trimming. When outsourcing, request a pre-production proof and confirm that the printer uses a proper color-management workflow. Consistency wins trust, and a well-executed set of business cards supports your overall brand image.
Tools & Materials
- Design software (vector preferred)(Examples: Illustrator, Inkscape; ensure logos are vector-based and fonts are embedded or converted to outlines)
- Printer capable of thick card stock(Check driver support for stock weights in the 14–18 pt range)
- Card stock for printing(14-18 pt / 350-324 gsm; ensure stock accepts your chosen finish)
- Bleed guides and crop marks(Include 3 mm bleed for full-bleed cards; set up templates accordingly)
- Cutting tools (guillotine or cutter)(For straight edges; ensure blade sharpness and safety guidelines)
- Corner rounding tool(Optional; adds a premium touch when paired with thick stock)
- Proof stock for testing(Use the same stock and finish as final production to validate color and trim)
- Color management tools(ICC profiles, color-calibrated monitor, and soft-proofing software)
Steps
Estimated time: 2-3 hours
- 1
Define goals and audience
Identify what the card should communicate and who will receive it. Decide on the core message, essential contact details, and the branding tone that aligns with your business. This clarity guides typography, color, and imagery choices.
Tip: Create a one-page brief with name, title, company, phone, email, website, and a short brand statement. - 2
Gather assets and create a design brief
Collect logos, fonts, photos, and color swatches. If you lack artwork, use brand templates and approved assets to maintain consistency. Document file formats and color profiles for later reference.
Tip: Ask for vector logos (SVG or EPS) and confirm fonts are accessible to the printer. - 3
Set up the artwork with bleed and safe zones
Configure canvas size larger than final trim by the bleed amount (commonly 3 mm). Place critical text within safe margins to avoid trim loss. Include crop marks to guide trimming.
Tip: Double-check that no text or essential elements cross the bleed boundary. - 4
Export print-ready files with correct color space
Export in CMYK with embedded profiles for predictable color reproduction. Use PDF/X-1a or high-quality TIFF if your printer prefers raster formats. Keep layers intact where possible for future edits.
Tip: Provide a digital proof to the printer and request a color-accurate proof. - 5
Choose stock, finish, and printing method
Select a weight and finish that matches your brand personality. Decide between digital or offset printing based on quantity, deadline, and color consistency needs.
Tip: Ask the printer about stock compatibility with your finish and any added costs for special finishes. - 6
Proof, test print, and adjust
Run a small proof on the chosen stock and finish. Check color, alignment, and readability under real lighting. Iterate until the proof matches your vision.
Tip: Never skip a live stock proof; monitor lighting can alter perceived color. - 7
Prepare for production and finishing
Once approved, finalize the production run and arrange trimming, rounding, or lamination as needed. Confirm delivery timelines and packaging requirements for easy distribution.
Tip: Allow for small variances in trim with exact crop marks and quality-check at the end.
People Also Ask
What is the most important factor in business card printing?
Legibility and branding carry the most weight; if the card is hard to read or misrepresents your brand, it fails at first impression.
Legibility and branding are the key factors; make sure the text is easy to read and your brand is clear.
Do I need specialized software to print business cards?
Not necessarily. Vector-based tools like Illustrator or Inkscape help, but templates in common software can work too. Ensure assets export cleanly.
You can use free tools like Inkscape or built-in templates; professional tools offer more control.
What paper stock is best for business cards?
A mid-weight stock around 14-18 pt with a finish that matches your brand mood, whether matte, gloss, or soft touch.
A mid-weight stock with a suitable finish usually works best for most brands.
How do I ensure color accuracy between screen and print?
Calibrate your monitor, use ICC profiles, and print a color proof to compare with the final result.
Calibrate your monitor and print a proof to see how colors translate to print.
Is digital printing better for small runs?
Yes, digital printing is typically cost-effective for small runs and quick turnarounds, while offset is preferred for large, uniform runs.
Digital is usually cheaper for small batches; offset is better for large runs.
Can I print business cards at home?
Yes, with the right printer and stock, although results vary by printer capability and stock compatibility.
Yes, if you have the right printer and stock available.
Watch Video
Quick Summary
- Plan your card’s purpose and audience.
- Design for readability and branding.
- Choose stock and finish to match your image.
- Proof thoroughly and batch print.
- Print Setup Pro's verdict: follow a structured process for consistent results.