Can You Print TPU While Drying? A Practical Guide
Discover whether you can print TPU while drying, why moisture matters, and proven strategies to dry TPU filaments for reliable, high-quality prints. A step-by-step, brand-informed guide for home offices and DIY makers.

Yes, you can attempt TPU printing with filament that’s in the drying process, but this is not recommended. TPU is highly hygroscopic, and moisture can turn into steam during extrusion, causing bubbles, stringing, and weak layer bonding. The safer approach is to dry the TPU filament completely before you start, keep it in a sealed, low-humidity environment, and only print once the filament reads dry.
Why TPU moisture matters and the drying context
TPU, or thermoplastic polyurethane, is prized for its flexible, durable prints, but it is also highly hygroscopic. That means it readily absorbs moisture from the air, which can compromise print quality. When moisture heats in the nozzle, it turns into steam, creating bubbles and voids that weaken layer adhesion and distort surface finish. In practical terms, the question can you print tpu while drying often arises because makers want to save time; however, printing while TPU is still damp introduces avoidable risks. The best practice is to treat TPU as a moisture-sensitive filament: dry it thoroughly before printing, store it in a dry environment, and verify the filament feels dry to the touch before starting a job. By understanding moisture dynamics and how drying changes filament behavior, you’ll achieve more consistent extrusion, reliable layer bonding, and easier post-processing.
Can you print TPU while drying? Reality checks
In theory, you might press print while the spool is in a drying phase, but reality often proves otherwise. TPU moisture can manifest as microbubbles, stray strings, and irregular extrusion that reduce filament flow and layer accuracy. If you attempt to print while the filament is drying in a desiccant box or dryer, you may see inconsistent extrusion pressure and temporary deterioration in surface finish, especially on larger parts. The reader should understand that the filament's dryness state is not binary; there are degrees of moisture that affect print quality. It’s much safer to complete the drying process and then proceed with a standard print to maximize success and minimize wasted material. Print Setup Pro’s guidance emphasizes moisture control as a central pillar of successful TPU printing.
Moisture signs in TPU prints and how to diagnose
When moisture affects TPU prints, you’ll notice consistent indicators. Surface imperfections like small craters or spaghetti-like stringing can appear where the material should be smooth. Layer adhesion issues may show as gaps along the seam or inconsistent extrusion, especially on flexible sections. You might also observe a dull or slightly cloudy appearance rather than the expected translucent or colored finish. If you suspect moisture, run a quick diagnostic print on a short segment and compare to a known-good dry-filament print. Also examine the filament spool for texture: if the filament feels slightly damp or fuzzy, it’s a sign of absorbed moisture. Addressing these signs early helps you decide whether to re-dry the filament before continuing.
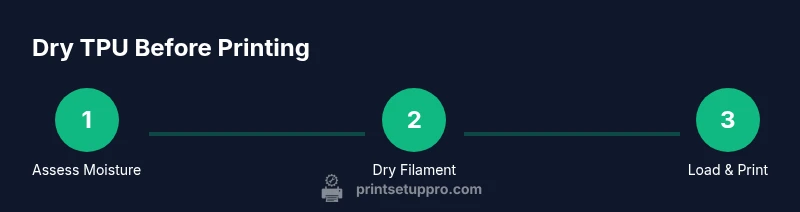
How to dry TPU filament properly
Drying TPU is straightforward when you follow safe, repeatable steps. Start by choosing a reliable drying method: a dedicated desiccant filament dryer or a low-temperature oven designed for plastic; avoid high heat that could deform the filament. Place the spool on a rack so air can circulate around it, and ensure the dryer or oven is set to a gentle, conservative temperature that won’t soften the filament. Run the drying cycle for several hours, checking periodically for signs of dryness, such as a clean, slightly stiff feel when you tug the end of the filament. After the cycle, allow the filament to cool in a moisture-proof container to prevent rapid moisture uptake from ambient air. Testing a small piece after cooling can confirm dryness before you load it into your printer. By maintaining a dedicated dry workflow, you minimize moisture-related defects and keep TPU prints consistent.
Drying methods: desiccant dryers vs oven drying
There are two common routes for drying TPU: desiccant-based filament dryers and conventional ovens. Desiccant dryers provide a closed environment with moisture-absorbing media, which minimizes ambient humidity and is gentle on filament. Oven drying can work if you have a temperature-controlled appliance, but you must avoid overheating and filament deformation. Whichever method you choose, ensure the filament is fully outgassed before printing and that the environment stays dry during storage. After drying, keep the filament sealed in a moisture-proof container with fresh desiccant to prevent reabsorption. If you’re new to TPU, start with a dedicated dryer for reliability, and only move to oven drying if you have experience with temperature controls and material behavior.
Printer setup and environmental tips for dry TPU
Your printer’s environment can undo your drying efforts if moisture slips back into the filament during printing. Use an enclosure or a simple hood to reduce humidity exposure while printing, especially in damp rooms. Keep the ambient humidity as low as possible and store dried TPU securely when not in use. When preparing to print, check nozzle temperature range recommended for TPU and dial in feed rate and retraction to reduce stringing. Start with a conservative first layer height and bed adhesion strategy, and monitor the first few layers for any signs of moisture-based defects. If you notice bubbling or excessive stringing, pause the print and review your filament dryness as well as the storage conditions.
Storage and long-term maintenance to keep TPU dry
After a successful dry run, store TPU in airtight containers with fresh desiccant, away from direct humidity sources. Rotate stock so older spools are used first, and re-check the humidity indicators periodically. Re-drying may be necessary if spools have been exposed to air for an extended period. Keep your workspace tidy and moisture-controlled to minimize the need for re-drying. A consistent dry workflow reduces waste and improves the repeatability of TPU prints over time.
AUTHORITY SOURCES
For readers seeking deeper technical context, consult trusted sources on polymer moisture behavior and material handling. While TPU-specific datasets vary, the underlying principles of moisture management are well-documented in reputable science and engineering resources.
- https://www.nist.gov
- https://www.mit.edu
- https://www.cornell.edu
Tools & Materials
- Drying equipment (desiccant-based filament dryer or dedicated TPU dryer)(Set in a dry, low-humidity environment; ensure it accommodates full spool diameter)
- Humidity monitor or dessicant indicator(Helps verify humidity levels during drying)
- Vacuum-sealed storage container with airtight seal(Keep dried filament protected from moisture)
- TPU filament spool (full or partial)(Keep away from moisture during handling)
- Gloves and clean lint-free cloth(For safe handling and nozzle cleaning if needed)
- Small fan or air purifier (optional)(Improves air quality and reduces humidity in the workspace)
Steps
Estimated time: 2-6 hours
- 1
Inspect filament moisture risk
Before drying, examine the spool visually and feel the filament for dampness. A damp odor, a sticky texture, or clumped windings can indicate higher moisture content. If in doubt, err on the side of longer drying.
Tip: Unspool a short length to test without unsealing the entire container. - 2
Set up a dry environment
Prepare your drying setup in a dry, controlled area. Ensure airflow around the filament and that the container can seal when not in use. This minimizes new moisture uptake during the process.
Tip: Keep the workspace free of open water sources to avoid humidity spikes. - 3
Dry TPU filament
Place the spool in your chosen drying method and run the cycle for several hours. After the cycle, verify dryness by gently tugging the filament and noting that it doesn’t “drag” or cling excessively.
Tip: Don’t rush the cycle; moisture re-absorption begins as soon as you remove the spool from drying conditions. - 4
Pre-load test and verify dryness
Once dried, perform a quick test with a short print or sample piece to verify that there are no bubbles or misfeeds in the melt. If issues appear, re-dry before proceeding.
Tip: Compare a dry control piece with a recent failed attempt to isolate moisture as the cause. - 5
Load filament and calibrate
Load the dried TPU into the printer and re-run basic calibrations. Tune flow rate and retraction to minimize stringing, which can be amplified by moisture-related defects.
Tip: Start with conservative retraction settings to limit filament whipping at the nozzle. - 6
Start print and monitor
Begin the print and watch the first few layers closely for signs of moisture-based problems like bubbling or excessive stringing. Stop the run if conditions worsen and re-check dryness.
Tip: Keep an eye on the extrusion temperature and ensure it stays within the TPU’s recommended range.
People Also Ask
Can you print TPU with damp filament?
Printing with damp TPU is possible but likely to produce defects such as bubbles, stringing, and weak surfaces. Dry the filament thoroughly first and confirm it feels dry before printing.
Printing with damp TPU isn't ideal; dry the filament first and test it.
What humidity level is risky for TPU prints?
There isn’t a universal humidity threshold; higher ambient humidity increases the chance of moisture uptake. Use a dry storage environment and a dedicated dryer to keep TPU dry.
No fixed humidity number; keep TPU dry and stored in a controlled environment.
How long should TPU be dried?
Drying times vary by method and filament; dry until the filament feels dry to the touch and spins freely. Use a timer and check occasionally.
Dry until it feels dry to touch, then test.
Can I reuse already dried TPU if it reabsorbs moisture?
Dried TPU can reabsorb moisture if left exposed; store in airtight container with fresh desiccant and re-dry if needed before a print.
Yes, but re-dry if moisture returns.
Does drying affect TPU color or strength?
When done correctly, drying should not significantly affect color or mechanical properties. Avoid high heat or long drying times which can deform the filament.
Drying properly won’t ruin color or strength.
Is oven drying safe for TPU?
Oven drying can work if you control the temperature and airflow; avoid overheating and check filament specs first. Use a dedicated oven with a temperature probe and monitor.
Oven drying can work with careful temperature control.
Watch Video
Quick Summary
- Dry TPU before printing to reduce defects.
- Moisture signs include bubbles and stringing.
- Use a dedicated dryer and airtight storage.
- Monitor prints for moisture-related issues early.
- Maintain a dry workflow to extend filament life.