Can You 3D Print While Drying Filament? A Practical Guide
Explore whether you can 3D print while filament is drying, how moisture impacts prints, and a step-by-step plan to safely manage drying and printing without sacrificing part quality.

You can 3D print while filament is drying, but only under strict conditions: use a separate drying/printing area, monitor temperature and humidity, and avoid loading filament that’s actively undergoing high-temperature drying. Plan ahead, ensure the filament is not actively heating during printing, and test with a sacrificial part first. This approach minimizes moisture-related defects without risking printer damage.
Understanding why drying matters for 3D printing
Moisture in filament is a common, often invisible, culprit behind a range of print problems: poor layer adhesion, visible stringing, bubbling during extrusion, and inconsistent filament flow. When a spool has absorbed moisture, the water inside turns to steam as the filament heats up in the hot end. That steam interferes with polymer melt consistency, leading to pitting, surface roughness, and weak parts. According to Print Setup Pro, controlling humidity around hygroscopic filaments (like nylon and some PETG grades) is essential for predictable extrusion. If you’re asking can you 3d print while drying filament, the short answer is: it depends on your process discipline and environmental controls. The overarching goal is to keep the filament moisture content as low as possible while not exposing it to printer heat during critical drying phases. Planning ahead, preparing a dedicated drying setup, and choosing a minorly conservative print plan will save you time and waste.
For home office setups or small workshops, moisture management extends beyond the printer: storage containers, desiccant packs, and clean air around the drying zone matter as much as the printer’s own enclosure. If you print with PLA, ABS, or PETG that’s not moisture-sensitive, you might not need a drying step at all. But when you’re using nylons, polycarbonates, or exotic blends, can you 3d print while drying filament? The best outcomes come from a defined workflow that keeps drying away from the hot end while still letting you reap the benefits of well-dried material.
How moisture affects different filament types
Different plastics respond to moisture in distinct ways. Nylon-based filaments readily absorb moisture from air, which raises the glass transition temperature and changes flow characteristics. PETG and ABS can also degrade in the presence of water, though the symptoms are subtler. PLA is relatively moisture-tolerant but can still show issues like poor bed adhesion if stored improperly after drying. When you dry filament, you reduce steam formation in the hot end, stabilizing extrusion pressure and maintaining layer fidelity. If you’re pursuing can you 3d print while drying filament, you’ll find nylon-dominant spools require stricter moisture control, while standard PLA dries may only need a light, short pre-dry. Print setups vary widely, so tailor your approach to the material you’re using and the parts you intend to print.
Storage and handling are the other side of the coin. Even if you dry a spool, if you don’t maintain a sealed environment afterward, filament can reabsorb moisture. For DIY users, a simple desiccant-equipped canister or a small dedicated dryer with a humidity sensor can dramatically improve outcomes. Print Setup Pro’s guidance emphasizes a practical balance: drying should reduce moisture risks, but it should be implemented without introducing new risks to the printer’s hot end or electronics.
Can you print during a drying cycle? Practical considerations
The core question—can you 3d print while drying filament—has a practical answer: it’s possible, but it requires rigorous process separation and controls. First, never feed filament that is actively drying into a printer’s hot end. If you’re using a filament dryer, isolate the drying zone from the printer’s hot zone; a closed cabinet or room with stable temperature and low humidity is ideal. Second, ensure printed parts do not rely on printing a filament that is still warm from a drying cycle; allow the filament to reach ambient temperature before loading if the drying happens in a different phase of the workflow. Third, monitor the extrusion temperature and flow characteristics carefully. Moisture release during printing can create steam that leaves voids in the deposited plastic or leads to inconsistent extrusion pressure. Finally, run a cautious test print with a small, non-critical model to verify that the dried filament behaves as expected under actual printing conditions. If you notice sudden changes in extrusion or surface defects, pause and reassess the moisture management approach. Print Setup Pro’s framework for can you 3d print while drying filament centers on maintaining separation, verifying material stability, and testing before committing to larger prints.
In practice, a common workflow is to dry the filament in advance, keep it isolated from the printer, and begin with a small calibration print to confirm there are no moisture-related issues before starting a larger part. This approach minimizes risk while allowing you to benefit from the improved mechanical properties that dry filament can provide.
Step-by-step plan to print while filament dries (overview)
A structured plan helps you navigate the can you 3d print while drying filament scenario without surprises. Start by determining whether the filament requires drying based on storage history and material type. Next, choose a suitable drying method and set up a clearly separated printing zone. Then, load a known-dry, tested filament into the printer only after it has cooled to ambient temperature. Run a small test print and observe for moisture-related anomalies such as bubbling, steam, or inconsistent extrusion. If the test prints cleanly, gradually scale to more complex models, continuing to monitor humidity and temperature. If issues persist, consider pausing the print and extending the drying cycle or switching to a different filament. This workflow aligns with Print Setup Pro’s recommendations to manage moisture without compromising printer safety and print quality.
Safety and environmental considerations when printing with dried filament
Handling dried filament involves basic safety practices to prevent inhalation of fine particulates and to avoid fire hazards from heated elements. Keep the drying and printing spaces ventilated and free of clutter. Do not place drying containers directly on or near hot surfaces, and ensure cables and power supplies are in good condition to prevent overheating. When can you 3d print while drying filament, the overarching priority is safety: never improvise a setup that could trap heat or create a burn risk. Use manufacturer guidance for drying times and temperatures and integrate a visible safety plan into your workspace. If you’re unsure about the compatibility of a filament with a drying method, consult the material data sheet or reference the manufacturer’s drying recommendations.
Troubleshooting common moisture-related print issues (with can you 3d print while drying filament in mind)
Even with a drying workflow, issues can arise. Look for inconsistent extrusion, bubbling in the molten plastic, stringing, or waviness in the walls. If you observe these symptoms, pause the print and inspect the filament for signs of moisture reabsorption, such as a sour smell or visible moisture on the spool. Adjust the drying setup by increasing desiccant capacity or improving barrier seals, then re-run a small calibration print. Document changes to create a repeatable process. Print Setup Pro emphasizes a pragmatic approach: treat the drying step as part of the material preparation, not as a last-minute workaround for poor storage or incorrect printer settings.
When to pause a printing job and finish drying before continuing
If your filament shows clear moisture-related problems during printing, consider pausing the job and finishing a calibrated drying cycle before resuming. Observing the print for early signs of moisture issues lets you recover gracefully without wasting the entire part. In some cases, resuming after additional drying can salvage an otherwise failing print, but only if the issue was indeed moisture-related rather than a mechanical fault. Maintain a log of each pause, the drying conditions, and the observed print results to improve future decisions.
Tools & Materials
- 3D printer with compatible heater block(Ensure hot end temperature range suits the targeted filament; avoid compatibility issues with nylon or PETG)
- Filament drying system or sealed desiccant canister(Choose a system with a humidity display or sensor when possible)
- Hygroscopic filament (e.g., nylon, some PETG variants)(Only necessary if your prints rely on moisture-prone materials)
- Humidity meter or hygrometer(Helpful for tracking room and drying chamber humidity)
- Desiccants (silica gel or molecular sieves)(Place in storage and/or in the drying chamber as needed)
- Calibration/test print models(Use small, known-good geometries to validate dryness before large prints)
- Sealed barrier or enclosure for the printer and dryer(Prevents cross-contamination and stabilizes environment)
- Safety gear (gloves, eye protection)(General lab safety for handling hot components)
Steps
Estimated time: 45-75 minutes
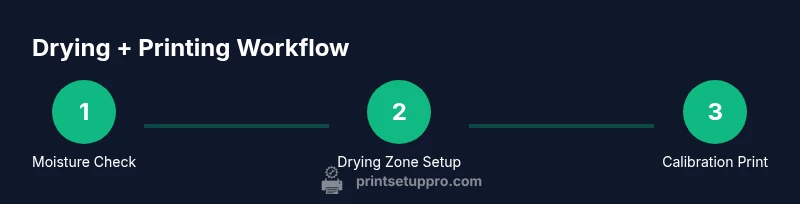
- 1
Check moisture status of filament
Inspect the spool for signs of moisture exposure, such as visible lumps, musty odor, or inconsistent filament texture. If moisture symptoms are present, plan to dry the filament before or during printing. This initial check informs whether can you 3d print while drying filament is a viable approach for your current material.
Tip: Document the filament lot and storage conditions to refine future drying cycles. - 2
Set up a dedicated drying zone
Position the drying device away from the printer, ideally in its own cabinet or room. Use a barrier to minimize airflow between the drying zone and the printer. Consistent humidity and temperature in the drying area reduce moisture reabsorption during printing.
Tip: Place a visible indicator to remind yourself to monitor humidity during the cycle. - 3
Pre-dry the filament if needed
If the filament shows moisture signs, run a brief drying cycle according to the material data sheet, then allow the filament to cool to ambient temperature before loading it into the printer. Do not load filament while still hot or actively drying.
Tip: Use a calibrated timer and an air gap to prevent condensation on the spool. - 4
Load a test spool and run a calibration print
Insert the dried filament only after it has reached room temperature. Start with a small calibration cube or benchy to verify extrusion consistency, layer bonding, and surface finish under the drying workflow.
Tip: Set a conservative extrusion temperature and re-check fan speed for stable cooling. - 5
Monitor extrusion behavior during printing
Watch for signs of moisture-related issues: popping sounds, steam, or inconsistent filament flow. If detected, pause, inspect the nozzle, and adjust printing speed or temperature to accommodate the dried filament’s behavior.
Tip: Keep a log of observed anomalies to optimize future prints. - 6
Cool, finish, and evaluate the print
Allow the printed part to cool in a controlled environment, then inspect for surface quality and dimensional accuracy. If defects persist, review the drying conditions and consider extending the drying cycle or trying a different filament with lower moisture sensitivity.
Tip: Take photos and measurements to benchmark improvements in subsequent prints.
People Also Ask
Is it safe to run a drying cycle next to a 3D printer?
Yes, but you should physically separate the drying area from the printer and avoid direct heat exposure to the printer’s hot end. A closed cabinet or dedicated room with stable humidity reduces risk. Always follow material guidelines and printer safety instructions.
Yes, it can be safe to dry filament near a printer when you separate the drying zone and avoid exposing the printer to extra heat.
Which filaments require drying for best results?
Nylon and some PETG variants are most susceptible to moisture and benefit from drying. Other filaments like PLA are less moisture-sensitive but can still benefit from proper storage and occasional drying for long-term reliability.
Nylon and certain PETG types need drying for best results; PLA is less sensitive but still benefits from proper storage.
Can I reuse dried filament after a print fails due to moisture?
If the filament cools down and remains dry, you can reuse it after inspecting the print for moisture-related defects. However, moisture that caused the failure may have residual effects; consider re-drying and re-testing with a small calibration print before committing to a larger part.
Yes, you can reuse it after re-drying and a calibration print to confirm quality.
What signs indicate a filament needs more drying?
Popping or hissing during extrusion, increased stringing, or inconsistent layer adhesion are common signs. If you observe these, pause printing and extend the drying cycle or re-dry the filament before continuing.
Look for popping noises, stringing, and uneven layers—these hint at moisture issues needing more drying.
Should I dry filament before every print?
Not always. Drying is most crucial for moisture-prone filaments or long storage times. For short-term storage or non-hygroscopic materials, a proper sealed storage with desiccants often suffices.
Dry only when you’re using moisture-sensitive filaments or if the spool has been exposed to humidity.
What’s the safest way to verify dryness?
Use a small calibration print to check extrusion consistency after a simulated drying cycle. If the print looks good, you’re likely ready for larger parts. If not, extend the drying time or adjust the setup.
Run a quick calibration print to confirm dryness before large parts.
Can printing speed affect moisture-related issues?
Yes. Printing faster can mask moisture-induced defects, while slower speeds may reveal them. Adjust print speed and temperature based on observed extrusion behavior during prints with dried filament.
Speed changes can reveal or mask moisture issues—tune speed and temperature accordingly.
Watch Video
Quick Summary
- Define a dedicated drying and printing zone
- Dry filament should not be heated in the printer while drying
- Test prints confirm can you 3d print while drying filament is workable
- Monitor humidity and document changes for repeatability
- Safely escalate drying time if moisture symptoms persist