Can You Print While Drying? A Drying-Aware Guide
Explore whether you can print while media is drying, understand how drying affects ink and paper, and follow a safe workflow with pro tips for home offices and small businesses.

In most cases you should not print while the media is still drying. Printing on damp surfaces can smear ink, cause jams, or degrade print quality. To proceed safely, ensure the media is fully dry, allow any coatings to cure, and follow manufacturer drying times or a controlled heat setting if applicable.
Can you print while and is drying
According to Print Setup Pro, printing while media is still drying is generally not recommended. The presence of surface moisture can cause ink to smear, lead to uneven absorption, and increase the likelihood of paper jams. This is particularly true for glossy or coated papers, photo media, and textiles used with certain printers. Before you print, verify that the surface feels dry to the touch and that any coatings or finishes have had adequate time to cure. In this guide, we’ll explore why drying matters, how to read media specs, and a safe workflow for drying-aware printing. Print Setup Pro emphasizes planning around drying times to protect print quality and printer longevity.
How drying affects ink performance
Drying influences how ink sits on the surface and how quickly it locks in. On absorbent papers, ink readily sinks in, which can help with bleed control but may slow drying. On coated papers, ink sits on the surface longer and can smear if the surface is still damp. Humidity and air flow shift these dynamics; a humid environment can lengthen drying times, while strong air flow can help, but excessive drafts may cause paper cockling or curling. Understanding your paper type and ink formulation is key to predicting drying behavior. Print Setup Pro’s analysis highlights that matching media and drying conditions yields the most consistent results across colors and tones.
Media and environment: getting dryness right
Your printing environment matters as much as the media. Work in a well-ventilated area with moderate, stable temperature and humidity. Keep the surface clean and free from moisture sources such as nearby sinks or steam. If you’re printing photos or high-gloss prints, consider using media with built-in drying properties or finishing coatings that cure under ambient conditions. For textiles and specialty media, always consult the manufacturer’s dry-down recommendations. Small adjustments in ambient temperature or the use of a quiet desk fan can meaningfully impact drying time without affecting print quality.
Safe workflow for drying-aware printing
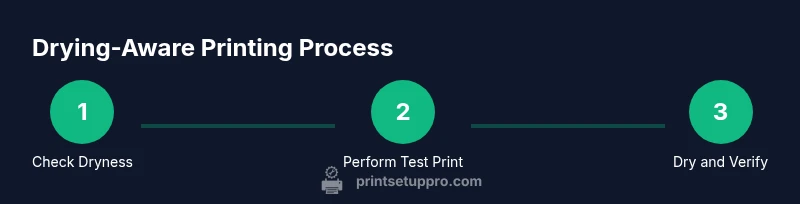
A safe workflow minimizes waste and protects your printer. Start with dry media and a known-good printer setting, perform a test print on a sacrificial sheet, and review the result after a short drying interval. If the test shows smearing or ink feathering, pause printing and extend the drying period or adjust environmental conditions before proceeding. Maintain consistent media handling, avoid touching the print surface during drying, and keep the printer away from heat sources that could accelerate unintended drying or cause warping. Document the drying times you observe for future reference.
Common mistakes and how to avoid them
Common missteps include assuming drying time is the same across all media, printing immediately after a large print run, or ignoring humidity fluctuations. Another pitfall is rushing the process with excessive heat, which can alter ink chemistry and paper stability. Always follow media manufacturer guidelines, use the printer’s built-in drying options if available, and test with small samples before committing to a full print job. Keeping a simple drying log helps you refine your workflow over time.
When to contact support
If you notice persistent smearing, unusual ink behavior, or frequent jams during printing on recently dried media, it may indicate a deeper issue such as improper media handling, printer head clogging, or incorrect driver settings. In those cases, consult official printer documentation, seek guidance from the community forums, or contact the manufacturer’s support line. Drying-aware printing reduces risk, but ongoing issues should be investigated with professional support.
Tools & Materials
- Clean, dry workspace(Avoid humid surfaces and moisture near the printer.)
- Drying surface or rack(A flat, clean surface that allows air to circulate around the media.)
- Desk fan or gentle ventilation(Helps move air but avoid direct, strong drafts on the media.)
- Media suitable for drying (coated or plain paper as recommended)(Check media specs for drying recommendations and coatings.)
- Humidity/temperature monitor (optional)(Keeps environmental conditions stable during drying.)
- Test sheets or sacrificial paper(Use for initial dry checks before committing to final prints.)
Steps
Estimated time: 60-90 minutes
- 1
Check media dryness
Feel the media surface and lightly bend a corner to assess moisture. If it feels damp, pause and allow more time to dry, ideally in a controlled environment. This step prevents immediate smear risks.
Tip: If in doubt, extend the air-drying period by 5–10 minutes and recheck. - 2
Run a test print on sacrificial sheet
Print a small test page on a disposable sheet to observe adhesion and bleeding without risking the final media. Compare the test print against expected results after a short drying interval.
Tip: Use the same media type and the same print settings as the final job. - 3
Assess post-print drying
Wait the recommended drying time before evaluating print quality. If the ink appears tacky or shows feathering, pause and extend the drying period.
Tip: Fan-assisted or room-temperature air usually yields safer, gradual drying. - 4
Adjust environment if needed
If drying is slow, moderate humidity and improve airflow; if drying is too fast or media curls, adjust by lowering airflow or moving to a cooler area.
Tip: Avoid direct heat sources that could warp media or alter ink chemistry. - 5
Proceed with final print
Once the test print dries cleanly and matches expected color/contrast, run the final job using the same dry-media workflow.
Tip: Document the successful settings for future print runs. - 6
Document results
Keep a simple drying log including media type, ambient conditions, drying time, and observed print quality. This helps refine your process over time.
Tip: A short note each time you print saves time on future projects.
People Also Ask
Is it safe to print on media that is still damp?
Printing on damp media increases the risk of smearing, ink bleed, and feed jams. Always ensure the media is dry or follow the media's drying specifications before printing.
Printing on damp media is risky; wait until it’s dry to avoid smearing and jams.
What should I do if my print smears after drying?
Pause, inspect the media type, and confirm it’s dry. Reprint on a fresh sheet after ensuring adequate drying time and proper environmental conditions.
If your print smears, recheck dryness and redo the print with fresh media.
Can I speed up drying without harming the ink?
Use gentle airflow and avoid direct heat sources that can warp media or alter ink chemistry. Follow media-specific drying recommendations.
Use gentle airflow and avoid direct heat to speed up drying safely.
Should I always dry prints in a controlled environment?
A stable environment helps consistency. Moderate temperature and good ventilation support predictable drying without affecting print quality.
Yes, a stable, ventilated space helps prints dry consistently.
Where can I find drying guidelines for my media?
Refer to the media manufacturer’s drying guidelines and your printer’s user manual. If unsure, start with conservative drying times and test prints.
Check the media specs and printer manual for drying guidelines.
Watch Video
Quick Summary
- Verify media dryness before printing
- Use test sheets to prevent waste
- Control environmental factors for reliable drying
- Document your drying workflow for consistency