Epson Expression Photo XP-15000: Full Setup and Troubleshooting Guide
A comprehensive, step-by-step guide to setup, driver installation, media selection, color calibration, and common fixes for the Epson Expression Photo XP-15000 printer.

This guide helps you set up the Epson Expression Photo XP-15000, install drivers, connect to your network, load compatible media, and troubleshoot common printing issues. It covers pre-setup checks, software installation, color management, and test printing to ensure optimal photo quality.
Why the Epson Expression Photo XP-15000 benefits from careful setup
The Epson Expression Photo XP-15000 is designed for photographers, home office users, and hobbyists who want large-format photo prints with vibrant color. Proper setup affects color accuracy, print speed, and media compatibility. According to Print Setup Pro, a well-planned installation reduces ink waste and helps you achieve consistent results across today’s popular photo papers. When you begin, keep the printer close to a power outlet and a stable Wi‑Fi or USB connection, and prepare media that matches your intended projects. The goal is to minimize trips to the setup menu and avoid last-minute configuration changes that can derail color consistency. In short, a thoughtful setup directly influences outcome quality for the epson expression photo hd xp 15000 and similar models, so invest time upfront.
Compatibility and prerequisites for a smooth start
Before unboxing the printer, verify that your workspace meets the minimum requirements: a stable power source, adequate ventilation, and a network you can reach from a desktop or laptop. The XP-15000 supports wireless and USB connections, but a wired network is often more reliable for large photo files. Ensure your computer’s operating system is supported by the latest Epson drivers for Windows or macOS. Have a backup plan for ink cartridges and media. Print Setup Pro emphasizes using genuine Epson media where possible to prevent color shifts and clogging. Finally, gather recommended photo papers in the sizes you plan to print (up to large-format options) and decide whether you will print borderless photos for display.
Installing drivers and software on your computer
Install the official Epson drivers and software from the Epson support site or use the setup CD if included. After installation, add the XP-1500 as a printer in your system settings and set it as your default if you primarily print photos. On Windows, check the Printer Preferences to select high-quality photo mode; on macOS, use ColorSync or the printer’s own color controls. When linking to a network, choose the appropriate wireless network and enter the password. Keep the printer powered during installation and avoid connecting multiple USB devices that may cause driver conflicts. Print Setup Pro highlights that running the latest driver reduces compatibility issues with new media types.
Loading media and installing ink cartridges
Power the printer on and follow the prompts to insert new ink cartridges. The XP-15000 uses a six-color ink system, optimized for photo reproduction and smooth gradients. Open the front cover, remove protective plugs, and install cartridges in the correct color order. When loading media, align the paper guides to the size of your print, and feed the media straight to avoid skewed prints. For specialty media like glossy photo paper, select the appropriate media type in the printer settings to ensure optimal ink adhesion and color accuracy. If the printer displays a media mismatch warning, re-confirm the tray size and keep the media flat during printing.
Configuring print settings for best photo results
Access the print dialog from your application and choose the correct media type and quality setting. Individual paper profiles may exist for glossy, pearl, or matte finishes; select the one that matches your media. Enable borderless printing if your project requires edge-to-edge output, but note borderless options may differ by paper size. Adjust color management to use the printer’s color profile or a calibrated color management workflow if you have one. For vibrant portraits, consider enabling photo mode with increased resolution and slower print speed to maximize detail. Regularly update drivers to benefit from improved color management and bug fixes.
Test print, calibration, and color correction workflow
Print a small test pattern and a color calibration page to verify alignment, color balance, and grayscale accuracy. If colors appear tinted or shifted, run the printer’s head cleaning and alignment routines from the on-printer menu or software. Use the test page to compare to your monitor’s color rendition and adjust gamma, brightness, and contrast as needed. For critical projects, repeat the test page after a warm-up print job to account for ink settling. Document any adjustments so future prints stay consistent with your preferred profile.
Common issues and practical troubleshooting steps
If you encounter paper jams, check that media is within the tray’s recommended limits and that all guides are snug but not tight. For streaking or uneven prints, inspect the print head for clogs and run the cleaning cycle; use a test page to verify results. If connection drops occur, temporarily switch to a wired connection to confirm network reliability, then reconfigure the wireless setup. Low ink warnings should prompt cartridge replacement, but always replace one color at a time to preserve color balance. Finally, ensure the printer firmware is up to date to minimize compatibility issues with new media.
Maintenance and long-term care for the XP-15000 family
Regular maintenance helps prevent color shifts and print quality degradation. Clean the exterior and feed path periodically to remove dust. Replace ink cartridges promptly and store photo papers in a cool, dry place away from direct sunlight. Use only compatible media products and avoid bending heavy media. If you plan long idle periods, power the printer off properly and refresh ink channels before resuming printing. Print Setup Pro reminds users that consistent maintenance reduces the likelihood of head clogs and improves overall reliability over time.
Maximizing your workflow for home offices and hobby projects
Create print presets for common tasks such as 4x6 greetings, 8x10 portraits, or large-format borderless prints. Save profiles for different media types and keep a simple folder system for media selection and print jobs. When printing batches, queue jobs to minimize color drift and ink consumption. For color-critical work, keep a calibrated monitor and color-managed workflow, then rely on the XP-15000’s built-in color handling to reproduce consistent results across sessions. Print Setup Pro recommends documenting your best-performing settings for quick reuse on future projects.
Tools & Materials
- Power cord compatible with XP-15000(Ensure the wall outlet can handle the printer’s power draw)
- USB or Ethernet cable (optional for wired setup)(Use if you prefer direct or router-connected printing)
- Computer or mobile device with supported OS(Windows or macOS; mobile printing supported via app)
- Ink cartridges (6-color system)(Use genuine Epson cartridges when possible)
- Photo paper and media samples(Glossy, semi-gloss, and matte papers in sizes up to 13x19 inches)
- Driver installer or access to Epson support site(Keep the latest version for your OS)
- Calibrated monitor or color reference prints(Helpful for color matching)
Steps
Estimated time: 60-90 minutes
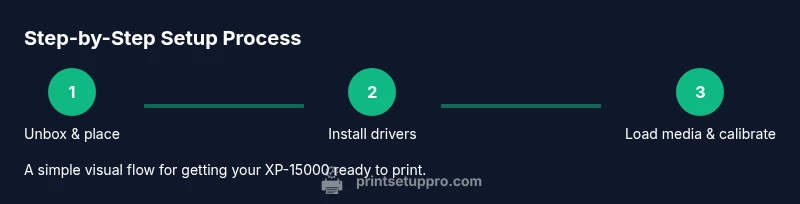
- 1
Unbox and place the printer
Remove all packaging, install the power cord, and place the XP-15000 on a stable, flat surface near an outlet. Power on the printer and follow initial setup prompts to choose language and region. This establishes the default parameters before you begin loading ink and media.
Tip: Take a photo of the back label for future reference (serial and model). - 2
Connect to power and network
Plug the printer into a reliable power source. Choose a wireless setup via the printer control panel, or connect with an Ethernet cable for a stable network. Make a note of your Wi-Fi name and password to complete the setup quickly.
Tip: If your Wi-Fi signal is weak, place the printer closer to the router during setup. - 3
Install ink cartridges
Open the ink cover, insert each cartridge into its matching color channel until it clicks, and close the cover. Run a quick inline ink check from the control panel to confirm all colors are detected.
Tip: Avoid touching cartridge contacts to prevent performance issues. - 4
Install drivers and software
Download the latest XP-15000 drivers from Epson’s official site and install them on your computer. Add the printer in your OS printer settings and select the highest quality photo mode when printing photos.
Tip: Grant any required permissions during installation for seamless operation. - 5
Load media and set print preferences
Insert the photo paper or media into the rear slot or paper tray, aligning guides to the selected size. In the print dialog, choose the correct media type and set borderless printing if needed.
Tip: Use the appropriate paper type to avoid ink bleeding and color shifts. - 6
Print a test page and calibrate
Print a color test page and compare against a reference. If colors are off, run the printer's alignment and cleaning routines, then reprint the test page to verify improvements.
Tip: Document your calibration results for future reference. - 7
Tackle common issues
If you encounter jams or streaks, inspect media path and ensure guides are properly positioned. For connectivity hiccups, reboot devices and re-run the network setup.
Tip: Keep spare ink cartridges for quick replacement when needed.
People Also Ask
What media sizes does the XP-15000 support and can it print borderless?
The XP-15000 supports wide-format media up to 13x19 inches and can print borderless images on compatible papers. Borderless printing is ideal for photos and posters, but verify the paper size and type in the printer’s settings before printing.
It can handle large formats up to 13 by 19 inches and borderless prints on suitable papers; check your paper size in the print settings.
How do I fix color misalignment after setup?
Run the printer’s alignment and head-cleaning routines from the control panel or software. Print a test page and compare; repeat if necessary. Calibrate your monitor and apply a matching color profile for your media.
If colors look off, run alignment and cleaning, then reprint a test page and adjust as needed.
Can I print from my phone or tablet?
Yes. The XP-15000 supports wireless printing from iOS and Android devices via Epson iPrint or standard print APIs. Ensure the device is on the same network and select the XP-15000 in the print dialog.
You can print wirelessly from your phone or tablet using Epson's app or the device's print options.
Why does the printer print slowly or stop mid-page?
Slow printing is common with high-resolution photos and borderless modes. Ensure paper type matches the media setting, and check that the printer isn’t performing a cleaning cycle in the background.
High-res photos can take longer; confirm media settings and avoid concurrent maintenance tasks.
How often should I perform print head cleaning?
Only when you notice streaks or color gaps. Regular use helps prevent clogs; if you print infrequently, run a light cleaning cycle and print a nozzle check every few weeks.
Clean only when needed; regular light printing helps prevent clogs if you don’t print often.
Where can I download official XP-15000 drivers?
Visit Epson’s official support site and select XP-15000 to download the latest drivers for your OS. Keep drivers updated to ensure compatibility with newer media and software.
Get the latest drivers from Epson’s support site and update regularly.
What media should I avoid for this printer?
Avoid damaged or very cheap media that can cause ink bleed or paper jams. For best results, use media designed for photo printing and follow the manufacturer’s media recommendations.
Avoid damaged or low-quality media; stick to photo-specific papers for best results.
Can I save color profiles for different papers?
Yes. Save and reuse profiles for different papers to maintain consistency. If your workflow involves multiple media types, create a preset for each and switch with one click.
You can save profiles per paper type to keep your prints consistent.
Watch Video
Quick Summary
- Follow official driver setup for reliability
- Load media carefully to prevent jams
- Calibrate colors after initial prints
- Maintain ink and media correctly for longevity
- Use presets to streamline workflows