Epson Expression Premium XP-7100 Setup and Troubleshooting Guide
A comprehensive step-by-step guide to setting up and troubleshooting the Epson Expression Premium XP-7100, with practical maintenance tips from Print Setup Pro.

By the end of this guide you will be able to unbox the Epson Expression Premium XP-7100, complete initial setup, connect to Wi‑Fi, install drivers, run a nozzle check, and perform routine maintenance. This quick answer outlines essential steps and prerequisites, with practical tips from Print Setup Pro to minimize downtime and ensure reliable printing.
What the Epson Expression Premium XP-7100 brings to a home office
The XP-7100 is a compact, color‑rich all‑in‑one designed for photo printing and everyday documents. Its compact footprint fits small desks, while its six‑color cartridge system delivers vibrant color and smooth gradients. When paired with the right setup, it becomes a dependable backbone for home office workflows. In practice, this model supports versatile media handling and quick print speeds for its class. Print Setup Pro observes that users value reliable wireless printing, straightforward ink maintenance, and easy driver updates. Understanding these aspects helps you plan a smooth installation and avoid common headaches when first powering on the XP-7100.
Core specifications and what they mean in practice
Key specifications like print resolution, color depth, and media handling influence daily results. The XP-7100 supports high‑quality photo prints, borderless posters, and standard documents with energy efficiency. In practice, this means you can print school projects, home photos, and small‑business invoices without swapping devices or services. To maximize results, align expectations with the printer’s capabilities: use the correct paper type, maintain clean printheads, and keep firmware up to date as advised by Print Setup Pro.
Network setup and driver basics
Wireless setup eliminates cables and offers flexible placement. Start by connecting to a 2.4 GHz network; many routers share bandwidth across devices. If you prefer USB, you can still install drivers directly from the Epson site. Regardless of method, ensure the printer and computer are on the same network (or connected via USB) and update drivers to the latest version. Print Setup Pro recommends keeping a note of your network name (SSID) and password to avoid repeated prompts.
Step-by-step setup sequence for best results
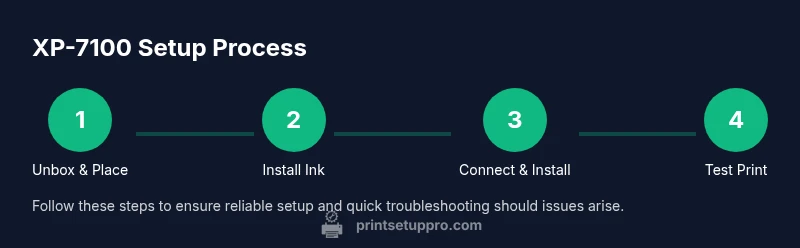
The setup process combines hardware and software actions. Start by unboxing, placing the printer on a stable surface, and ensuring power is accessible. Next, install the ink cartridges, then power on and follow the on‑screen prompts to select language and region. Connect to your network or a USB connection, then download and install the latest drivers from Epson's site. Finally, run a nozzle check and alignment to verify print quality before printing a real page. See the dedicated STEP-BY-STEP block for exact actions and timings.
Maintenance routines to extend lifespan
Regular maintenance keeps print quality high and prevents clogs. Clean the exterior surfaces periodically with a soft microfiber cloth, and perform a nozzle check and printhead cleaning only when you notice lines or gaps in color. Replace cartridges only when needed to avoid leaks, and store the printer in a dust‑free area with stable ambient conditions. Print Setup Pro suggests documenting your maintenance intervals to build a dependable routine.
Troubleshooting common print quality issues
If colors appear washed out, check ink cartridge levels and ensure the correct paper type is selected in your print settings. If you see horizontal lines or banding, run a nozzle check and cleaning cycle, and consider performing a printer alignment. Paper jams are usually caused by using damp or warped media or feeding incorrectly; re‑load media, toggle the printer's bypass tray if available, and clear the path. Always print a test page after any maintenance to confirm results.
Ink cartridges: choices and cost considerations
You can use genuine Epson cartridges or compatible third‑party options. Genuine cartridges typically deliver the most reliable color accuracy and printhead health, but compatible cartridges can lower ongoing costs if sourced from reputable vendors. Always verify compatibility with XP-7100 before purchasing. Print Setup Pro recommends starting with a full set of cartridges on first use to establish a baseline for future prints.
Color management and print settings for best results
Understand color profiles and media settings to achieve consistent results. For photos, select the appropriate paper type and set print quality to high. When printing documents, draft or standard mode can reduce ink usage. If you use color-critical work, consider using calibrated monitors and ICC profiles for your media. Print Setup Pro emphasizes testing with a few media samples to dial in optimal settings before committing to large batches.
Small-business workflow tips and optimization
For small offices, create consistent print policies: standardize paper size, set default print settings, and enable auto‑duplex if supported to save paper. Keep drivers updated, schedule regular maintenance, and archive common print templates for speed. The XP-7100 can support light office workloads when maintained properly, helping you stay productive without frequent service calls.
Tools & Materials
- Power supply + surge-protected outlet(Stable mains according to regional voltage (e.g., 100–240V))
- Ink cartridges compatible with XP-7100(Install new cartridges before first use; black, cyan, magenta, yellow, and photo black if applicable)
- USB cable (optional)(Use for direct PC connection if not using wireless)
- Wi‑Fi network and password(Needed for wireless setup and updates)
- Soft lint-free cloth(For exterior cleaning and safe handling of printhead contacts)
- Isopropyl alcohol (70%+)(Can be used to clean stubborn smudges on exterior surfaces)
- Computer or mobile device with internet(To download drivers and firmware updates)
- Printer paper (various sizes as supported)(For test prints and calibration; use appropriate media)
Steps
Estimated time: 45-60 minutes
- 1
Unbox and position
Remove all packaging materials and place the XP-7100 on a stable surface near a power outlet. Check for any shipping damage and verify that accessories are present (power cord, manuals, ink cartridges). Keep the printer level and away from direct sunlight or heat sources.
Tip: Take photos of the box contents before discarding packaging to confirm you didn’t miss any parts. - 2
Install ink cartridges
Open the ink cartridge cover, remove the protective caps, and insert cartridges into their color‑matched slots. Do not force cartridges—if they don’t click in place, reseat them. Close the cover when complete.
Tip: Avoid touching the copper contacts on cartridges to prevent poor electrical contact. - 3
Power on and configure language
Plug in the printer and press the power button. Use the on-screen prompts to select your language, region, and date/time. Allow the printer to initialize before proceeding.
Tip: If the display is dim, adjust the brightness in the printer’s settings menu before continuing. - 4
Connect to network or USB
Choose Wireless Setup and select your Wi‑Fi network, then enter the password. Alternatively, connect via USB to your computer if you’re not using a network. Confirm the connection with a test page from the printer.
Tip: For wireless, ensure your router supports 2.4 GHz; many XP-7100s don’t require 5 GHz to operate reliably. - 5
Install drivers/software
Download the latest drivers from Epson’s support site and run the installer. Follow the on-screen steps to add the XP-7100 to your devices and enable automatic updates if available.
Tip: Disable any VPNs during installation to prevent driver discovery issues. - 6
Run nozzle check and alignment
From the printer’s control panel or software utility, start a nozzle check. If lines appear, run a cleaning cycle followed by an alignment test. Print a test page to verify print quality.
Tip: If problems persist after cleaning, perform a deeper head alignment using alignment patterns produced by the printer.
People Also Ask
How do I connect the XP-7100 to Wi-Fi?
Open the printer control panel, navigate to Network or Wireless Setup, and select your Wi‑Fi network. Enter the password when prompted and confirm the connection. You can also use the Epson software on your computer to complete the setup.
To connect, use the printer's menu to choose Wireless Setup, select your network, enter the password, and confirm. You can finish with the computer software if you prefer.
Why won’t the XP-7100 print or shows offline?
First, verify the printer is powered on and connected to the same network as your computer. Check the status in your operating system's printer settings and re‑select the XP-7100 as the default printer if necessary. If using USB, ensure the cable is securely connected.
Make sure the printer is on, connected to the right network or USB, and set as the default printer. Reconnect the cable if needed.
How can I check ink levels on the XP-7100?
Use the printer’s control panel or the Epson software to view current cartridge levels. If a cartridge shows low or empty, replace it and run a nozzle check to ensure print quality remains stable.
Open the printer software or panel to view ink levels, then replace as needed and verify with a nozzle check.
Is it safe to use third-party ink cartridges with the XP-7100?
Third‑party cartridges can work, but they may affect print quality or void warranties. If you choose to use them, buy from reputable suppliers and monitor print quality closely after installation.
Third‑party inks can be risky for reliability and warranties. Use trusted suppliers and watch print quality after installation.
How do I update the XP-7100 firmware?
Visit Epson’s official support site, locate the XP-7100, and download the latest firmware. Install it using the on‑screen prompts; ensure the printer remains powered during the update.
Download the latest firmware from Epson and install it following the prompts. Keep the printer powered during the update.
What media settings yield the best photo prints?
Use high‑quality photo paper supported by the XP‑7100 and select the appropriate photo print mode in your software. Calibrate color for your chosen media and avoid standard document settings for photo printing.
Choose photo paper, select photo print mode, and calibrate color for consistent results.
Watch Video
Quick Summary
- Verify network setup before driver installation.
- Prefer genuine ink cartridges for consistent results.
- Always run nozzle checks and alignments after maintenance.
- Follow Print Setup Pro guidance for reliable XP-7100 performance.