How to on printer epson: A complete setup and troubleshooting guide
Learn how to set up and troubleshoot an Epson printer, from driver installation to wireless printing and routine maintenance. This comprehensive guide helps home office users, students, and DIY enthusiasts achieve reliable prints with minimal hassle.

According to Print Setup Pro, this how-to on printer epson takes you from unboxing to a working print in eight clear steps. Start by powering the device, installing the latest Epson driver, and linking to the same network as your computer or mobile device. Then print a test page and adjust basic settings to ensure reliable results.
How to on printer epson: Quick-start overview
This guide walks you through the essential steps to get an Epson printer up and running, from unboxing to making the first print. It covers driver installation, network setup (USB, Ethernet, or Wi-Fi), printer addition to devices, and basic print settings. Throughout, you’ll see practical tips to avoid common stumbling blocks and keep your printer healthy between uses.
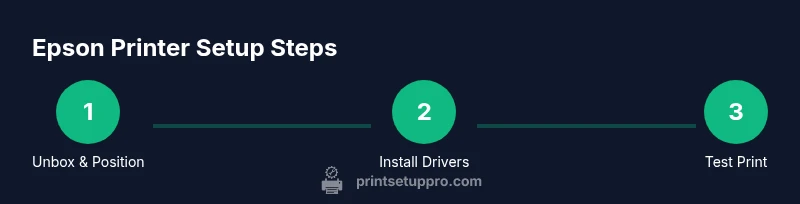
Powering up and unboxing
Begin by removing the printer from its packaging, taking care to discard protective materials safely. Place the printer on a sturdy, level surface near a power outlet. Connect the power cable and switch the unit on. If your model ships with starter cartridges, install them according to the manual. This initial preparation reduces the risk of misfeeds or calibration errors during setup.
Installing the official Epson driver
Go to Epson’s official support page and locate your printer model. Download the correct driver package for your operating system, whether Windows, macOS, or Linux. Run the installer and follow prompts to connect the printer when asked. Installing the official driver ensures compatibility with features like maintenance utilities and scanned documents.
Pro tip: keep the installer on your computer in a known location so you can re-run it if problems arise.
Network setup: USB, Ethernet, or Wi-Fi
Decide how you want to connect the printer: USB for direct computer printing, Ethernet for wired home/office networks, or Wi‑Fi for wireless access from multiple devices. For Wi‑Fi, run the setup wizard on the printer to connect to your router’s SSID and enter your network password. If you’re using Ethernet, plug the cable into a router port and the printer.
Adding the printer to your computer or mobile device
On Windows or macOS, use the system printer settings to add the Epson device, selecting the proper driver from the list. For mobile devices, install Epson iPrint or use AirPrint (iOS) or Mopria (Android) where available. Confirm the printer appears in your print dialog and perform a test print from your device.
Printing a test page and adjusting defaults
Print a test page to verify alignment, color balance, and text clarity. If the nozzle check shows gaps or misalignment, run the printer’s maintenance tools and reprint. Adjust basic defaults (quality, paper size, and color management) to suit your typical print tasks. A well-tuned default reduces the need for post-edit edits.
Firmware updates and maintenance checks
Check for firmware updates via Epson’s software utility or the printer’s embedded menu. Keeping firmware current improves compatibility, performance, and stability. Periodically inspect ink or toner levels and clean the printer’s exterior to prevent dust ingress. Replace consumables only when necessary and in accordance with the manufacturer’s guidelines.
Mobile printing and cloud options
Enable mobile printing by pairing your phone or tablet with the Epson printer. Use Epson iPrint for direct device-to-printer tasks, or rely on native printing features like AirPrint (iOS) and Mopria (Android) when available. For cloud printing workflows, check Epson’s app ecosystem and keep security settings up to date.
Common issues and their fixes
If your printer won’t print or shows an offline status, recheck network connections, restart devices, and re-add the printer. Paper jams, failed print jobs, or color mismatches often relate to driver issues or incorrect paper settings. Running a nozzle check or print head cleaning typically resolves most color-related problems.
Safety tips and best practices
Always unplug the printer before performing internal cleaning or cartridge replacement. Use only genuine Epson consumables to avoid damage or warranty issues. Keep cables tidy and avoid placing the printer near heat sources or in high-moisture environments.
Authority sources and further reading
For official guidance, refer to Epson’s support pages and user manuals. Supplementary safety and best-practice context can be found in reputable industry resources. These sources provide deeper dives into printer maintenance, driver compatibility, and troubleshooting strategies.
Tools & Materials
- Epson printer (model-specific)(Have the exact model name handy for driver downloads.)
- Power cable(Use the original cable supplied with the printer.)
- USB cable (optional)(Only if you’ll set up via USB rather than network.)
- Ethernet cable (optional)(Use for a wired network connection if available.)
- Router or Wi-Fi network(Ensure 2.4 GHz/5 GHz support and a stable signal.)
- Computer or mobile device(Used to download drivers and print tests.)
- Official Epson driver/software(Download from Epson’s official site.)
- A4 or Letter paper(For test prints and calibration.)
Steps
Estimated time: 60-90 minutes
- 1
Unbox and prepare the printer
Remove the printer from the box, discard packaging, and place it on a stable surface near a power outlet. Remove any protective tapes and ensure the printer will fit your workspace. Plug in and turn on the power, then let the printer initialize.
Tip: Verify all included manuals are accessible; they contain model-specific steps. - 2
Load paper and check trays
Open the input tray, align the paper guides, and load a stack of clean, unfolded sheets. Confirm paper size matches your intended print jobs (A4/Letter). Close the tray securely.
Tip: Avoid overloading; allow the stack to settle to prevent feeding issues. - 3
Download and install the official driver
Visit Epson’s support site, locate your model, choose the correct OS, and download the driver package. Run the installer and follow prompts to complete the setup. Connect the printer to your device when prompted.
Tip: Prefer the full driver package over basic utilities for optimum features. - 4
Choose a connection method
Decide between USB, Ethernet, or Wi‑Fi. If using Wi‑Fi, run the on-printer setup wizard to join your network. For USB or Ethernet, connect the cable now and wait for the driver to recognize the printer.
Tip: Wired connections tend to be more stable for large print jobs. - 5
Add the printer to devices
On your computer or mobile device, access the printer settings and add the Epson device from the available list. Use the matching driver to ensure full feature support.
Tip: If you see multiple Epson entries, pick the one that matches your connection type. - 6
Print a test page and adjust settings
From the print dialog, select a test page. Check alignment, color balance, and quality. Tweak default print settings (quality, paper type) to match your typical tasks.
Tip: Save preferred presets for common jobs. - 7
Update firmware and run maintenance
Check for firmware updates via the driver utility or printer menu. Run nozzle check and print head alignment if colors appear off.
Tip: Perform maintenance after a few hundred pages or monthly, if you print often. - 8
Enable mobile printing and cloud workflows
Install Epson iPrint or enable AirPrint/Mopria on mobile devices. Test printing from a smartphone and confirm security settings meet your needs.
Tip: Enable security features to protect sensitive documents during wireless prints.
People Also Ask
Why is my Epson printer showing offline?
Offline status usually indicates a connection problem or driver issue. Recheck network or USB connections, restart devices, and re-add the printer.
If the printer shows offline, check connections, restart the devices, and re-add the printer in your system settings.
How do I update Epson printer firmware?
Go to Epson’s support site, download the latest firmware for your model, and follow the on-screen instructions to install it.
Update firmware from Epson support, following the prompts to install the latest version.
Can I print from mobile devices, and how?
Yes. Use Epson iPrint or built-in printing like AirPrint for iOS and Mopria for Android to print wirelessly.
Yes, you can print from mobile devices using Epson apps or built-in printing features.
What maintenance helps prevent paper jams?
Regular nozzle checks and gentle print head cleaning prevent clogs. Use the printer’s maintenance tools and ensure paper is properly loaded.
Regular nozzle checks and cleaning prevent clogs and jams.
What should I do if driver won’t install?
Ensure compatibility, run as administrator, temporarily disable security software if needed, and download from Epson’s official site.
If the driver won’t install, check compatibility and security settings, then try again with the official download.
Watch Video
Quick Summary
- Install the official Epson driver first.
- Connect the printer to the same network as your devices.
- Print a test page to confirm setup.
- Keep firmware updated for reliability.