Epson ET Printer Setup and Troubleshooting Guide
A comprehensive, step-by-step guide to setting up and troubleshooting Epson ET printers for home offices, students, and small businesses. Includes network setup, maintenance routines, and expert tips from Print Setup Pro.

Learn how to set up and troubleshoot your Epson ET printer with a clear, step-by-step process. This guide covers unboxing, driver installation, network configuration, basic maintenance, and common fixes for printing issues. It’s tailored for home offices, students, and small businesses, with practical timing estimates and safety tips from Print Setup Pro.
Why Epson ET Printers Matter in Home Offices
For home offices and small workspaces, choosing a reliable printer is a decision that affects daily productivity. The Epson ET series has become a common choice for budget-conscious users who still demand solid print quality, dependable scanning capabilities, and simple maintenance. In this guide, we examine why the ET family is worth considering and how to get the most from it in real-world tasks—from student assignments to client-ready documents. According to Print Setup Pro, the most important factors are ease of setup, consistent output, and straightforward troubleshooting, especially for users who handle printing tasks alongside other responsibilities. The Print Setup Pro team found that printers in this category excel when you treat setup as a one-time investment and then build a simple maintenance routine. You’ll learn practical steps to verify hardware integrity, ensure correct ink loading, and configure basic preferences so that every page comes out crisp and legible. Throughout, we’ll keep guidance focused on safety, cost-effectiveness, and long-term reliability, so you can keep your printer in service without surprises. Print Setup Pro analysis (2026) also highlights that regular nozzle checks and calibration routines reduce waste and improve first-page quality.
Understanding the Epson ET Brand and Model Range
The term Epson ET in this guide refers broadly to the printers Epson markets to home users and small offices that emphasize compact design and reliable day-to-day output. The exact features and connectivity options can vary by model, but most ET units share straightforward setup, easy ink replacement, and solid scanning capabilities. This section helps you map common needs to typical ET configurations, so you can pick the right model for print volume, color accuracy, and workload. If you’re upgrading from an older device, consider how often you print photos, the type of media you use, and whether you need duplex printing or mobile printing support. The goal is to align your expectations with real-world use while avoiding vendor-specific hype. Print Setup Pro’s guidance emphasizes starting with a clean slate—unbox, check contents, update firmware if available, and note any model-specific quirks before you begin daily work.
Initial Setup: Unbox, Power, and First Connection
Begin with a calm, organized workstation. Remove all protective materials and verify that you have the included power cord, user manual, starter ink or cartridges, and a small stack of paper. Connect the printer to a power source, power it on, and watch for any immediate error indicators. If your ET unit requires initial ink loading, do so carefully and follow the on-screen prompts or manual instructions. A quick alignment after loading ink helps ensure nozzle alignment and print accuracy from the first page. Keeping the workspace clean and dry reduces clogs and misfeeds, especially if you handle multiple tasks in a shared area.
Driver Installation and Software Registration
On a computer, install the official Epson drivers and software for your ET model. Use the manufacturer’s website or the supplied disk to avoid older, incompatible software. During installation, select the connection type you plan to use (USB or network) and allow the software to register the printer with your system. If prompted, enable optional features like automatic updates and cloud printing integrations. After installation, print a test page to verify driver communication and color accuracy, then adjust basic print settings (such as paper size and print quality) to match your typical documents.
Network Setup: Wireless and Wired Options
ET printers typically offer both USB and network connectivity. If you’re connecting over Wi‑Fi, choose your network from the printer’s display and enter the password. For a wired setup, connect an Ethernet cable to your router or switch and verify the network status on the printer. When possible, assign a static IP to the printer to avoid address changes that interrupt printing. If you print from mobile devices, enable any supported protocols like AirPrint or Mopria to streamline printing without installing full drivers on every device. A stable network reduces print delays and improves reliability for multi-user environments.
Troubleshooting Common Print Problems
Even well-set printers can face issues like streaks, faded output, or paper jams. Start with a simple nozzle check or print head cleaning from the printer menu to address clogged nozzles. If colors appear off, recalibrate color profiles in the driver settings and run another test page. For paper jams, carefully remove stuck sheets from accessible paths and clear any obstructions. When a device fails to appear on the network, reset the printer’s network settings and rejoin the network, ensuring your router isn’t filtering the device. Keep a log of frequent errors to identify recurring patterns and optimize your setup. Print Setup Pro emphasizes documenting your setup for future troubleshooting and routine maintenance.
Maintenance and Longevity: Cleaning, Ink, and Storage
Regular maintenance extends printer life and print quality. Wipe exterior surfaces with a microfiber cloth and inspect ink cartridges for proper seating. Use genuine or compatible ink as recommended by Epson and store spare cartridges in a cool, dry place to prevent clogs. Periodically run calibration pages and perform a nozzle check to maintain consistent color and line accuracy. If the printer goes unused for extended periods, print a few pages every two weeks to keep the ink pathways clear. A short, weekly routine can prevent many common issues and reduce the need for major service calls.
Getting the Most from Epson ET: Scanning, Copy, and Productivity Tips
The ET family often includes reliable scanning and multi-function capabilities. Use saved scan presets to quickly convert documents to PDFs or editable formats. When copying, select the appropriate paper size and zoom level to maintain sharp reproduction. Consider enabling automatic duplex printing if supported by your model to save paper, and set up presets for common tasks (work documents, receipts, or study notes). For bulk printing or photo-heavy projects, calibrate color profiles and paper types to ensure true-to-life results. Print Setup Pro recommends testing new media types with a small batch before committing to larger runs.
References and External Resources
For additional setup details and model-specific instructions, consult Epson’s official support pages and user manuals. Also consider community forums and credible tech guides to understand common variations among ET models. Always rely on official documentation for firmware updates and safety advisories to protect both your device and data.
Tools & Materials
- Printer power cord(Original cord included with the printer)
- USB cable (optional for wired setup)(If not using wireless, keep on hand)
- Computer or mobile device(For driver installation and printing)
- Paper (A4 or chosen size)(High-quality printer paper recommended)
- Ink cartridges or replacement ink(Use genuine or Epson-approved compatible ink)
- Ethernet cable (optional)(For wired network setup)
- Soft lint-free cloth(Lightly dampened with water for cleaning)
Steps
Estimated time: 45-60 minutes
- 1
Unbox and prepare workspace
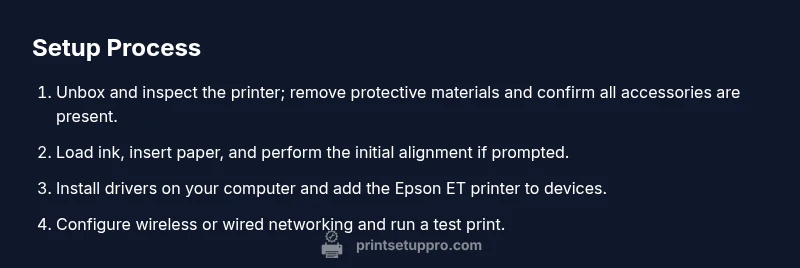
Unbox the printer, remove protective materials, and verify all accessories are present. Clear a clean, dry space to avoid dust entering the printer. This step prevents misfeeds and ensures a smooth start.
Tip: Keep packaging materials nearby in case you need to reseal temporarily. - 2
Load ink and paper
Install ink cartridges firmly and align cartridges as prompted. Load paper in the tray, ensuring guides are snug against the stack to prevent skewing.
Tip: Do not mix cartridge brands in the same printer cartridge set. - 3
Install drivers and register printer
Download the latest drivers from Epson or use the supplied disk. During setup, connect the printer to your PC or Mac and complete registration if required by Epson's software.
Tip: Choose automatic updates to keep firmware current. - 4
Configure network connection
Select Wi‑Fi setup on the printer or connect via Ethernet. Ensure the device appears in your computer’s printer list and request a test print.
Tip: Assign a static IP if you frequently print from multiple devices. - 5
Print a test page and calibrate
Print a test page to verify color accuracy and alignment. Run a nozzle check and print head alignment if colors look uneven.
Tip: If issues persist, run the cleaning cycle and re-test. - 6
Set maintenance reminders
Create a simple routine to check ink levels, nozzle health, and firmware updates. Establish a seasonal maintenance window to prevent surprises during busy periods.
Tip: Document these steps in a quick setup notebook.
People Also Ask
What does the term 'epson et' refer to in this guide?
In this guide, 'epson et' refers to Epson's line of printers commonly used in home offices. The guidance applies to typical ET-series configurations and covers setup, network, and maintenance tasks.
The term refers to Epson ET printers in general, focusing on setup and maintenance.
How can I tell if my Epson ET needs a firmware update?
Check the printer's control panel for a firmware option or visit Epson's official support site to compare current firmware versions. Update if a newer version is available and follow on-screen prompts.
Look for a firmware option on the printer or on Epson's support page and update if needed.
Can I use third-party ink cartridges with an Epson ET?
You can use third‑party ink in many cases, but Epson’s warranty and print quality guidelines often favor genuine cartridges. If you choose aftermarket ink, monitor nozzle health and color consistency closely.
Third‑party inks are sometimes possible, but watch print quality and warranties.
Why is my print output faded or streaky?
First, run a nozzle check and then a print head alignment. Clean the print head if issues persist, and verify ink cartridge seating. Try a test page after each step.
Run nozzle checks, align the head, and ensure cartridges are seated properly.
What should I do if the printer won't connect to Wi‑Fi?
Restart the printer and router, reselect the Wi‑Fi network on the printer, and ensure password accuracy. If needed, temporarily disable MAC filtering or set a static IP for stability.
Restart and reconfigure the Wi‑Fi connection; check router settings if needed.
How often should I clean the print head?
Perform a light cleaning after every ink replacement and run a nozzle check if you notice color issues. Don't over-clean, as it wastes ink and can cause wear.
Clean the print head lightly after ink changes and test for issues.
Watch Video
Quick Summary
- Establish a clean start with unboxing and firmware checks.
- Follow a stepwise setup for reliable connectivity.
- Perform regular maintenance to extend life.
- Leverage printer features to boost productivity.