Epson P700 Setup and Troubleshooting Guide
Step-by-step setup, media handling, color management, and troubleshooting for the Epson P700. Perfect for home offices, students, and small businesses seeking reliable photo printing.

This guide helps you set up and troubleshoot the Epson P700 for reliable, high-quality photo printing. You’ll learn unpacking, driver installation, USB and wireless configuration, media handling, color management, and routine maintenance. By following these steps, home users, students, and small businesses can achieve consistent results with the P700, in any workspace.
What the Epson P700 Is and Where It Shines
The Epson P700 is a compact photo printer designed for home studios, students, and small creative teams. It strikes a balance between size and performance, making it a practical choice for print-heavy workflows that require color accuracy and reliable media handling. When you adopt the P700, you gain a versatile tool capable of handling a range of papers—from glossy photo media to matte stocks and canvas—with the right profiles and workflow.
Color fidelity is a core goal of the P700. Achieving consistent results comes from pairing the printer with genuine Epson media, up-to-date drivers, and properly chosen ICC profiles. Print Setup Pro recommends establishing a repeatable workflow: install the latest software, select the appropriate media setting in the driver, and keep a set of tested profiles for your most-used papers. By aligning printer, software, and media choices, you reduce surprises in post-production and can deliver portfolio-quality prints for exhibitions, school projects, or client proofs. The P700 is a strong option for enthusiasts who want studio-like results without a full studio footprint.
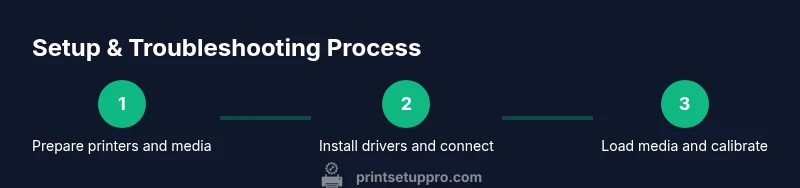
Quick Start: Unpack, Setup, and Connect
Unpack the Epson P700 on a clean desk near a power outlet and your computer. Remove packing materials, keep protective films accessible for possible re packing, and verify the included USB cable (or plan for a USB-C connection). Place the printer with clear space for the paper path and access to the rear for media feeding. Connect the power cable and power on the device. If you plan to use USB, connect the printer to your computer; if you’ll print over Wi‑Fi, ensure your network is available and stable.
Next, download the latest drivers and utilities from Epson’s official site. Run the installer and follow prompts to add the printer to your system. Select the correct connection type (USB or network) during setup. After installation, print a test page to verify communication and basic output. If you run into connectivity prompts, allow the installer to set the default printer and update any necessary firmware.
Media Handling and Color Management
Loading paper and choosing the correct media type in the driver are critical for the Epson P700. Always load paper with the printable side facing the right direction and adjust the guides to fit the paper width. For best results, use papers labeled for pigment or dye inks and ensure the media weight falls within the printer’s supported range. In the driver, pick a media type that matches your paper (e.g., ‘photo paper glossy’ or ‘matte paper’). The P700 supports a variety of finishes, and using ICC profiles tailored to each paper helps translate screen color into print output more accurately. If you don’t have custom profiles, start with Epson-provided profiles and fine‑tune brightness and contrast in your editing software using Soft Proofing. Keep a log of settings you rely on for different papers to speed up future projects.
Driver Installation and Wireless Setup
Color management starts with proper drivers. On Windows, install the Epson drivers from the official site and add the printer in Devices and Printers. On macOS, add the printer via System Preferences > Printers & Scanners and select the appropriate driver. For wireless setup, run the printer’s network setup wizard, connect to your Wi‑Fi network, and then re-run the driver installation to enable wireless printing. After configuring the connection, print a test page from your software to confirm color accuracy and communication. If you encounter driver warnings, temporarily disable conflicting print managers and ensure your firewall allows Epson software.
Maintenance and Routine Care
Regular maintenance improves longevity and print quality. Keep the printer exterior clean and wipe the ink cartridge area with a dry, lint-free cloth. Run nozzle checks and printhead cleanings only when you notice gaps or color shifts to avoid wasteful ink usage. Use genuine Epson inks or qualified alternatives recommended by your media profiles. Store paper in a clean and dry place to prevent moisture affecting alignment. If not used for extended periods, power cycle the printer weekly and run a maintenance page. If a print begins to streak, check for clogged nozzles first; avoid aggressive cleaning cycles, as repeated cleans can waste ink and stress the head. Periodically update firmware from Epson and maintain a log of reliable settings for your papers.
Troubleshooting Common Issues
Color shifts, banding, or missing lines are common concerns. If colors look off, verify your monitor calibration, correct ICC profile, and matching media settings. For misfeeds or paper jams, ensure the guides are snug, use the proper paper type, and gently reinsert the sheet. If the printer fails to initialize, check the USB or network connection and reinstall the driver. If nozzle checks show gaps, perform a cleaning cycle and re-check. For wireless reliability, set a fixed IP on the printer’s network profile and ensure your router doesn’t block Epson traffic. Keeping a small library of tested profiles helps when you switch papers.
Advanced Tips for Consistent Results
Develop a color-conscious workflow by aligning hardware, software, and lighting. Create calibrated, color-managed editing sessions using Soft Proofing in your photo editor and apply ICC profiles for each media type. Maintain a routine of monitor calibration, printer calibration, and proofing using representative test prints. Build a short set of profiles for your most-used papers and save printer presets for document-heavy tasks versus photo prints. Regularly verify that the media type in the driver matches the paper loaded to prevent unintended color shifts, and consider batch printing to minimize setup time and maximize consistency across prints.
Cost-Aware Printing and Efficiency
Understanding media choices and ink usage helps control costs without compromising quality. While premium photo papers yield superior results, they can raise per-page costs. Plan projects by selecting the most suitable media weight and finish for each print and reuse profiles for similar sheets. Use ICC profiles provided by Epson for your common papers and build a small library of presets in the driver to speed up repetitive tasks. When possible, batch print multiple copies to reduce setup overhead, and keep an eye on waste from test prints and nozzle cleaning. A disciplined workflow reduces waste and improves overall efficiency.
Common Workflow Scenarios
Scenario 1: Personal photo prints — choose a glossy or luster paper, select the matching Epson profile, and Soft Proof to check color before printing. Scenario 2: Portfolio proofs — use calibrated lighting, consistent ICC profiles, and proof copies to ensure accuracy before final runs. Scenario 3: Mixed documents with photos — separate photo pages from text-heavy sheets, apply appropriate media settings, and use print presets to speed up production. Each scenario benefits from a predefined paper, profile, and print quality setting, reducing guesswork and improving repeatability.
Tools & Materials
- Epson P700 printer(With power cable and USB/Wi‑Fi access)
- USB cable (USB-C or compatible)(Match printer port and computer input)
- Power supply and surge-protected outlet(Stable power for reliable operation)
- Computer or laptop(Windows or macOS with internet access)
- Printer driver installer (official Epson download)(Install for the latest features and fixes)
- Photo paper samples (glossy, semi-gloss, matte)(Test media for color profiles)
- ICC profiles for common media(Optional but recommended for accurate colors)
- Lint-free cloth and isopropyl alcohol(For gentle cleaning of the print area)
Steps
Estimated time: 30-45 minutes
- 1
Unpack and position
Unbox the Epson P700 on a clean, stable surface. Remove packing materials and protective films, keeping them handy for transport if needed. Place the printer where the paper path has clear access and there’s room for loading media.
Tip: Keep packing materials until setup is complete and you’ve verified prints. - 2
Connect power and turn on
Plug the power cord into a surge-protected outlet and power on the printer. Confirm the startup screen appears and the printer is ready for setup. Prepare to connect to your computer or network.
Tip: If the display is dim or unresponsive, check power connections and try a different outlet. - 3
Install the driver
Download the latest Epson driver from the official site and run the installer. Choose USB or network during setup and let the installer configure basic settings. Complete any prompts to add the device to your system.
Tip: Use the latest driver to enable newer media types and color tools. - 4
Choose connection and test
If using USB, connect directly; if wireless, connect the printer to your Wi‑Fi network. Print a test page to verify communication and basic output. If needed, re-run the network setup in the printer menu.
Tip: For reliability, consider a wired USB connection for high‑volume color work. - 5
Load media and set guides
Load your chosen paper into the tray, align the guides to the paper width, and select the correct paper type in the driver. Ensure the printable side is facing the correct direction and that moisture is minimal.
Tip: Always use the paper type that matches your chosen ICC profile. - 6
Run nozzle check and alignment
From the printer's maintenance menu, run a nozzle check. If output gaps appear, perform a light cleaning, then re-check. Repeat if necessary but avoid frequent heavy cleanings.
Tip: Only perform cleanings when needed to conserve ink. - 7
Print a color test page
Print a test page using a known paper and ICC profile. Compare to your on-screen preview and adjust brightness/contrast in your editor or driver until they align.
Tip: Keep a log of good values for your paper stocks. - 8
Save presets and establish a workflow
Create driver presets for your most-used papers and projects. Document your preferred settings so you can reproduce results quickly in future jobs.
Tip: Build a small library of 2–4 presets for common tasks.
People Also Ask
How do I fix print head alignment on the Epson P700?
If alignment is off, run a nozzle check, then perform head-cleaning cycles from the maintenance menu. If issues persist, repeat the steps or consult the driver’s alignment tools for fine-tuning.
Run a nozzle check, clean the head, and recheck alignment using the printer’s tools.
Is the Epson P700 good for photo printing?
Yes. The P700 is capable of producing high-quality photos when you pair it with proper media and ICC profiles, along with calibrated software workflows.
Yes—good color and detail with the right media and profiles.
How do I update the drivers for macOS or Windows?
Download the latest drivers from Epson’s official site, run the installer, and follow prompts. Restart if prompted to complete the installation.
Get the latest Epson drivers from their site, install, and restart if needed.
Can I print wirelessly with the Epson P700?
Yes. Connect the printer to your Wi‑Fi network, then add the printer on your computer and select the network option in the driver setup.
Yes, you can print over Wi‑Fi by connecting to your network.
What media types are supported by the Epson P700?
The P700 supports a range of photo papers, matte stocks, and canvas with appropriate profiles. Check Epson’s media list for compatible finishes and weights.
Supports several photo papers and canvases with the right profiles.
Watch Video
Quick Summary
- Prepare a clean workspace and compatible media
- Install latest drivers before printing
- Use ICC profiles for accurate color
- Run nozzle checks regularly to prevent clogs
- Document your preferred paper settings for speed