Epson Receipt Printer Setup and Troubleshooting Guide
Comprehensive step-by-step guide to set up and troubleshoot an Epson receipt printer for home offices and small businesses. Learn driver installation, connectivity options, common issues, and maintenance practices to keep your POS running smoothly.

Learn how to set up and troubleshoot an Epson receipt printer for reliable receipts in a home office or small business. This guide covers driver installation, USB, network, and Wi‑Fi connections, plus common printing issues and essential maintenance steps to keep your POS running smoothly. It also covers protecting data, power reliability, and minimizing downtime.
Why Epson receipt printers are a smart choice for small businesses
According to Print Setup Pro, Epson receipt printers strike a balance of reliability and affordability that suits home offices and retailers. They offer fast print speeds, robust driver support across Windows and macOS, and a wide range of models optimized for low maintenance. When choosing an Epson receipt printer, consider printer size, paper width, and supported interfaces to match your POS workflow. Epson printers are known for durable thermal heads, long-roll life, and quiet operation, which helps keep customer sit-downs or service counters efficient. For first-time buyers, it’s worth comparing models with auto-cutters, drop-in loading, and built-in USB or network connectivity to ensure a smooth integration with your POS software.
Key takeaway: pick a model whose interfaces align with your POS system and cash-tray design to minimize setup friction.
Key features to look for in an Epson receipt printer
Epson offers both thermal and impact-like capabilities tailored for receipt printing. When evaluating features, look for 80mm roll compatibility, fast print speeds (measured in lines per second), and an auto-cutter for clean receipts. Compatibility with common POS software, drivers for Windows and macOS, and easy paper loading reduce downtime. Wireless options (Wi‑Fi or Bluetooth) can simplify placement away from PCs, but wired connections (USB/Ethernet) typically offer steadier performance in busy environments. Consider supporting peripherals like USB hubs, power-saving modes, and compatibility with third-party receipt stock. Real-world workflows benefit from reliable auto-cutter performance and straightforward status indicators.
Tip: If you frequently cancel or reprint, choose a model with a reliable auto-cutter and a durable mechanism that tolerates high-use days.
Picking the right model for your setup
Start by identifying how your POS will connect: USB for direct PC printing, Ethernet for a sharedPOS station, or Wi‑Fi for a distributed setup. Network-capable models simplify multi-station environments, but they require proper router configuration and security considerations. Paper width matters: 80mm is standard for most receipts, but some shops use 58mm. Check driver support for your operating system and POS software, and ensure the printer can handle the required language and character set. If you operate in a retail environment with long hours, consider fatigue-resistant components and a compact footprint to fit in limited counter space. Finally, confirm warranty terms and access to local service centers.
Practical tip: write down the exact model number and firmware version before contacting support; this speeds up troubleshooting.
Preparing your workspace and gathering materials
Clear the desk, ensuring enough room for a full receipt roll and a stable power outlet. Have spare rolls of receipt paper and a backup roll of label stock if you plan to test printing different formats. Gather the essential cables: power, USB or Ethernet, and a possible Wi‑Fi setup device. Keep your computer, POS tablet, or mobile device ready for driver installation and printer registration. If you’re setting up a networked printer, note your network name (SSID) and security key to avoid repeated prompts. Finally, ensure the printer’s environment is dry and dust-free to extend print head life.
Organize a small testing area with printer, paper, and a host device to streamline the initial setup.
Step-by-step setup: get connected and installed
This section walks through the practical actions to bring an Epson receipt printer online. Start by unboxing, loading paper, and connecting the power. Install the printer driver or software from Epson’s official site, select the correct language and region, and then choose the USB or network connection. If using a network connection, assign a fixed IP address to simplify future maintenance. Once the device is detected, print a test page to confirm alignment and ink/thermal head health. Finally, document the printer’s settings for future reference and firmware updates.
Note: Follow on-screen prompts and avoid mixing USB and network connections unless your POS software explicitly supports both.
Connecting drivers and configuring receipt formats
Driver installation is where most setup headaches originate. Use the manufacturer’s installer or your POS software’s built-in printer wizard. After installation, configure the default paper width, character set, and the printer’s language settings if your receipts need currency symbols or logos. Some POS systems require you to map a specific printer port or network path. If you plan to print logos or barcodes, ensure the driver supports these features and that you’ve uploaded the correct image file in a supported format. Save your configuration as a profile for quick recovery after firmware updates.
Pro tip: test with real-world receipts, including line items, taxes, and total formatting, to ensure alignment and readability.
Testing and common issues at setup
A successful print test confirms alignment, font size, and cut accuracy. If the test print looks skewed, re-check margin settings in the printer driver and the POS software. When receipts fail to print, verify power, cable connections, and whether the printer is selected as the active device in your POS app. Common issues include driver mismatches, incorrect paper width, and outdated firmware. Always run a firmware check from Epson’s support portal and apply updates if available. If you see a blinking error light, refer to the user manual for diagnostic codes and recommended actions. Keep a log of issues to share with support when needed.
Warning: never touch the thermal element with bare fingers; oils can reduce print quality.
Wireless and network considerations for Epson receipt printers
Wireless setups offer flexible placement but can introduce interference and signal stability concerns. If you experience sporadic printing or dropped connections, ensure the printer is on the same network as the POS device and that the router’s firmware is up to date. Use a fixed IP for the printer to simplify reboots and troubleshooting. Encryption and network segmentation help protect payment data; consult IT guidance or your POS provider for best practices. For reliability, consider pairing a wired fallback with Ethernet when possible. Regularly check signal strength and channel interference in busy environments.
Security note: disable unnecessary remote access and enable WPA3 where available.
Maintenance, cleaning, and long-term care
Regular maintenance keeps the printer running smoothly. Use a soft, lint-free cloth to clean the exterior and wipe the print head area with a recommended cleaner or isopropyl wipe as per the manual. Replace paper rolls promptly to prevent jam-induced downtime and inspect the auto-cutter mechanism for wear. Avoid exposing the printer to extreme temperatures and dust; keep it away from direct sunlight and humid spaces. Schedule monthly checks of drivers, firmware, and alignment to prevent buildup of issues that could impair print quality. Consider setting up a simple log to track maintenance dates and printer health metrics.
Bottom line: proactive care minimizes unexpected outages and extends the printer’s lifespan.
Troubleshooting common Epson receipt printer errors and when to contact support
If you encounter persistent issues, begin with a documented steps-based approach: check power, verify connections, verify paper and alignment, reinstall drivers if necessary, and run a firmware update. If problems persist, consult Epson’s official knowledge base and your POS vendor’s support channel. Have your printer model, firmware version, and a recent test print screenshot ready when contacting support. For recurring problems, consider a service plan or extended warranty to reduce downtime.
Conclusion: most printer problems are resolved by re-verifying connections, updating firmware, and ensuring the correct driver is active.
Quick-start recap: next steps for your Epson receipt printer
Review the setup steps, verify print quality, and confirm the printer is correctly integrated with your POS software. Keep a small maintenance schedule and a quick-reference card with default settings for future changes. If you rely on this printer daily, set up alert notifications for paper jams, low paper, or head overheating. With the right setup, your Epson receipt printer will deliver reliable receipts and smooth operations.
Troubleshooting resource and community help
If you ever need more help, explore Epson’s official support site and POS software forums for model-specific guidance. Create a simple fault log and capture the exact steps that led to the issue to speed up support. Print Setup Pro’s guides and templates can also help you standardize troubleshooting across multiple workstations.
Final note on compatibility and future-proofing
As technology evolves, ensure your printer remains compatible with your POS ecosystem by reviewing firmware notices and OS driver requirements. Keeping your device up to date protects against security vulnerabilities and improves reliability. By planning ahead, you can amortize any upgrade costs and minimize downtime as your business grows.
Tools & Materials
- Power cable(Standard AC power cord suitable for your region)
- USB cable(Type depends on printer model (USB-A to USB-B or USB-C))
- Ethernet cable(Use for networked setups if available)
- Printer driver/software installer(Download from Epson support site; ensure OS compatibility)
- Computer or tablet(Hosting initial setup and driver installation)
- Receipt paper rolls(80mm width is standard; keep spares)
- Mobile device (optional)(For Wi‑Fi setup via mobile app)
- Wi‑Fi network credentials(SSID and password for wireless setup)
Steps
Estimated time: 60-75 minutes
- 1
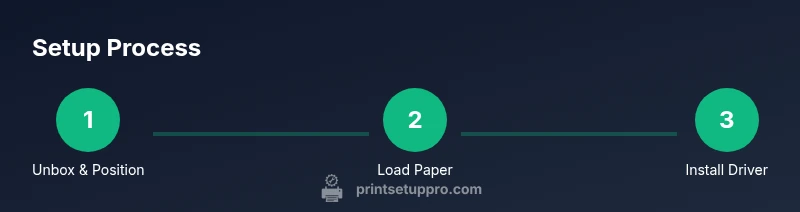
Unbox and position the printer
Carefully remove the packaging, place the printer on a stable surface, and ensure there is space behind for cable routing and airflow. Check for shipping damage and verify that the power switch works. This initial setup reduces the chance of jam or misfeeds caused by a crowded workspace.
Tip: Keep packaging until you confirm the printer works. - 2
Load paper and labels
Open the paper drawer, insert a fresh roll with the paper feeding from the bottom, and advance a few inches to ensure proper alignment. Confirm the paper width matches the printer’s spec and that the roll spins smoothly without sticking. Close the cover securely before powering on.
Tip: Always use fresh paper and avoid folded edges. - 3
Connect power and power on
Plug the power cable into a grounded outlet and connect to the printer. Turn on the printer and listen for the initialization beeps. If the power indicator behaves unusually, unplug and inspect cables for damage before retrying.
Tip: Use a surge protector to protect the printer from spikes. - 4
Install the Epson driver
Download the latest driver from Epson’s official site that matches your OS. Run the installer and follow on-screen prompts to complete the setup. If prompted, select USB or network as your connection type.
Tip: Avoid installing other vendor drivers that could conflict with the Epson driver. - 5
Connect via USB or network
For USB, connect the cable and let the system detect the printer. For network, assign a static IP or use DHCP with a reserved IP, and ensure the printer is reachable from your POS device. Verify basic communication with a test page.
Tip: Static IPs prevent change after reboots and reduce troubleshooting time. - 6
Add the printer to your computer
Open printers settings and add a new device. If the printer appears in the list, select it and complete the driver installation. If it’s not visible, check cables, drivers, and firewall settings that may block printer discovery.
Tip: Restart the computer after driver installation to ensure all components load correctly. - 7
Configure default settings
Set the paper width, line spacing, font size, and default language in the printer properties. If your receipts include a logo, configure image printing or stock templates here. Save these as a profile for quick reuse.
Tip: Test with a basic receipt first, then add logos or barcodes. - 8
Print a test receipt
Send a simple test print to verify alignment, margins, and readability. Check for misfeeds or gaps along the edges. If the test shows issues, adjust margins, font size, or printer head alignment as needed.
Tip: Fine-tuning margins early saves time during live operations. - 9
Set up wireless or cloud options
If using Wi‑Fi, connect to the correct network and enable WPA2/WPA3 security. For cloud or POS app printing, ensure the device is registered and accessible through the network. Confirm reliability with another device on the same network.
Tip: Keep the network password confidential and rotate periodically. - 10
Update firmware and back up settings
Check for firmware updates on the Epson site and apply if newer. Back up your printer configuration to a USB drive if available. Document settings so you can restore quickly after future updates.
Tip: Firmware updates can fix known issues but may reset some preferences; plan for a quick reconfiguration if needed.
People Also Ask
Do I need a network connection for basic receipt printing?
No, you can print via USB directly from a computer. A network connection is only required if you plan to share the printer across multiple devices or stations.
You can print over USB directly from a computer. If you want multiple devices to print to the same printer, you’ll need a network connection.
What should I do if the printer isn’t detected by my computer?
Check power, verify USB or Ethernet connections, confirm the correct driver is installed, and restart the computer. If it still isn’t detected, try another USB port or run the Windows/macOS printer troubleshooter.
If it isn’t detected, verify cables and drivers, then restart and try another USB port or run the built-in troubleshooter.
Can I use third-party receipt paper with an Epson printer?
Most Epson receipt printers support third-party thermal paper as long as the width and heat characteristics match the printer’s specs. Test new stock and ensure it doesn’t jam more than necessary.
Yes, you can use third-party paper as long as the width matches and it prints cleanly; always test first.
How do I update firmware on an Epson receipt printer?
Visit Epson’s support site, locate your model, and follow the firmware update instructions. Keep a backup of your configuration before updating as some settings may reset during the process.
Go to Epson support, download the firmware for your model, and follow the steps. Back up settings before updating.
What routine maintenance helps extend print head life?
Regularly clean the print head area with a recommended solvent or wipe, keep paper paths clear, and avoid overheating through continuous long prints. Schedule monthly checks to prevent head wear from impacting print quality.
Clean the print head area regularly and keep paper paths clear to extend the printer’s life.
Watch Video
Quick Summary
- Select a model with the right interfaces for your POS.
- Follow driver installation steps precisely to avoid conflicts.
- Test print early and document settings for quick reuse.
- Keep firmware updated and clean the printer regularly.