Housing a 3D Printer: Home Enclosure Guide
Learn to build a safe, quiet enclosure for a housing 3d printer in a home setup. Step-by-step guidance, materials, ventilation, and maintenance for DIYers and small offices.

Goal: build a safe, functional enclosure for a home 3D printer that minimizes fumes, dust, and noise. You’ll plan for proper ventilation, accessible filament loading, and easy access for maintenance. This guide offers a materials checklist, step-by-step assembly, and safety tips to help DIYers, students, and small businesses create a reliable workspace.
Understanding the purpose of a home enclosure for a 3D printer
For many makers, a well-designed housing enclosure is more than a cabinet: it’s a small, controlled environment that protects your work area from dust, fumes, and noise while keeping tools and cables organized. When you consider the phrase housing 3d printer, you’re focusing on safety, workflow, and cleanliness in a home workspace. According to Print Setup Pro, a carefully planned enclosure can dramatically improve day-to-day usability by making prints quieter, reducing heat transfer to surrounding surfaces, and simplifying post-process cleanup. This section outlines the core reasons to invest time in planning a proper enclosure rather than repurposing an old cabinet. You’ll learn how enclosure design affects airflow, thermal stability, and accessibility for filament changes and maintenance. A thoughtful design also lowers the risk of accidental contact with moving parts and hot surfaces, which is essential in shared home offices or student dorm rooms.
Safety-first considerations for a home enclosure
Ventilation is not optional when you’re dealing with fumes from certain thermoplastics like ABS; even PLA can release micro-particulates under high temps. An enclosure should guide warm air away from your face and electronics while allowing fresh air intake and exhaust without creating a draft that disturbs prints. Electrical safety matters too: keep outlets accessible, avoid cord overloads, and use a smoke detector nearby if you’re printing with heat-intensive materials. Print Setup Pro Analysis, 2026 notes that well-ventilated, properly grounded enclosures can improve safety and reliability during longer print runs. Always maintain a clear path for cables and consider a simple air filter to capture particulates on longer jobs.
Design options and materials for a reliable enclosure
The choice of materials sets the tone for durability, noise dampening, and ease of construction. Wood (plywood or MDF) offers strength at a reasonable cost and is approachable for DIY builders. Acrylic panels provide visibility into the print area, which can be helpful during calibration or when supervising prints. Metal enclosures are sturdy and heat-tolerant but may require more advanced cutting and joining. No matter the material, plan for air gaps, door access, and cable pass-throughs. Acoustic insulation can significantly reduce noise, especially in compact home offices, while a well-sealed frame minimizes drafts that could affect print quality. Weather stripping around doors and vent grilles can seal gaps and improve safety without sacrificing accessibility.
Planning your enclosure: size, access, and airflow
Begin with a practical layout: measure your printer with clearance on all sides for cables, a tool tray, and a door that opens fully. Aim for at least 2–4 inches (5–10 cm) of extra space on every side to accommodate airflow and maintenance access. A dedicated ventilation path should pull air away from the printer and expel it outside the room, ideally through a small fan and ducting with a filter. Include a front-access door that seals when closed and allows easy filament changes, bed leveling, and print removal. If you’re working in a shared space, consider a whisper-quiet fan and vibration-damping feet to minimize disturbances. Finally, think about future expansion: a modular design can accommodate a larger printer or upgraded filtration without a full rebuild.
Step-by-step build plan overview (high-level)
This section presents a high-level plan you can adapt for an initial build. Start with a solid base frame, attach panels for the sides and back, install a hinged door, and route ventilation carefully. Ensure you leave space for a power switch and air intake, then seal gaps with weather stripping. Plan for easy access to the printer’s back and top without removing the enclosure. Finally, test fit with the printer inside and run a short print to identify any airflow hot spots or vibration issues. The goal is a stable, safe workspace that supports reliable printing and straightforward maintenance.
Finishing touches: acoustics, temperature management, and lighting
Noise reduction is often achieved with a combination of mass-loaded insulation, soft gaskets, and a lightweight interior panel. Temperature stability helps maintain print quality; depending on the material and printer, you may need a modest exhaust flow or a passive cooling strategy to prevent heat buildup. Lighting improves visibility for bed leveling and filament checks, and LED strips tucked inside the enclosure provide even illumination. Keep the interior clean and dust-free, and consider easy-to-clean panels for long-term maintenance. A simple, well-lit enclosure improves safety and reduces the likelihood of smudges on prints caused by poor visibility.
Maintenance and long-term care for enclosure
Regular inspections prevent minor issues from growing into major failures. Wax paper or foam can cushion fragile edges, and periodic cleaning keeps dust from clogging ventilation. Check for loose screws, warped panels, or sagging doors and address them before they impact print quality. Replacing a single panel is simpler than rebuilding the entire frame. If you upgrade your printer, consider a modular enclosure that can be reconfigured without a full rebuild. Document changes so future users understand the current setup and safety features.
Tools & Materials
- Plywood or MDF panels(3/4 inch (18–20 mm) thick for rigidity)
- Acrylic panels (optional)(Windows for visibility)
- Measuring tape(4–6 ft (1.2–1.8 m))
- Pencil or marker(For precise cut lines)
- Circular saw or panel saw(To cut panels accurately)
- Power drill and screwdriver bits(For screws and drilling holes)
- Wood screws(Assorted lengths (1.5–2.5 inch))
- Wood glue(For sturdy joints)
- Hinges (2–3) and door latch/magnet(For a functional access door)
- Ventilation options (fan, ducting, grille)(Active ventilation improves safety for fumes)
- Acoustic insulation material(Mass-loaded vinyl or foam for noise dampening)
- Smoke detector and basic fire extinguisher(Extra safety if high-temp prints are common)
Steps
Estimated time: 4-6 hours (plus glue drying time)
- 1
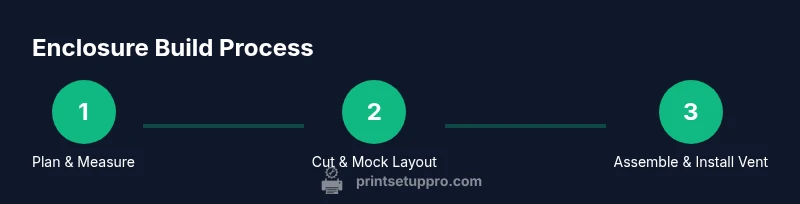
Plan and measure
Take precise printer measurements with doors fully open and add at least 2–4 inches of clearance on each side. Mark cut lines on your panels and plan for cable pass-throughs. This planning prevents fitting issues later.
Tip: Double-check clearance for power plugs and filament spools to avoid obstruction. - 2
Cut panels and mock layout
Cut the panels to size using a saw, then dry-fit the frame to verify alignment and square corners. Make adjustments before final assembly to avoid misfits that complicate sealing and airflow.
Tip: Use scrap pieces to test fit before committing to final cuts. - 3
Assemble frame and base
Assemble the base frame first, then add side panels. Pre-drill holes to prevent wood splitting, apply wood glue at joints, and clamp while the glue dries for accuracy.
Tip: Use a level and square to keep the enclosure true and stable. - 4
Attach doors and hinges
Mount hinges on the door first, then align with the frame. Ensure the door sits flat and closes with a light latch or magnets. Test opening/closing with the printer in place.
Tip: Lightly lubricate hinge pins if the door binding occurs. - 5
Install ventilation and electrical considerations
Place the fan and ducting to maximize exhaust without pulling heat back toward the printer. Route cords safely and keep outlets accessible, with a dedicated switch if possible.
Tip: Keep intake clear of dust and avoid blocking the exhaust path. - 6
Test fit and finalize
Insert the printer, run a short calibration print, and monitor airflow and temps. Add weather stripping to seal gaps and adjust as needed for quiet operation.
Tip: Record any heat hotspots and adjust the airflow as needed.
People Also Ask
What is the ideal enclosure size for my printer?
Measure the printer’s dimensions and add at least 2–4 inches on every side for airflow and access. Consider future upgrades and the space needed for cables and a small filter if used.
Measure your printer and add space for cables, airflow, and future upgrades.
Do I need active ventilation inside a printer enclosure?
Active ventilation is recommended when printing with materials that emit fumes, such as ABS, to reduce particulates and odors. For PLA-only printing, passive ventilation can be sufficient with good airflow.
Yes, active ventilation is recommended for fumes; PLA-only setups may use passive airflow.
What materials work best for a home enclosure?
Wood is common for DIY projects due to cost and ease of work; acrylic offers visibility; metal enclosures are durable but harder to modify. Each material has trade-offs in weight, cost, and ease of construction.
Wood is common; acrylic for visibility; metal is durable but harder to modify.
Can I convert an existing cabinet into an enclosure?
Yes, many builders adapt an old cabinet by reinforcing panels, adding a door, and installing a vented panel. Ensure interior clearance and airflow remain sufficient for the printer.
Yes—adequately reinforce and modify for ventilation and access.
Is PLA printing safe inside an enclosure?
PLA is generally safer than ABS but still releases particulates at high temperatures. An enclosure with minimal drafts and periodic ventilation remains a good practice for any thermoplastic.
PLA is safer, but it's wise to have ventilation and a test run.
How long does it take to build a basic enclosure?
A basic enclosure typically requires several hours, depending on materials and complexity. Allow extra time for fittings, sealing, and testing before running a full print.
Typically several hours; plan for setup and testing.
Watch Video
Quick Summary
- Plan thoroughly before cutting any panel.
- Ensure adequate ventilation and airflow.
- Secure doors, cables, and power connections safely.
- Test with a short print and monitor temperatures for stability.