How to Fax from a Printer: A Complete Guide
Learn how to fax from a printer using built-in fax, FoIP, or cloud options. This step-by-step guide covers hardware checks, setup, testing, security, and maintenance for home offices and small businesses.

By following this guide, you will learn how to fax from a printer using built-in fax, FoIP, or cloud fax options. You’ll verify compatibility, connect the right line, and run a test fax with a clear checklist. According to Print Setup Pro, most home offices can fax reliably with standard gear and a simple setup.
Why faxing from a printer remains relevant
Faxing from a printer continues to serve niche industries and many small offices that require legally binding transmission records. In a world of digital documents, a fax still offers a simple, widely supported channel for sending scanned pages directly to a recipient’s fax machine. The convenience of doing this from a device you already own can reduce complexity and paper waste compared to printing, scanning, and emailing attachments separately. According to Print Setup Pro, a significant share of small businesses maintain a basic fax workflow as part of archival and compliance routines. At its best, a modern multifunction printer (MFP) with fax capability acts as a single hub for document handling, enabling you to scan, send, receive, and store faxes without leaving your desk. This block outlines how to determine if your device can fax, what methods exist, and how to choose a workflow that matches your needs.
How faxing from printers works today
Today’s printers offer several routes to fax a document. The traditional method uses an analog telephone line connected to the printer’s fax modem. A newer approach is Fax over IP FoIP, which streams faxes over a digital network or the internet; FoIP often requires a compatible service or a cloud-based fax provider. Many printers also support cloud fax or online-to-fax features through vendor apps, letting you send faxes from your computer or smartphone while the printer handles the physical transmission. The choice depends on your setup, the volumes you expect, and whether you need inbound faxes stored at the printer or in the cloud. Print Setup Pro’s guidance emphasizes matching your network and line type to the device’s capabilities to avoid failed transmissions and long retry cycles.
Assessing your hardware: does your printer support fax?
Not every printer includes a fax modem. Start by checking the model’s documentation or the on-device menu for a Fax option. If you see a Fax or Fax Settings section, your device likely supports sending and sometimes receiving faxes. Some printers require you to enable Fax in the settings, while others pair with a dedicated phone line for inbound and outbound calls. If your printer lacks built-in fax, you can still fax by connecting to a computer with fax software or using a cloud-based service that sends from the printer via FoIP. In either case, confirm that your firmware is up to date and that the device has a clear scanning path for documents.
Methods to fax from a printer: built-in vs PC-based vs cloud
Built-in fax is the simplest path when your printer includes a fax modem and a dual-line input. For occasional needs, this may be enough. PC-based or laptop-assisted fax uses a connected computer to prepare, then transmit documents through the printer’s driver using Windows or macOS built-in fax features. Cloud fax options use the printer’s app or a vendor’s service to route the fax through the internet; this can be convenient for remote recipients or multi-location offices. Each method has trade-offs: reliability vs convenience, cost vs speed, and on-premises control vs minimal setup. Evaluate your expected volume, privacy requirements, and whether you need to receive faxes on the device. Print Setup Pro analysis suggests many small teams benefit from starting with built-in fax and then adding FoIP if volumes grow.
Step-by-step workflow overview
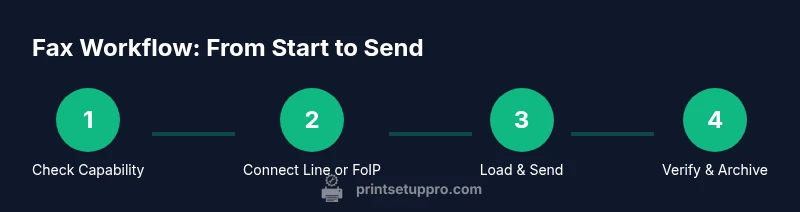
While the exact screens vary by model, the general workflow is consistent across brands. Load the documents using the document feeder or flatbed, select Fax as the destination, enter the recipient’s fax number (or choose from an address book), adjust any options (cover page, double-sided pages, resolution), and press Send. If you are using a FoIP setup, you may choose the network or cloud option and authenticate as needed. The device will dial the recipient’s fax number, scan the documents, and transmit a fax signal. After sending, review the transmission report for success or failure notices, and save copies if your policy requires audit records.
Troubleshooting common fax issues
Common problems include a busy signal, failed transmission, or poor scan quality. First check the line or FoIP connection; ensure the printer is connected to that line and that the service is active. Verify recipient numbers, timeouts, and dialing prefixes for international faxes. If you receive a failure notice, read the error log and retry with a smaller page count or lower resolution. Ensure paper is loaded correctly and that the scanner glass is clean. Firmware updates can resolve compatibility issues, as can reconfiguring the transmission settings to optimize baud rate and compression.
Security and privacy when faxing with a printer
Faxes travel over the chosen transmission path, so security is a concern. On a traditional line, the content is transmitted via the telephone network, while FoIP routes data over the internet. Use secure internet connections, enable any available encryption features, and review access controls on the printer’s web interface. If sensitive information is involved, prefer devices with separate send/receive storage and enable log deletion after transmission. Store sent faxes securely, and remove documents promptly after scanning to minimize exposure.
Maintenance and best practices for reliable faxing
Keep the device firmware current, maintain clean scanning surfaces, and run periodic test faxes to verify paths remain open. Label and organize your fax numbers, set up a simple cover page, and establish a small retention policy for fax logs. If you rely on cloud fax, ensure your cloud provider has a reputable security posture and incident response plan. Regularly back up device settings and confirm that the phone line or FoIP service remains active.
When to upgrade or switch to alternative fax solutions
If your current setup struggles with inbound faxes or requires frequent reconfiguration, consider upgrading to a newer MFP with robust FoIP support, or switch to a dedicated cloud fax service that integrates with your document workflows. For mixed environments, a hybrid approach—using built-in fax for local transmissions and cloud fax for remote parties—often delivers the best balance of speed, reliability, and cost. Print Setup Pro recommends evaluating total cost of ownership, compatibility with your existing network, and the legal requirements of your industry before choosing.
Tools & Materials
- Printer with built-in fax capability(Confirm model supports fax via the settings menu.)
- Phone line or FoIP service(Analog line or internet-based fax service compatible with your printer.)
- Network access (Ethernet or Wi‑Fi)(Needed for FoIP or cloud-based fax workflows.)
- Documents to fax(Use originals or digital files to scan or feed.)
- Power supply(Keep the printer powered during the entire fax session.)
- Optional cover page(Helpful for identifying recipients and context.)
Steps
Estimated time: 30-45 minutes
- 1
Verify fax capability
Check the printer menu for Fax Settings, confirm the firmware is up to date, and ensure the device is connected to a working line or FoIP service.
Tip: Consult the manual; run a quick test page from the Fax menu. - 2
Connect transmission path
Attach the proper line or configure the FoIP service in the printer’s settings. Verify line status is idle before sending.
Tip: If using FoIP, prioritize a stable network with QoS for reliability. - 3
Prepare documents
Place documents in the ADF with the correct orientation and ensure the scan path is clear. Choose desired resolution and whether to include a cover page.
Tip: Remove staples and ensure pages are flat for accurate scanning. - 4
Enter recipient details
Dial or select the recipient’s fax number from the address book. Review settings like double-sided pages and color preferences.
Tip: Double-check the recipient number and country code if sending internationally. - 5
Send a test fax
Send a one-page test to confirm the path works and the fax is legible.
Tip: Check the transmission report and address any errors before sending multi-page jobs. - 6
Confirm receipt and log results
Ask the recipient to confirm receipt and save the transmission record if required by your workflow.
Tip: Store copies or logs securely per your retention policy.
People Also Ask
Do all printers support faxing natively?
No. Only some multifunction printers include a built-in fax modem. Check your model’s manual or settings for a Fax option. If not available, you can still fax via a PC or cloud service using FoIP.
Not every printer has built in fax; check your model's features or use a PC or cloud fax as an alternative.
Can I fax from a printer using cloud services?
Yes. Many printers integrate with cloud fax or FoIP providers; you can send faxes through the printer’s app or connected software.
Yes—cloud fax is often possible from a printer via the app or connected software.
What types of documents can I fax?
You can fax physical documents by scanning them, or send digital files that you print or re-scan. Contracts, forms, and reports are common fax targets.
You can fax scanned papers or digital documents after sending them from the printer.
Why is my fax transmission failing?
Common causes include a faulty line, incorrect dialing, wrong recipient number, or misconfigured FoIP settings. Check the connection, verify numbers, and review the FoIP configuration.
A failing fax is usually a line issue or a setting problem; verify line, numbers and FoIP config.
Is faxing from a printer secure?
Fax security depends on the path. Use secured lines or encrypted FoIP and proper access controls to minimize exposure of sensitive documents.
Fax can be secure if you use encrypted FoIP and strong access controls.
How do I add a new recipient to the printer's address book?
Open the printer’s app or control panel, locate Contacts or Address Book, and add the recipient’s name and fax number. Sync if required.
Open the printer app, find Contacts, and add the recipient’s fax number.
Watch Video
Quick Summary
- Verify your printer’s fax capability.
- Choose the proper transmission path (analog or FoIP).
- Use a cover page and maintain detailed logs.
- Regular maintenance prevents failed faxes.