How to Use a Printer: Step-by-Step Guide
Step-by-step guide to using a printer—from setup and drivers to printing, scanning, and basic troubleshooting—designed for home offices, students, and small businesses.

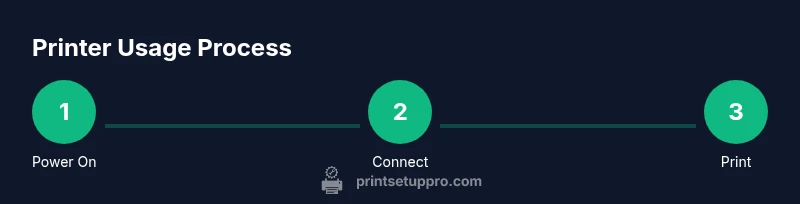
By the end of this guide you will know how to use a printer from initial power-on to printing, scanning, and basic maintenance. You’ll connect via USB or Wi‑Fi, install the correct drivers or apps, load media properly, and choose the right print settings for common tasks from computer and mobile devices. According to Print Setup Pro Analysis, 2026 a structured, calm approach reduces frustration.
Understanding the basics of printer operation
Printers translate digital pages into physical copies using print drivers and built-in processing. Whether you own an inkjet or laser model, your main tasks are to connect a device, choose a print language, and send jobs to the printer. This section clarifies the terminology and the typical workflow for how to use a printer in everyday life. Print head alignment, cartridge handling, and the role of print queues will come up as you proceed. Familiarize yourself with the idea that printers accept data in a language that your computer can understand (PCL, PostScript, or vendor-specific formats) and then render a page via the print engine. If you’re switching between devices or operating systems, you’ll need to ensure the driver matches the OS version to avoid compatibility issues. For most home users, a straightforward USB or Wi‑Fi connection plus the vendor’s app or driver is enough to begin.
Print Setup Pro Analysis, 2026 indicates that a clear mental model of these steps reduces trials and errors during setup and daily use. By understanding where the printer stores its settings (in-queue versus device preferences) you’ll be able to troubleshoot misfeeds or unexpected page sizes without guessing. This foundation makes subsequent steps faster and less frustrating, especially when you’re balancing deadlines with schoolwork or business tasks.
bold
Tools & Materials
- Printer(Any current model with standard print capabilities (inkjet or laser))
- Power cable(Original power cord; ensure it matches your region (voltage))
- USB cable or stable Wi‑Fi network(For initial setup via USB or wireless connection)
- Computer, laptop, or mobile device(Needed to install drivers/apps and print)
- Printer paper (plain, 20 lb / 75 g/m² or standard size)(A4/Letter depending on region)
- Official driver/software download(Download from the printer manufacturer’s website or app store)
- Optional cleaning kit(Printer head cleaning tools or wipe)
- Extra ink/toner (optional)(Keep spares on hand for uninterrupted printing)
Steps
Estimated time: 45-75 minutes
- 1
Power on and position printer
Unpack carefully, place the printer on a stable surface near a power outlet, and connect the power cable. Turn the printer on and wait for the initial self-check to complete. Ensure there is at least a few inches of space behind the device for ventilation and cable management.
Tip: Use a surge protector to guard against power spikes and keep cords tidy to avoid tripping hazards. - 2
Connect to a device (USB or Wi‑Fi)
If you’re using USB, insert the cable firmly into both the printer and your computer. For wireless, ensure the printer is connected to the same Wi‑Fi network as your device and note the network name (SSID). Verify the printer appears in your system’s available devices before proceeding.
Tip: If Wi‑Fi is unstable, temporarily use USB while you install drivers, then switch to wireless after setup. - 3
Install the correct driver or app
Download the appropriate driver or mobile app from the manufacturer’s site. Run the installer and follow prompts to grant permissions and set up your default preferences. Reboot the printer and computer if prompted to ensure all components are recognized.
Tip: Choose the exact OS version (Windows/macOS/iOS/Android) to avoid compatibility issues. - 4
Load media and configure tray
Open the paper tray and adjust guides to match your paper size. Insert paper stack neatly and avoid overfilling. Run a quick feed test to confirm straight feeding and no jams.
Tip: Always fan stack of papers to prevent sticking and misfeeds. - 5
Print a test page
From your computer or app, select a basic document and print a test page. Check margins, color accuracy, and alignment. If any edge trimming or color misregistration appears, run a quick alignment or print head cleaning from the printer’s maintenance menu.
Tip: Test prints help catch issues early before printing important documents. - 6
Configure common print settings
Set your default page size, orientation, print quality, and color options. For everyday tasks, draft/eco mode saves ink, while photo batches may require higher resolution. Save your preferred preset for future work.
Tip: Use presets to speed up repetitive printing tasks and reduce misprints. - 7
Print from a computer
Open the document, choose Print, select your printer, and adjust settings as needed. Use the print preview to confirm layout and margins before submitting the job. Monitor the print queue for jumbo jobs or stalled tasks.
Tip: If a job stalls, cancel it and reprint after a moment to reset the queue. - 8
Print from a mobile device
On iOS use AirPrint or the manufacturer’s app; on Android use Mopria or the manufacturer’s app. Select the document, tap Share or Print, then choose the correct printer and adjust settings. Some apps offer direct print from within the document.
Tip: Ensure device and printer remain on the same network for seamless wireless printing. - 9
Maintenance and routine checks
Periodically clean the print head nozzles (if applicable), check for paper dust in the feed path, and run a calibration. Replace cartridges only when color or black is noticeably faint. Keep the device firmware up to date.
Tip: Regular maintenance prevents quality drops and extends printer life.
People Also Ask
What is the first step to use a printer?
First, power on the printer and connect it to your device via USB or wirelessly. Then install the driver or app to enable communication between the computer and the printer.
First, turn on the printer, connect it to your device, and install the driver to enable printing.
How do I connect my printer to Wi-Fi?
Open the printer’s wireless setup or control panel, choose your Wi-Fi network, enter the password, and confirm the connection. Ensure the printer and your device are on the same network.
Go to the printer’s wireless settings, select your network, enter the password, and confirm the connection.
Why is my print quality poor even after setup?
Check cartridge status, run a nozzle check or print head cleaning, and verify you’re using the correct media type and print settings for your task.
Poor quality can be due to low ink, clogged nozzles, or wrong settings. Run a cleaning and check settings.
Can I print from my phone without a computer?
Yes. Use AirPrint (iOS) or Mopria (Android) or the printer’s app to print directly from compatible apps.
Yes, you can print from your phone using AirPrint or Mopria or the manufacturer’s app.
What should I do if the printer jams?
Power off, gently remove jammed paper, check for torn pieces, and resume printing. Clear jams from the rear tray or front access panel as per the manual.
Power off, remove the jam carefully, and check for any torn bits before resuming.
How often should I clean the printer?
Perform a light cleaning monthly and a deeper cleaning every few months or after heavy use. Replace cartridges when color or black runs low.
Clean the printer regularly, and replace cartridges when they’re low.
Watch Video
Quick Summary
- Power on and connect using the right method
- Install official drivers to ensure compatibility
- Load media correctly and test print to verify setup
- Use presets and mobile printing options to save time
- Perform regular maintenance to prevent quality issues