How to Fix Printer Paper Jam: A Step-by-Step Guide
Learn how to fix printer paper jam quickly and safely with a proven, model-agnostic approach. This guide covers troubleshooting, prevention, and maintenance for home offices and small businesses.

In this guide you’ll learn how to fix a printer paper jam quickly and safely. You’ll identify jam locations, clear obstructions, and test the printer to confirm it’s ready for use. Before starting, gather the essential tools and consult your printer’s manual. This quickStart emphasizes safety, proper paper handling, and model-specific steps you should follow, then moves into a detailed, step-by-step approach.
Understanding Paper Jams and Their Causes
According to Print Setup Pro, paper jams typically occur when the paper feed path is blocked or when paper is fed incorrectly, causing misalignment before the rollers grab it. The most common culprits are damp or curled paper, overfilled trays, and worn or dirty rollers. Different printer models have jam-prone zones—rear access panels, straight-through paths, and duplexers are frequent trouble spots. Symptoms include unusual noises, a partially fed sheet stuck in the path, or paper tearing as you pull. Recognizing these signs helps you respond calmly and avoid further damage. Regular checks of the paper path, tray alignment, and roller cleanliness dramatically reduce the chance of a repeat jam. For multi-function printers, jams can also occur when chasing the document through auxiliary paths like bypass trays or rearfeeds.
Jam Scenarios by Printer Type: Inkjet vs. Laser and Front vs. Rear Paths
Inkjet printers tend to jam where the paper leaves the cartridge area or behind the rear access panel, while laser printers more often jam in the feed path between the tray and drum unit. Front-loading paths are generally easier to clear than rear pathways because you can see the sheet and access it directly. When diagnosing, note whether the jam occurs immediately as you press print, after several pages, or during duplex printing. These patterns help you identify whether misfeed, moisture, or worn rollers are at fault. If you have a duplex unit, always inspect both sides of the path, as a small curl on a single sheet can cause a cascade of jams later.
Safety First: Prep and Basic Maintenance Before Digging In
Power down and unplug the printer before handling any internals. Wear clean hands or lint-free gloves if you’re concerned about oils transferring to components. Prepare a dry, lint-free cloth to wipe rollers, and keep a small plastic tool (like a plastic card or blunt tweezer) handy for gentle jam removal. Do not use metal tools that could scratch delicate surfaces. Ensure the printer is in a well-lit, dust-free area. If the jam is stubborn, avoid forcing the sheet—excess force can stretch or tear the media and damage feed rollers. Finally, verify you’re using the correct paper type and weight for your model.
Prevention: Habits That Reduce Future Paper Jams
Preventive maintenance is the best defense against frequent jams. Always fan and straighten paper before loading, keep the tray within the recommended fill line, and store paper in a dry environment to prevent curl. Clean rollers and capping areas every few months or after heavy usage, using a lint-free cloth slightly moistened with water or isopropyl alcohol if the manufacturer allows it. Avoid damp or greasy papers, damaged reams, and old stock. Check for worn rollers or rubber flaps; if you notice slipping or shiny surfaces, it’s time to schedule service or replace the affected parts. Regularly running a diagnostic page can help you spot problems before they escalate.
What to Do If a Jam Persists: Quick Escalation Guide
If you cannot remove the jam safely or if it recurs after every few pages, consult the printer’s manual for model-specific steps or contact customer support. Do not attempt to disassemble critical assemblies beyond the recommended access panels. Document the jam pattern, the model, and the steps you tried; this helps with service calls and replacement parts. Additionally, consider updating firmware if the jam is sporadic and tied to print jobs with certain settings.
Final Thoughts for Longevity
A proactive maintenance routine and careful handling during loading are your best tools against jams. Keep spare paper on hand, maintain a clean work area, and train team members on proper handling to reduce user-induced jams. Regularly review supplier recommendations for paper type and thickness to ensure you’re aligned with your specific printer.
Tools & Materials
- Printer owner's manual(Keep for model-specific jam guidance and service steps.)
- Lint-free cloth(For cleaning rollers and feed paths without leaving fibers.)
- Plastic card or blunt plastic tweezers(Gently lift or guide jammed paper without gouging surfaces.)
- Isopropyl alcohol (70%)(If allowed by manufacturer, use sparingly on a cloth to clean rollers.)
- Small flashlight or phone light(Helpful for inspecting tight paths and rear jams.)
Steps
Estimated time: 25-40 minutes
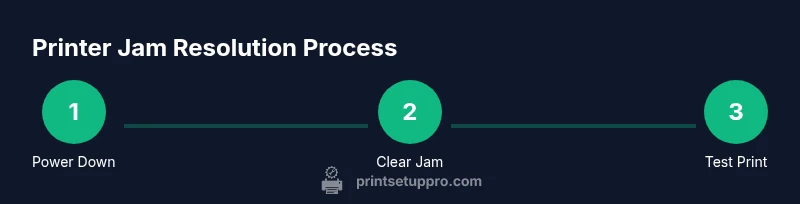
- 1
Power down and unplug
Shut off the printer and disconnect the power cord to prevent any accidental startup. If the model has a USB or Ethernet connection, leave those in place but avoid interacting with the device until you’re ready to test. This step minimizes electric shock risk and protects internal components during jam removal.
Tip: Wait 30 seconds after unplugging before touching internal parts to allow capacitors to discharge. - 2
Open access panels
Open the front and rear panels as instructed by the manual. Do not force any doors or trays; if panels feel stuck, double-check locking clips or release latches. The goal is to gain clear visibility of the jam path without bending or tearing components.
Tip: Take a quick photo of the path before touching parts to aid reassembly. - 3
Locate and remove visible jammed paper
Gently grip the jammed sheet and pull it in the direction of paper travel to avoid tearing. If the sheet is torn, remove small fragments one by one, ensuring no fibers are left in the rollers. If the jam is tightly wedged, use the plastic tool to ease it free instead of pulling harder.
Tip: Never force the sheet; tearing creates small fragments that can cause repeat jams. - 4
Inspect and clean the feed path
Check for any scraps, dust, or tiny fibers along the feed path and around rollers. Wipe surfaces with a dry, lint-free cloth. If your printer’s manual allows it, lightly clean the rollers with a cloth dampened with isopropyl alcohol and let dry completely before closing the panels.
Tip: Avoid wetting the rollers with liquids; moisture can slip into electronics. - 5
Reload paper correctly
Fan the paper stack to prevent sticking, align edges, and place the stack within the tray’s fill line. Ensure the paper type and weight match the printer’s specifications. Close the tray smoothly and reseat all panels before powering on.
Tip: Always remove curved or damp paper; curved stock increases feed resistance. - 6
Test print and observe
Power the printer back on and run a test page. If the jam recurs, stop and recheck the path, especially around duplexers or rear feeds. If necessary, run the printer’s built-in diagnostic page to reveal error codes and the likely location of the obstruction.
Tip: If the test page fails, write down any error code to look up model-specific solutions.
People Also Ask
Why does my printer keep jamming after loading paper?
Repeated jams after loading often indicate misfeeds, damp or curled paper, or worn rollers. Start by inspecting the feed path, then check paper quality and tray alignment. Addressing these root causes typically resolves repeat jams.
Repeated jams after loading usually come from feed path issues, paper quality, or worn rollers. Check the feed path and tray alignment to fix it.
How can I safely remove a jam without tearing the paper?
Take a steady, gentle grip on the jammed sheet and pull in the direction of paper travel. If resistance is high, stop and use a plastic tool to ease the sheet free. Avoid pulling at an angle or twisting the page.
Grip the jammed sheet and pull with the paper’s travel direction. If it resists, use a plastic tool to ease it out—don’t yank.
Is it safe to use compressed air to clear jams?
Most printers should not have compressed air directed into internal areas, as moisture or dust can cause damage. Always consult the manual and, if in doubt, contact support. Use approved cleaning methods only.
Avoid using compressed air inside printers unless the manual approves it. When unsure, contact support.
How can I avoid jams when loading paper?
Use clean, dry paper and fan the stack to prevent sheets from sticking. Align the stack with tray guides and avoid overfilling. Regularly check for curled or damp stock before loading.
Load clean, dry paper, fan the stack, and align with the guides to prevent jams.
Do I need to replace rollers to prevent jams?
If you notice frequent jams at the same location, worn rollers are a likely culprit. Replacing rollers restores proper grip and feed. Consult the printer’s service guide or a professional if you’re unsure about replacement.
Worn rollers often cause repeated jams; consider replacement if jams persist at the same point.
What should I do if the jam is behind a rear feed path?
Rear path jams can be trickier. Open the rear panel per the manual, remove the sheet carefully, and ensure any dust or fibers are cleared. If you can’t access the path safely, seek professional help.
Rear path jams require caution—open the rear panel, remove the sheet, and clear debris. Seek help if unsure.
Watch Video
Quick Summary
- Power down before any jam clearance.
- Remove jammed sheets gently to avoid tearing.
- Inspect and clean the feed path and rollers.
- Reload paper correctly and test with a printer diagnostic page.