Laser Printer Setup & Troubleshooting Guide for Home Offices
A comprehensive how-to on setting up, connecting, calibrating, and maintaining a laser printer for home offices, with practical steps, tips, and troubleshooting guidance.

This guide shows you how to install, connect, and troubleshoot a laser printer for reliable home-office printing. You’ll learn to choose USB, Ethernet, or Wi‑Fi connections, load media, adjust print quality, and fix common jams. Gather the printer, driver source, toner, and the right cables to begin a smooth, efficient setup.
What is a laser printer and how it works
According to Print Setup Pro, a laser printer uses a laser beam to charge a photosensitive drum, attracting dry toner particles that are then transferred to paper and fused with heat. This process yields sharp text and fast output, and it scales well for high-volume documents. Unlike inkjet devices, laser printers typically offer lower ink costs per page and longer drum life for everyday office tasks. In practice, you’ll notice crisp type, stable outlines, and consistent grayscale performance once the printer is properly calibrated. This section explains the core mechanism so you can troubleshoot intelligently when something seems off.
A key distinction for home office users is duty cycle—the number of pages a device can reliably print in a month. Laser printers excel at text-heavy documents, while color photo printing may require different media and calibration. With proper maintenance, a laser printer can deliver years of dependable service for documents, reports, and client presentations.
Tip: If you’re upgrading from an inkjet, factor in toner cost per page and drum replacement intervals to estimate ongoing expenses. Print Setup Pro emphasizes planning ahead to avoid surprises later in the life of the device.
Quick-start: what you need before you begin
Before you power up, gather what you need and confirm compatibility. Verify you have the correct toner cartridge and the appropriate paper stock for your laser printer model. Ensure you can access the printer’s control panel or web interface, have a power outlet, and know whether you’ll connect via USB, Ethernet, or Wi‑Fi. Download or locate the latest driver package from the manufacturer’s site and note the installation steps. Finally, set aside a clean workspace with a lint-free surface to prevent paper fibers from lodging in the printer path. A well-prepared start reduces troubleshooting time and keeps your first print page clean and crisp.
Why it matters: The right toner, media, and driver version prevent common issues like smearing, ghosting, or misfeeds, which are frustrating in early use. Print Setup Pro notes that a deliberate prep phase saves time later in the setup journey.
Choosing connections: USB, Ethernet, or Wi‑Fi
Connecting options affect speed, reliability, and where you can place the printer. USB is simple for near‑term single‑device setups; Ethernet makes a shared workgroup easy and stable; Wi‑Fi provides flexibility but requires network configuration and password management. Consider your home or small office network: do you have a router with available ports, a static IP preference, and a print server if needed? Also check that your router supports standard wireless printing protocols. Security is important: enable encryption and consider guest networks for guests. If you’re setting up a mixed environment (Windows, macOS, and mobile devices), prioritize a method that supports all your devices.
Pro tip: If you can route through a dedicated printer VLAN, you’ll reduce interference from other devices and improve reliability over time.
Installing drivers and software the right way
Install the official driver package from the printer manufacturer and select the correct model to avoid feature gaps. On Windows, run the installer as administrator, connect when prompted, and set the printer as default if desired. On macOS, use the built-in print system and select the network or USB connection. After installation, print a test page and use the calibration tools in the printer settings to verify alignment. Keep the driver up to date to ensure compatibility with security updates and new OS versions. If you encounter installation errors, consult the vendor’s support site and use their online troubleshooting guides.
Why this matters: Mismatched drivers or outdated firmware can cause printing delays, reduced features, or security vulnerabilities. Regular updates help keep the device compatible with new software ecosystems.
Loading media and choosing media types
Laser printers use dry toner and usually have one or more input trays. Start with standard copy paper (20‑24 lb). If you’re printing labels or glossy media, verify compatibility because some media can cause jams or physical damage. Adjust the tray guides to the paper size and fill to the recommended level; avoid overfilling. Use duplex printing selectively to save paper. The printer’s control panel will show indications of misfeeds or wrong media type.
Watch for: The wrong media can scratch the drum or cause fuser residue buildup, impacting print quality over time. Always consult the user manual before using specialty media.
Tuning print quality: density, contrast, and calibration
Print quality depends on toner density, contrast, and fuser temperature. Use the printer’s preset modes (Normal, Draft, and Photo) as a baseline and adjust density for bold text or light pages. For color models, run a color calibration if the device supports it, and compare prints against a reference page. Small adjustments can reduce banding and improve uniformity. If you notice specks or lines, clean the corona wire or drum housing per the manufacturer’s instructions.
Tip: Run a quick calibration after changing media or toner brand to reestablish optimal prints. Print Setup Pro recommends keeping a small set of reference pages for ongoing checks.
Common jams and troubleshooting steps
Jams are common with busy workloads. Start by turning off the printer and inspecting the paper path. Remove stuck sheets gently from accessible access points; avoid tearing or pulling through the fuser. Check the tray for paper that isn’t aligned and straighten it. Clean rollers with a lint-free cloth; avoid solvents unless recommended. If jams recur, check for damaged rollers or the pickup assembly and replace worn parts. For persistent issues, consult the service manual.
Warning: Do not reach into the fuser area while powered; hot surfaces can cause burns. Always power down and unplug before maintenance.
Maintenance and longevity: cleaning and part replacement
Schedule regular maintenance to keep a laser printer running smoothly. Wipe the exterior and accessible interiors with a dry or slightly damp lint-free cloth. Replace toner cartridges before they run completely empty to avoid print quality loss. For high‑volume environments, consider changing the drum/transfer belt according to the manufacturer’s lifecycle guidance. Keep the printer in a dust-free area and away from direct sunlight. Periodically run cleaning cycles if your device provides them, and update firmware to ensure compatibility. By integrating a simple quarterly maintenance ritual, you extend the life of critical components and reduce the risk of unexpected downtime.
Print Setup Pro tip: Maintain a small log of consumables and dates to anticipate replacements and budget accordingly.
Authority Sources
For further reading and official guidance, consult these authoritative sources:
- https://www.nist.gov/topics/lasers — NIST overview of laser technology and safety considerations for devices that use laser components.
- https://www.osapublishing.org/ao/ — Optical Society of America: peer‑reviewed articles and industry insights on laser systems and imaging.
- https://www.iso.org/standards.html — ISO standards on printing, media handling, and device interoperability to inform best practices.
Tools & Materials
- Power cord(Ensure the cord is rated for your printer’s power draw and fits the outlet.)
- Toner cartridge (new or compatible)(Verify compatibility with your model and have an extra cartridge on hand if printing in high volume.)
- USB or Ethernet cable(Optional for direct USB or wired network setups.)
- Wi‑Fi network access(Required only if using wireless setup; ensure password ready.)
- Paper stock (20‑24 lb standard)(Use plain paper to begin; test with higher quality media later.)
- Driver software URL(Download from the manufacturer’s official site.)
- Cleaning supplies (lint-free cloth, isopropyl alcohol)(For routine maintenance of rollers and the paper path.)
- Spare release parts (drum/transfer belt, if applicable)(Only replace when advised by maintenance intervals.)
Steps
Estimated time: 60-90 minutes
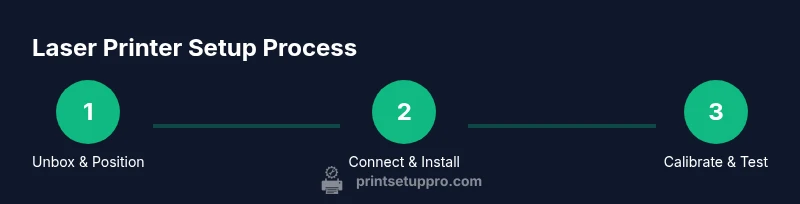
- 1
Unbox and position the printer
Remove packaging, discard protective materials, and place the printer on a sturdy, dust-free surface near a power outlet. Check for shipping damage and ensure vents are unobstructed. This step sets up a safe, accessible baseline for all later steps.
Tip: Keep the box handy for reference or returns if needed. - 2
Install toner and load media
Unpack the toner cartridge and install it according to the manufacturer’s directions. Load standard paper into the main tray and align the guides to the paper size. Avoid overfilling the tray to prevent jams.
Tip: Handle toner carefully to avoid smudges on your first prints. - 3
Connect power and choose a connection
Plug in the printer and power it on. Decide whether you will use USB, Ethernet, or Wi‑Fi, and connect accordingly. If using Wi‑Fi, note the SSID and password and ensure the network supports your printer’s capabilities.
Tip: For reliability, a wired Ethernet connection is often more stable than wireless in busy environments. - 4
Install drivers and configure
Download the official driver package from the manufacturer and install it on your computer. Follow the prompts to select the correct model and set it as default if desired. Print a test page to confirm the setup.
Tip: Run the installer with administrator rights where required. - 5
Calibrate and test print
Use the printer’s calibration tools to align the drum and verify image sharpness. Print a test page and check for ghosting, misalignment, or color discrepancies. Make minor adjustments as needed.
Tip: Calibration should be part of the initial setup and after any major media changes. - 6
Load media properly and set trays
Adjust tray guides to the loaded media and ensure the media type matches your print settings. Enable duplexing only if your workflow requires it, and verify margins and paper size are correct.
Tip: Avoid using shredded paper or damaged stock that can cause jams. - 7
Run a routine maintenance cycle
Clean accessible rollers with a lint-free cloth, and check for paper dust in the path. Replace toner or drum parts as recommended by the manufacturer. Update firmware if available.
Tip: Regular maintenance reduces downtime and print defects. - 8
Print a final test and document setup
Print a full-page test with black text and color elements to verify print quality across modes. Save the setup details for future reference and keep a simple log of consumables.
Tip: Documenting settings helps reproduce the same results later. - 9
Plan ongoing maintenance and replenishment
Set reminders for toner and drum replacements based on usage, and schedule periodic firmware checks. Keep spare consumables on hand to avoid gaps in productivity.
Tip: Proactive replenishment minimizes downtime.
People Also Ask
What is a laser printer and how does it work?
A laser printer uses a laser to charge a photosensitive drum, attracting toner particles that are transferred to paper and fused with heat. This yields fast, crisp text and strong reliability for office tasks. It’s generally more cost-efficient for high-volume text printing than inkjets.
A laser printer uses a laser to apply toner to paper, producing fast, crisp text for typical office printing.
Can laser printers print photos well?
Laser printers can print photos, but they typically don’t match the color depth and gradient smoothness of high-end color inkjets. For best results, use dedicated photo paper and a calibrated print profile when color accuracy matters.
They can print photos, but for best color depth and smooth gradients you may prefer an inkjet or a dedicated photo printer.
Is a laser printer energy efficient?
Laser printers are generally energy-efficient during idle and when printing simple text, but active fusing can consume more power during heavy tasks. Modern devices include sleep modes to reduce energy use when not actively printing.
Yes, they’re energy-efficient in standby but use more power while actively fusing toner.
How often should I replace toner and parts?
Toner life depends on usage and page coverage. The drum or transfer belt may have a longer lifecycle in high-volume environments. Follow the manufacturer’s recommended replacement intervals and monitor print quality to decide when to replace.
Toner lasts for a while, but the drum and transfer belt may need replacement as you print more.
What should I do if paper jams persist?
Turn off and unplug the printer, gently remove jammed sheets from accessible paths, and straighten any misfed media in the tray. Check for damaged rollers and replace them if needed. If jams continue, consult the service manual or support.
If jams keep happening, unplug the printer, remove the jam carefully, check rollers, and consult the manual.
Can I use third-party toner cartridges?
Many laser printers support third‑party toners, but compatibility and warranty terms vary. Use reputable suppliers and consider the impact on print quality and device seals. If unsure, revert to the original manufacturer’s toner.
Yes, but check compatibility and warranty terms before using third‑party toners.
Watch Video
Quick Summary
- Follow a clear connection plan before powering up
- Install official drivers for full functionality
- Calibrate and test print for optimal quality
- Use the correct media to prevent jams
- Schedule regular maintenance to extend printer life