Matrix Printer Setup and Troubleshooting: A Practical Guide
A comprehensive, step-by-step guide to installing, configuring, and troubleshooting matrix printers (dot matrix) for reliable dot-matrix output in home offices and small shops.

This guide shows you how to install, configure, and troubleshoot a matrix printer (dot matrix) for reliable form printing. You’ll follow a step-by-step workflow, plus practical tips for ribbons, alignment, and maintenance. By the end, you’ll be ready to print multipart forms with consistent quality.
What is a matrix printer?
A matrix printer, commonly called a dot-matrix printer, uses a print head that strikes an ink ribbon against paper to create characters. This impact printing technology dates back to early computing and remains valuable for multipart forms, carbon copies, and harsh environments where reliability and low per-page cost matter. In this guide, we’ll cover setup basics, print quality, alignment, ribbons, and routine maintenance to keep your matrix printer performing well over years of use. The matrix printer family includes models designed for heavy-duty workloads, making them a popular choice in small shops and DIY offices. Throughout, you’ll see actionable steps you can apply today to fix common issues and optimize performance.
Why matrix printers remain relevant in 2026
Despite advances in laser and inkjet tech, matrix printers persist because they excel at multipart forms, long ribbon life, and affordability for high-volume tasks. They are rugged, can operate in less-than-ideal lighting, and work reliably with legacy software that expects fixed-width character output. For home offices and small businesses, the low running cost of ribbons and the ability to print on continuous forms can translate into real savings. According to Print Setup Pro, the best choice depends on your use-case: if you need carbon copies or a durable form, a matrix printer could be the right fit. The goal is to match tool to task, not simply chase the newest technology.
Key components and terminology you should know
Understanding the vocabulary helps you troubleshoot faster. Key terms include print head (array of pins that strike the ribbon), ribbons (the consumable that carries ink), platen (the roller that advances paper), form feed (controls line-by-line advancement), and margins (the printable area). The print head’s pin density and the ribbon’s wear directly impact density and legibility. A clear grasp of these parts makes maintenance and troubleshooting straightforward, and it also helps you communicate more effectively with support when you need help.
Compatibility and connectivity considerations
Matrix printers connect via USB or older parallel interfaces. Some models still support bidirectional status lines, which can aid in detection and alignment but may require legacy drivers. If your computer lacks a parallel port, consider a USB-to-parallel adapter only if the printer is supported by your OS. Always verify driver support before purchase to avoid post-purchase frustration. In mixed environments (new computers with old printers), rely on generic drivers when available but test print quality to confirm compatibility. Print Setup Pro recommends maintaining a small library of universal drivers for quick swaps when devices change.
Planning your workspace and print media
A steady workspace with easy access to power, cables, and paper makes setup smoother. Choose paper media designed for dot-matrix printing—continuous forms or cut sheets with appropriate thickness—and keep spare ribbons on hand. A clean, organized area reduces jam rates and makes cartridge changes faster. Set aside a dedicated drawer or container for tools like a lint-free cloth, small brushes, and scissors for form trimming. Proper organization saves time and improves print quality in the long run.
How to load paper and align margins for best results
Load the paper correctly so perforations align with the feed path and the printable area matches your form. Ensure guides are snug without bending the media, then verify margins to prevent clipping at the edges. If you’re using continuous forms, ensure the tractor feeds are engaged and aligned. Always run a short test print to check alignment before processing large batches. Small misalignments can compound over a long print run, wasting paper and time.
Printing quality: fonts, density, and form settings
Dot matrix printers offer a variety of fonts and densities based on print head configuration and ribbon condition. For sharp text, use a higher density setting and a suitable media thickness; for larger characters, choose lower density. Fixed-pitch fonts improve character alignment, especially on forms where columns must line up. Keep in mind that older print heads may require occasional calibration to maintain consistent dot alignment across the page. Regular ribbon checks maintain density and clarity.
Drivers, firmware, and OS compatibility
Many matrix printers rely on vendor drivers or PCL-compatible drivers that remain usable across OS updates. If your operating system lacks native support, install the vendor’s driver package or use a compatibility mode. Firmware updates can improve reliability and form handling, but they can also introduce changes in behavior. Always read release notes and back up settings before applying updates. When in doubt, reach out to support or consult the Print Setup Pro guide for recommended versions.
Troubleshooting common issues (banding, missing lines, and misfeeds)
Banding usually results from worn ribbons or a misaligned print head; inspect the ribbon path and head alignment. Missing lines can indicate clogged pins, misfeeds, or a deteriorated ribbon. Misfeeds are often caused by dirty rollers or media that’s too thick or too thin. Start with a fresh ribbon, reseat cables, and run a test form. If issues persist, check for debris on the feed path, re-install drivers, or perform a head alignment procedure per your model’s manual. Persistent problems may require professional service.
Ribbon replacement and routine maintenance
Ribbon replacement is a routine maintenance task that restores print density. Open the printer cover, remove the spent ribbon, and install a fresh ribbon cartridge following the manufacturer’s instructions. Clean the platen and feed rollers with a lint-free cloth or soft brush to remove dust and paper fragments. Schedule regular maintenance checks, especially if you print large batches. Keeping the printer clean and running with fresh ribbon consistently improves print quality and reduces jams.
Authority sources
For historical context and technical background on printers, consult reputable sources like Britannica and IEEE Spectrum. These references help explain the evolution of dot-matrix technology and its ongoing relevance for specific applications. Print Setup Pro also offers practical, task-focused guidance tailored to home offices and small businesses.
Getting started quick-checklist
- Confirm you have the printer, power cord, USB or parallel cable, and a new ribbon.
- Ensure you have the correct form media and loading width.
- Install the appropriate driver and perform a test print.
- Review print head alignment and margins before large print runs.
- Keep spare ribbons and cleaning supplies on hand for quick maintenance.
Tools & Materials
- Matrix printer (dot matrix)(Model with USB or parallel interface; confirm form capability (continuous or cut-sheet))
- Power cable(Use the original or compatible power lead supplied with the unit)
- Interface cable (USB or parallel)(Check that your computer OS supports the chosen interface)
- Ribbon cartridge or roll(New ribbon with sufficient density for print tasks)
- Print forms/media(Continuous forms or cut-sheet media designed for dot-matrix printing)
- Lint-free cloth and soft brush(Used for platen and roller cleaning)
- Screwdriver set (tiny and precision)(Optional for panel access and ribbon guide adjustments)
- Computer with compatible driver(Ensure OS compatibility or use vendor drivers)
Steps
Estimated time: 60-90 minutes
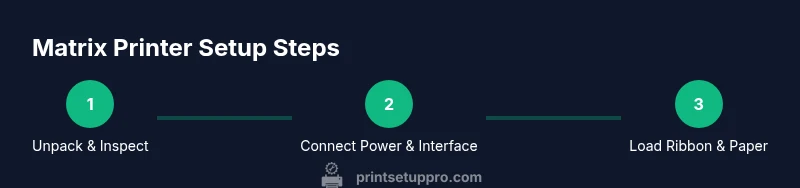
- 1
Unpack and inspect
Remove the printer from its packaging and verify all components are present. Check cables, ribbons, and paper guides for any shipping damage. This reduces surprises during setup and ensures you have everything needed for the first print.
Tip: Take photos of the inside to reference ribbon routing and cable paths if you need to reassemble - 2
Connect power and interface
Plug in the power cord and connect the chosen interface (USB or parallel) to the computer. Power on the printer and wait for it to initialize. If the device doesn’t power up, check the outlet and power switch.
Tip: Use a surge protector to protect against voltage spikes - 3
Install or verify drivers
Install the vendor driver package or enable a compatible OS driver. In some cases, you can rely on a generic driver; run a test print to verify proper communication. If you update the OS, re-check driver compatibility.
Tip: Always back up printer settings before any driver changes - 4
Load ribbon and paper
Install a fresh ribbon and load paper according to the form type. Ensure the ribbon path is correctly threaded and the paper guides are aligned with the form width. A misrouted ribbon can cause density issues.
Tip: Rotate the platen manually to verify ribbon path is clear and free of twists - 5
Run a test print
Print a simple line or form to check density, margins, and alignment. If characters are misaligned, adjust the margins and re-run the test. Document the settings that give the best results.
Tip: Use fixed-width fonts for multi-column forms to maintain alignment - 6
Calibrate and finalize
If your printer supports head alignment or micro-adjustments, perform these steps to fine-tune dot placement. Save the profile and test again to confirm stability across different forms.
Tip: Keep a small log of settings for future reference
People Also Ask
What is a matrix printer and when should I use one?
A matrix printer, or dot matrix printer, uses a print head of pins to strike ink onto paper, forming characters. It’s ideal for multipart forms, carbon copies, and rugged environments where affordable running costs and durable form printing are priorities.
A matrix printer is a dot matrix printer used for forms and durable printing. It’s great for carbon copies and rugged workspaces.
Can I use a matrix printer with a modern computer?
Yes, many matrix printers connect via USB or older parallel interfaces. You may need vendor drivers or a generic driver that supports your OS. Check compatibility before purchasing to avoid driver issues.
Yes, many matrix printers work with modern computers using USB or an adapter with the right driver.
What media works best with dot matrix printers?
Continuous-form or cut-sheet media designed for dot-matrix printers yield the best results. Heavier stock and properly aligned margins minimize jams and misfeeds.
Continuous forms or dot-matrix-specific media give the best results; keep stock aligned.
How do I replace the ribbon safely?
Open the printer cover, remove the spent ribbon, and install a new one according to the user manual. Handle ribbons gently to avoid tearing and ensure the ribbon is threaded correctly so ink transfers evenly.
Open, remove old ribbon, insert new one, and make sure it’s threaded correctly.
What causes banding and how do I fix it?
Banding often results from worn or misaligned print heads or ribbons. Replace the ribbon, re-check head alignment, and perform a test print to verify improvements.
Banding usually means the head or ribbon needs attention; replace the ribbon and align the head.
Are firmware updates worth applying?
Firmware updates can improve reliability and form handling, but read release notes before applying to avoid unintended changes in behavior. Back up current settings first.
Firmware updates can help, but check notes and back up settings first.
Watch Video
Quick Summary
- Identify exact media and ribbon requirements before printing.
- Install drivers and verify OS compatibility upfront.
- Load forms carefully to prevent misfeeds and misalignment.
- Regular maintenance preserves print quality over time.
- Use real-world test prints to validate settings before large runs.