Plotter Machine Setup: A Practical How-To Guide
Learn how to set up a plotter machine, load media, calibrate, and troubleshoot common issues with clear steps and expert tips from Print Setup Pro.

Goal: set up a plotter machine for accurate large-format drawing and cutting. You’ll need a compatible driver, suitable media, and a clean workspace. This guide walks you through loading media, calibration, and basic maintenance to achieve reliable results with your plotter machine.
What is a plotter machine?
A plotter machine is a specialized output device designed to draw precise vector lines or cut materials like vinyl, paper, or film across large formats. Instead of inkjets drawing on paper, a plotter uses pens, blades, or rollers to trace shapes with high precision. According to Print Setup Pro, plotter machines excel in signage, decals, and architectural drawings where straight lines and long runs matter. They are commonly used by hobbyists, small businesses, and schools to create banners, decals, or specialized art. When you choose a plotter machine, you’re investing in repeatable accuracy, robust media handling, and the ability to scale designs without losing sharpness. The Print Setup Pro team notes that understanding your workflow—whether you primarily cut or draw—helps you select the right tool, blades, and media types. In this guide, we’ll cover setup, calibration, troubleshooting, and maintenance so you can get reliable results with your plotter machine every session.
How a plotter machine differs from a standard printer
Plotters are purpose-built for vector graphics and precise material handling, whereas standard printers focus on raster images and full-color ink deposition on paper. Plotters often use interchangeable blades or pens and feature dedicated media feeding systems for vinyl, film, or poster stock. This distinction matters for reliability: a plotter’s alignment, blade offset, and pen width directly impact cut accuracy and line quality. Print Setup Pro emphasizes choosing the right media thickness, adhesive, and blade type to match your project. For DIY enthusiasts, this means selecting a model with compatible blades, good bed clearance, and easy access to calibration tools.
Top features to look for in a plotter machine
When evaluating a plotter machine, key features include: media versatility (vinyl, poster paper, heat-transfer vinyl), cutting force range, pen/knife interchangeability, accurate cutting head alignment, and robust driver software. Look for automatic media detection, edge guides, and a reliable calibration routine. Connectivity options (USB, Ethernet, or Wi-Fi) affect workflow efficiency. Print Setup Pro notes that reliable motor control and repeatable origin settings are essential for long runs and batch jobs. Consider the availability of replacement blades and the ease of firmware updates for ongoing performance.
Preparing your workspace: safety, space, and planning
Set up in a clean, well-lit area with a sturdy table. Clear away clutter to prevent media misfeeds and ensure easy access to power and cables. Use a non-static work surface and keep lint-free towels and cleaning swabs handy for maintenance. Protect sensitive electronics from dust by placing the plotter away from direct sunlight and moisture. A dedicated vent or fan is beneficial if you’re cutting materials that generate fumes or dust. Planning ahead with a clear bin of media, blades, and test sheets will reduce setup time and help you stay organized during calibration and test runs.
Step-by-step calibration and alignment
Step 1: Power on the plotter and mount the media. Step 2: Install the correct blade or pen and confirm the nib height matches the media type. Step 3: Use the plotter’s built-in calibration routine to set origin offsets. Step 4: Run a test pattern to verify alignment and adjust X/Y offsets as needed. Step 5: Fine-tune blade depth and pressure for clean cuts or precise drawing. Step 6: Save calibration profiles for future jobs. Regular calibration helps maintain accuracy across long runs and different media types.
Media loading and alignment for best results
Load media straight, guided by edge guides, and ensure there’s no skew. Use masking tape to secure the media ends to avoid feed slips during long cuts. Remove any protective liners and ensure media width matches the software’s job width. Align the media’s leading edge with the origin marks. For vinyl, ensure the liner is clean and free of dust; for poster stock, check thickness compatibility with the roller system. A well-aligned media path reduces misfeeds and scrap.
Driver setup, color management, and profiles
Install and update the plotter driver from the manufacturer’s site, then configure the software to the printer’s model. Set the media type, thickness, and origin. Create color profiles tailored to the ink or blade system you use, and enable color management to maintain consistent output between screen proofs and the final product. Save profiles for common materials (vinyl, poster, heat-transfer media) to speed up workflows. Print Setup Pro recommends testing profiles on small swatches before committing to a full run.
Common issues and quick fixes
Jams and misfeeds are often caused by dusty media, misaligned guides, or blade depth mismatch. Off-center cuts can result from incorrect origin settings or skewed media. Dry or brittle media can curl and feed poorly; replace with fresh stock. If colors differ between screen proof and print, re-check color profiles and print head alignment. For slow feed rates, verify motor settings and ensure firmware is up to date. Always power down before changing blades or performing deep maintenance.
Maintenance and long-term care for plotter machines
Regularly clean feed rollers and the media path with a lint-free cloth and isopropyl alcohol. Replace blades and nibs as soon as you notice dull edges or tearing. Keep firmware up to date and back up calibration and profile data. Store spare blades in a dry, clean container and shield the plotter from dust when not in use. Implement a weekly quick-clean routine to prevent buildup that can affect accuracy and reliability.
Tools & Materials
- Plotter machine(Model should support your media types and blade options.)
- Power cable(Use a grounded outlet; avoid daisy-chaining with other devices.)
- USB/Ethernet cable or network access(Ensure consistent connection for driver updates and job sending.)
- Computer or laptop with compatible OS(Needed to run drivers, calibrations, and design software.)
- Plotter driver/software(Download from the manufacturer; keep updated.)
- Vinyl, poster stock, or media suited to your plotter(Check media thickness and adhesive rating for your model.)
- Calibration media/test sheets(Used to verify alignment and origin accuracy.)
- Masking tape(Helpful for securing long media runs; optional but recommended.)
- Lint-free cloths(For cleaning media path and rollers.)
- Isopropyl alcohol (70%+)(Use to remove dust and residue from rollers and nibs.)
- Spare blades or pen nibs(Keep as backups for quick swaps.)
- Ruler or straightedge(Assist with manual alignment checks.)
- Protective gloves and safety glasses(Recommended for blade handling and maintenance.)
Steps
Estimated time: 30-60 minutes
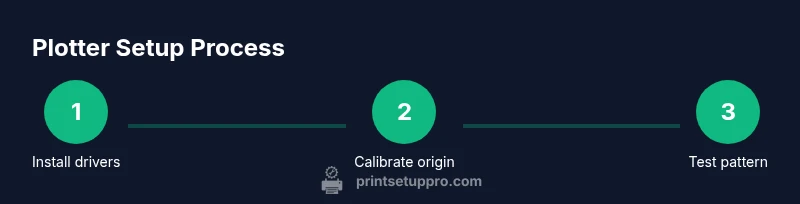
- 1
Install drivers and software
Download and install the latest plotter driver and companion software. Follow the on-screen prompts to complete the setup, then restart the computer if prompted. This ensures the device can communicate correctly with your design tools.
Tip: Verify compatibility with your OS and verify driver version against the plotter model. - 2
Connect power and boot
Plug in the plotter, power it on, and allow the startup routine to complete. Confirm all status indicators are normal before proceeding to load media.
Tip: Use a grounded outlet and avoid power strips with multiple high-draw devices. - 3
Load media and guides
Place the media on the feed path, align it with the edge guides, and secure ends with masking tape if needed. Ensure media is flat and wrinkle-free to prevent feed skew.
Tip: Use media type settings that match your stock to avoid feed pressure errors. - 4
Calibrate origin and blade/pen offset
Run the plotter’s calibration routine to set the origin and offset for the blade or pen. Adjust any detected misalignments until test patterns align with the expected start points.
Tip: Record your calibration values for future jobs to speed up repeat setups. - 5
Run a test pattern
Send a small test pattern to verify cutting/drawing accuracy. Review results for any drift, skew, or misalignment and re-run calibration if needed.
Tip: Use a simple pattern (rectangles and lines) before complex designs. - 6
Configure software print settings
Within your design software, set the correct media type, cutting force, and origin. Choose appropriate color profiles if your workflow requires color accuracy.
Tip: Create and save profiles for common media to speed up future jobs. - 7
Perform a full job test
Create a small, representative job (e.g., a decal or simple drawing) and run it end-to-end. Confirm alignment, cut quality, and any post-processing steps.
Tip: Document any issues and adjust settings before scaling up to larger runs. - 8
Save profiles and establish maintenance
Store calibration data, profiles, and workflow steps for reuse. Schedule a routine cleaning of rollers and path, and replace blades as needed.
Tip: Set reminders for periodic maintenance to extend the plotter’s life.
People Also Ask
What is a plotter machine and what is it used for?
A plotter machine draws or cuts precise vector lines on large-format media such as vinyl or poster stock. It is commonly used for signage, decals, and architectural drawings where long, accurate cuts or lines are needed.
A plotter machine draws or cuts precise vector lines on large media, perfect for signs and decals.
What media can I use with a plotter machine?
Plotters handle vinyl, heat-transfer sheets, poster paper, and similar stock. Check the device’s media thickness limits and adhesive compatibility to prevent jams.
Plotters work with vinyl and similar media; check thickness and adhesive.
How do I calibrate a plotter machine?
Use the built-in calibration routine to set origin offsets and blade/pen alignment. Run test patterns and adjust values until the output matches the expected start points.
Run the calibration routine and adjust offsets until it aligns with your start points.
Why is my plotter skipping media or producing jagged lines?
Common causes are misaligned media guides, dull blades, or incorrect feed settings. Clean the media path, replace blades if needed, and verify profile settings for the material.
Jams usually come from misaligned guides or dull blades; clean and adjust.
Can I use a plotter for vinyl cutting and drawing in one workflow?
Yes. Many plotters support both blades and pens; switch heads as needed and ensure your software profiles reflect the chosen tool.
You can switch between blade and pen for combined work; set profiles accordingly.
How often should I maintain a plotter machine?
Perform a quick weekly clean of rollers and inspect blades. Do deeper maintenance every few months or after long production runs.
Clean weekly and do deeper maintenance every few months.
Watch Video
Quick Summary
- Identify your plotter machine’s media needs and workflow.
- Calibrate origin, blade/pen offset, and test with patterns.
- Use aligned media and appropriate profiles for consistent output.
- Regular maintenance extends plotter life and reliability.
- The Print Setup Pro team recommends integrating a routine maintenance schedule.