Printer 11x17: Setup, Troubleshooting, and Best Practices
A complete, practical guide to setting up and troubleshooting printer 11x17 for home offices, small businesses, and students. Includes media loading, driver setup, alignment, calibration, and common issues with step-by-step instructions.

In this guide you will learn how to set up a printer 11x17 for reliable, high-quality prints, including media loading, driver installation, page size configuration, and basic troubleshooting. You’ll find practical steps, recommended tools, and tips to prevent jams and misalignment for everyday use.
Understanding 11x17 Printing: Why It Matters
In the home office, classroom, or small business, printing on 11x17 media (also called tabloid) expands your design canvas for posters, diagrams, architectural drawings, and large presentations. When you use a printer 11x17, you gain more real estate per page, which can reduce the need for tiling or multiple passes for large projects. This is especially valuable for quick prototypes, proof prints, and marketing materials. The Print Setup Pro team emphasizes that simply having a printer capable of 11x17 is not enough; you must optimize loading, driver settings, and media type to achieve consistent results. Start by confirming your model supports 11x17 media in its paper options and that the tray or feeder is compatible with tabloid-sized stock. Small misconfigurations—like selecting a standard letter size in the driver or using an incompatible paper weight—are the most common causes of jams and misfeeds. As you begin, document your printer’s capabilities and recommended media weights so you can reference them for future projects. This foundation helps you scale up printing tasks without sacrificing quality or reliability, whether you’re producing client handouts, class handouts, or large-format drafts. The goal is predictable output every time, with margins and orientation that suit your design. For many users, the move to 11x17 means rethinking layout and margins, not just increasing sheet size. Print Setup Pro’s analysis shows that aligning expectations with device capabilities leads to smoother workflows and fewer surprises during production.
Choosing Features that Support 11x17 Printing
A printer that performs well with 11x17 media typically offers several key features: a dedicated 11x17/ledger tray or a capable rear feeder, robust paper handling with adjustable guides, and driver settings that clearly expose 11x17 as a selectable paper size. Look for color managed workflows if you work with presentations or marketing materials, as accurate color reproduction becomes more critical on larger sheets. Consider built-in scan and copy capabilities only if you frequently reproduce larger documents; otherwise, a dedicated printer for 11x17 may be more cost-effective. Connectivity matters too—USB, Wi‑Fi, and Ethernet enable flexible workflows across devices. In practice, a reliable 11x17 printer should felt-solid when loading heavier stock and maintain consistent margins across multiple pages. We also recommend checking for ICC profiles from the manufacturer for common media weights, as using the right profile helps maintain color accuracy. Print Setup Pro notes that choosing a model with an intuitive control panel and clear status indicators speeds up troubleshooting when jams or misfeeds occur.
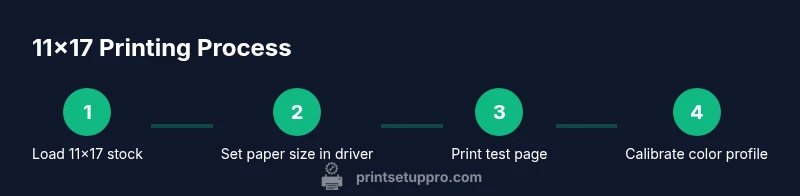
Setting Up Your Printer 11x17: Step-by-Step
Setting up for 11x17 printing begins with confirming media support and connecting the printer to your computer or network. Ensure the 11x17 tray is correctly installed or that the optional feeder is attached, then power on the device and let it initialize. Install or update the printer drivers to the latest version from the manufacturer’s site, as this ensures optimal compatibility with your operating system and improves recognition of 11x17 sizes in the print dialog. Once drivers are installed, open the printer preferences and select 11x17 as the default paper size. This reduces errors when printing from different apps. If you’re using a color printer, align color profiles to your media weight to preserve consistent hues across pages. Finally, print a test page to verify margins, alignment, and overall print quality. Print Setup Pro recommends saving your preferred settings as a profile to make future jobs faster and more predictable.
Loading and Handling 11x17 Paper Properly
Efficient handling of 11x17 stock starts with preparing the paper correctly. Fan the sheets to prevent sticking, then slide them into the tray with the top edge feeding first. If your model uses a rear feed, ensure the paper guides are snug without bending the media. Check that you’re using media weight appropriate for your printer’s capabilities; thicker stock may require slower print speeds and a different transfer setting. Always verify that the paper is loaded in a clean, dry environment to avoid moisture-related issues. When printing a critical job, run a short test on a similar sheet to confirm that margins and bleed align with the design. Print Setup Pro emphasizes using the right tray setting (tray 2 or rear feeder) for 11x17 to minimize feeding mismatches. If you notice frequent jams, double-check that the media thickness setting in the driver matches your stock and that the tray is not overfilled.
Alignment, Margins, and Page Layout for 11x17
Proper alignment is essential on large sheets because small misalignments become more noticeable. Start with a printer off, then carefully calibrate the print alignment in the driver or via the printer’s control panel. Use a calibration page or a known layout test sheet to verify edge-to-edge accuracy. Set generous margins if your design relies on border space, and verify bleed requirements for your project—bleed ensures color extends to the edge after trimming. If your output appears skewed or tilted, run a quick alignment test and adjust the feed mechanism or platen alignment as directed in your user manual. Save the final alignment as a user profile for repeatability. Print Setup Pro suggests that repeatable margins come from consistent paper loading, accurate tray settings, and using printer-provided alignment tools rather than ad-hoc tweaks.
Color Calibration and Print Quality on 11x17
Color calibration becomes more critical at larger sizes because even small deviations are magnified. Begin with the printer’s built-in calibration routine and compare to a color target or swatch library. If you’re working with brand colors, use ICC profiles supplied by the media manufacturer or the printer vendor to maintain consistency across devices. For photos or marketing materials, you may want to adjust contrast, brightness, and saturation in your application before printing, then fine-tune in the driver as needed. Be mindful of paper stock; different weights and finishes (matte vs. glossy) interact with ink density, drying time, and gloss differential. Print Setup Pro notes that a simple print test run on the same stock offers a practical way to establish a reliable baseline before running large batches. Record the final color settings for future jobs to ensure consistent results.
Troubleshooting Common 11x17 Printing Issues
Jams often occur when the stock weight or finish is incompatible with the tray’s gutter clearance or the roller tension. If you experience frequent feeding issues, clean the rollers as directed by the manufacturer and verify that the guides are properly aligned with the paper edges. Misalignment or skewed printing can stem from an uncalibrated feeder, a worn belt, or incorrect print settings. Check that the 11x17 media size is selected in both the driver and the software you’re printing from; inconsistent settings across applications are a common source of trouble. If color prints appear washed out, ensure the correct color profile is active and that no color management settings are forcing a lower gamut. When all else fails, restarting the printer and driver can clear stubborn cache issues. Print Setup Pro recommends maintaining a runbook of common fixes to accelerate resolution.
Maintenance, Cleaning, and Long-Term Care
Regular maintenance is essential for consistent 11x17 performance. Periodically clean paper paths, feed rollers, and the platen to prevent dust buildup that can affect print quality. Replace consumables like fuser or maintenance kits per the manufacturer’s recommended cycle, not on a fixed schedule alone, to avoid unnecessary replacements. Use recommended cleaning agents and non-abrasive tools to avoid damaging sensors or rollers. Keep the printer in a clean, dry environment away from direct sunlight, which can warp media and affect color. Regularly check for firmware updates and install them to improve compatibility with new media types and larger formats. Print Setup Pro emphasizes documenting every maintenance action to build a reliable history of device health and to facilitate troubleshooting when issues arise.
Verifying Results and Optimizing for Consistency
After completing setup and initial prints, compare multiple pages to ensure consistency across the batch. Look for uniform density, even margins, and predictable color across all sheets. If inconsistencies appear, revisit the driver’s color management settings, confirm media weight, and run another calibration cycle. Establish a simple workflow: load media, select 11x17 as the paper size, print a small proof, adjust as needed, then run the full job with a saved profile. Efficient processes reduce waste and improve turnaround time for frequent 11x17 projects. The Print Setup Pro team believes that a disciplined approach to setup and calibration translates into measurable gains in print reliability and satisfaction across home and office environments.
Tools & Materials
- Printer that supports 11x17 media(Check manufacturer specs for tray size and feed options)
- 11x17 (ledger/tabloid) paper stock(Choose appropriate weight and finish for your project)
- USB or network connectivity(Ensure reliable connection between computer and printer)
- Computer with updated printer drivers(Download drivers from the official vendor site)
- ICC profiles or color management tools(Helpful for color-accurate prints on specific media)
- Cleaning kit for rollers and feed path(Use manufacturer-approved cleaning supplies)
- Calibrated color target or swatch book(Facilitates accurate color calibration)
- Printer maintenance manual or quick-start guide(Reference for model-specific steps)
Steps
Estimated time: 25-40 minutes
- 1
Unpack and verify 11x17 compatibility
Unbox the printer and confirm that it supports 11x17 media. Inspect trays and feeders for any packaging remnants. This step prevents misfeeds caused by incompatible stock or obstructed paths.
Tip: Read the user manual’s media section to confirm weight and finish compatibility. - 2
Connect and power on the printer
Connect the printer to your computer or network and turn it on. Allow the device to complete its boot-up routine and run any initial printer alignment checks if prompted.
Tip: Do not unplug during startup to avoid incomplete initialization. - 3
Install or update drivers
Install the latest drivers from the manufacturer’s site or your OS vendor. This ensures 11x17 is recognized correctly and enables proper color management.
Tip: Restart after installation to ensure the OS recognizes the new drivers. - 4
Load 11x17 media into the correct tray
Place the stock in the appropriate tray or feeder, aligning guides to the paper edges. Ensure sheets are fan-ded to prevent multi-page feeding issues.
Tip: Avoid overfilling the tray; keep a clean, even stack for consistent feeding. - 5
Set 11x17 as the default paper size in the driver
Open printer properties and select 11x17 as the default. This reduces errors when printing from different apps.
Tip: If you print from multiple programs, set 11x17 as the default in each relevant app’s print dialog too. - 6
Print a test page and inspect margins
Print a single-page test to verify margins, orientation, and alignment. Adjust as needed before running a full batch.
Tip: Use a known layout test page to compare against expected results. - 7
Calibrate color if needed
Run a color calibration using built-in printer tools or ICC profiles for your media. Compare against a target to ensure color accuracy.
Tip: Always calibrate with the same stock and settings you plan to use for production. - 8
Save your settings as a profile
Create and save a print profile for 11x17 with your chosen media and color settings. This makes future jobs repeatable.
Tip: Give the profile a clear name indicating media weight and finish.
People Also Ask
Is 11x17 printing compatible with all home printers?
Not all home printers support 11x17; check the model specifications for paper size compatibility and tray availability. If supported, ensure you select 11x17 in the driver settings and the software print dialog before printing.
Most home printers don’t support 11x17 by default. Check your model's specs and set the paper size to 11x17 in the driver and the app before you print.
How do I load 11x17 paper correctly?
Fan the sheets and place them into the correct tray with guides snug against the stack. Avoid overfilling and ensure the top edge feeds first if the tray supports it.
Fan the stack, align the guides, and feed with the top edge first if your tray supports it.
Can I print 11x17 on a standard inkjet or laser printer?
Some printers offer 11x17 support, typically through a specialty tray or rear feeder. If your device advertises Tabloid or Ledger as a size option, you can print on 11x17; otherwise, you may need a larger-format model.
Only printers that explicitly support 11x17 or Tabloid sizes can print this format; otherwise use a dedicated wide-format option.
Why is my 11x17 print cropped or misaligned?
Misalignment often stems from incorrect margins, a skewed feeder, or mismatched printer profiles. Calibrate the alignment and verify that the margins and bleed settings match your design.
Cropping usually happens due to misalignment or wrong margins; recalibrate and ensure bleed settings align with your design.
How do I calibrate color for 11x17 printing?
Use the printer’s built‑in calibration tools or ICC profiles for your media. Print a color target and compare to ensure color accuracy, then adjust as needed.
Run calibration with the right ICC profiles and compare to a target to ensure accurate colors.
What maintenance helps prevent 11x17 jams?
Regularly clean feed rollers and paper paths, check for worn components, and use media within the printer’s recommended weight range. Keep trays properly aligned and avoid forcing non‑recommended media.
Keep rollers clean, check for worn parts, and avoid feeding unapproved media to prevent jams.
Watch Video
Quick Summary
- Verify 11x17 compatibility before setup.
- Load media correctly and select the right paper size in all drivers.
- Run a test print to confirm margins and alignment.
- Calibrate color with appropriate profiles for best results.
- Save a reusable 11x17 print profile for consistency.