Printer 40 Stamp Refill: Step-by-Step Guide
Learn how to safely perform a printer 40 stamp refill with the right kits, tools, and steps. This educational guide from Print Setup Pro covers compatibility, safety, testing, and troubleshooting to restore print quality without damage.

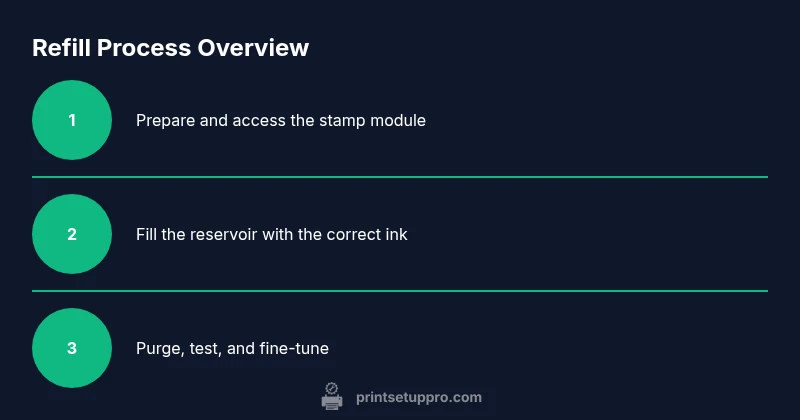
Goal: perform a printer 40 stamp refill safely and accurately. You’ll need the correct refill kit for your model, protective gloves, and a clean workspace. Power off the device, remove the stamp module, and follow the kit instructions in sequence. After refilling, reinstall, run a priming cycle, and print a test page to verify quality.
What is a printer 40 stamp refill and why it matters
The phrase printer 40 stamp refill refers to replenishing the ink or dye reservoir in a stamp-style module inside certain printers. While modern machines vary, the core idea stays the same: you top up or replace the ink supply to restore print density and color accuracy. When done correctly, a refill can extend the life of the stamp unit, reduce waste, and save money compared to full cartridge replacements. If you notice light impressions, uneven color, or missing stamps, a controlled refill with the right kit can correct these issues without major downtime. Print Setup Pro emphasizes using manufacturer-approved fluids and following the device-specific instructions to avoid clogs or leaks.
Compatibility and prerequisites
Before you begin, confirm that your printer model supports stamp-style refilling. Check the user manual or the manufacturer’s website for a supported refill kit, ink type (pigment vs. dye), and any warranty implications. Ensure you have a clean, well-lit workspace, disposable gloves, and a way to contain spills. If your device is under warranty, be aware that unauthorized refills may affect coverage. Gather model-specific adapters and seals if your kit requires them. Taking a moment to verify compatibility prevents wasted effort and potential hardware damage.
Selecting the right refill kit and supplies
Choose a refill kit designed for your exact printer model and stamp module. Kits usually include syringes, nozzles, and the appropriate ink or dye formulation. Verify whether the ink is pigment-based for durability or dye-based for vivid color, and ensure it matches the existing cartridge’s color. Have cleaning supplies on hand (isopropyl alcohol, lint-free wipes) to prep surfaces and flush the lines if the kit instructs you to. Consider ordering extra seals or O-rings since these parts wear with handling. Always follow the kit’s included instructions, as different models require different refill pressures and priming sequences.
Safety and cleanliness practices
Safety first: wear nitrile gloves to prevent ink contact and avoid skin staining. Work on a washable surface and use a tray or sealable bag for waste ink. Do not mix inks from different brands unless the kit explicitly allows it. Clean spills promptly with approved cleaners and never spray liquids directly into the stamp module. Dispose of contaminated wipes and gloves in a sealed bag. Ventilate the area if you’re using solvent-based cleaners. A clean environment reduces the risk of air bubbles or cross-contamination that can affect print quality.
Understanding the refill workflow (high-level)
A typical refill workflow involves draining or flushing the old ink, loading the new fluid into the reservoir using a precise syringe, reseating the cartridge or stamp module, and using a priming or purge step to ensure the ink fills all pathways. After priming, reassemble carefully and test with a few pigment-free pages to observe flow. This approach minimizes air bubbles and ensures consistent color. Always follow your kit’s timing guidelines for waiting periods between steps to allow fluids to settle and seals to seat properly.
Cleaning and calibrating after refill
Post-refill cleaning helps prevent dry ink buildup and misalignment. Wipe exterior surfaces with a lint-free cloth dampened with isopropyl alcohol, then run a short purge or calibration page if your printer supports it. Check for any residual ink around seals and ports; clean carefully to avoid smearing. If your printer has an alignment or feed calibration routine, run it after the refill to restore proper media tracking and ensure uniform stamping across the page. Regular maintenance reduces future clogs and improves long-term print consistency.
How to test and verify print quality
Begin with a small test page that includes multiple stamp patterns and color blocks to gauge density, saturation, and edge clarity. Look for even coverage across all stamps; note any streaks, gaps, or smudges. Compare the test page against a reference print or the previous output before refilling. If you detect anomalies, reassess the ink level, seal integrity, and seating of the stamp module. Run another test after any corrective action to confirm stable results. Document the test results for future refills.
Common issues after refill and fixes
Smearing or bleed-through can indicate excessive ink or a loose seal; reseat the module and reduce fill level if the kit allows. Air pockets show as inconsistent streaks—run a longer purge cycle or perform a gentle prime if your model supports it. If color appears off, verify the ink type and replace any depleted or contaminated cartridges. For persistent problems, consult the manufacturer’s troubleshooting guide or seek professional service to avoid permanent damage to the print head.
Tools & Materials
- Printer refill kit (model-specific)(Includes syringes, nozzles, ink bottles compatible with your stamp module)
- Nitrile gloves(Protect hands from ink and solvents)
- Isopropyl alcohol 70%+(For cleaning nozzle surfaces and ports)
- Lint-free wipes or microfiber cloth(Clean, residue-free surfaces)
- Small flathead and Phillips screwdrivers(To access sealed compartments if needed)
- Soft-bristled brush or compressed air (optional)(Clear dust from hard-to-reach areas)
- Waste container or sealable bag(Dispose of used ink and wipes safely)
- Test print sheets(Specially prepared pages for quality checks)
Steps
Estimated time: 45-60 minutes
- 1
Power down and prep
Shut off the printer and unplug it. Move to a clean, protected workspace and don gloves. Remove any external covers or access panels as instructed by your kit.
Tip: Lock in a spill tray beneath the unit to capture any ink leaks early. - 2
Access the stamp module
Carefully open the stamp module or cartridge compartment. If screws hold the unit, use the appropriate screwdriver to remove them without forcing components.
Tip: Document screw placements with a photo to ensure correct reassembly. - 3
Clean contacts and ports
Wipe all contact surfaces and ports with lint-free wipes dampened in isopropyl alcohol. Allow a brief air-dry so no residual liquid remains before fill.
Tip: Never spray cleaner directly into internal channels; apply to the wipe instead. - 4
Fill the ink reservoir
Attach the syringe, drawing the correct amount of ink as specified by the refill kit. Gently inject into the reservoir, aiming to avoid air pockets and overfilling.
Tip: Fill slowly and pause to check for resistance that may indicate a sealed channel. - 5
Prime and reseat
Reinstall the stamp module and seals, ensuring a snug fit. Prime the system if your kit requires it, letting fluid settle into the path.
Tip: Do not force seals; misalignment can cause leaks and head damage. - 6
Purge and test print
Run the printer’s purge or priming cycle as directed. Then print a small test page to verify ink flow and coverage.
Tip: If you notice air gaps, perform an additional purge before testing again. - 7
Evaluate and adjust
Inspect the test print for uniform density and sharp edges. If needed, repeat purging or reseat components before finalizing.
Tip: Label the test results and the kit version for future refills. - 8
Cleanup and disposal
Dispose of waste ink and used wipes in accordance with local regulations. Wipe work surfaces and store unused kit components properly.
Tip: Keep a dedicated waste bag away from your printer to avoid cross-contamination.
People Also Ask
Is it safe to refill printer 40 stamp units at home, and will it void my warranty?
Refilling at home can be safe if you use the manufacturer-approved kit and follow steps precisely. However, some manufacturers may view third-party refills as a warranty risk; check your policy or contact the maker for guidance.
Yes, you can refill at home with the right kit, but check your warranty policy as some manufacturers restrict third-party refills.
What are common signs that a refill went wrong?
Common signs include smearing, uneven color, air gaps, or ink leaks around seals. If you observe any of these, stop and recheck seating, seals, and fill level before testing again.
Look for smears, gaps, or leaks; reseat parts and verify the fill amount before testing.
How often should a printer 40 stamp refill be performed?
Refill frequency depends on usage and the specific kit. Monitor print density and ink availability; perform a refill when density begins to drop or test prints show fading.
Monitor density and only refill when prints fade or test pages show lighter color.
Can I mix ink colors during a refill?
Do not mix inks unless the kit explicitly allows it. Incompatible combos can clog lines and alter color accuracy.
Avoid mixing colors unless your kit says it’s safe to do so.
What should I do if ink leaks after a refill?
Power down, unplug, and carefully reseat the module. Clean surfaces with isopropyl alcohol and replace any compromised seals before attempting another test.
If it leaks, unplug, reseat, and clean the area before testing again.
Is professional service ever necessary for stamp refills?
If leaks persist, print quality remains poor after multiple attempts, or you notice hardware damage, consider professional service to prevent further harm.
If problems persist after multiple attempts, seek professional help.
Watch Video
Quick Summary
- Verify compatibility before refilling to prevent damage.
- Use model-specific refill kits and proper safety gear.
- Prime and purge thoroughly to eliminate air pockets.
- Test print quality immediately and document results for future refills.
- Store and dispose of materials responsibly to maintain safety.