Printer Settings: A Practical Guide to Better Prints
Learn practical printer settings to improve print quality, save ink, and reduce paper jams. This guide covers common options, how to adjust them, and when to reset defaults for home offices, students, and small businesses.

This guide helps you adjust printer settings to match each task—text, photos, or labels—quickly and effectively. You’ll learn which options matter, how to access them on Windows and macOS, and how to save custom presets for consistent results. Follow the steps below to improve clarity, color accuracy, and ink efficiency with smart, repeatable changes.
What are printer settings and why they matter
Printer settings control how output looks and how efficiently ink or toner is used. From paper size to color management, these options determine sharpness, margins, and overall readability. For home offices, consistent printer settings save time and reduce waste. According to Print Setup Pro, understanding printer settings is the first step to reliable output and predictable results. The Print Setup Pro team found that most print quality issues stem from mismatched settings rather than hardware faults. In this section you’ll learn the core concepts and how to approach them methodically. When you approach a new print job, start with the basics: paper size, media type, and print quality, then tailor advanced options for the task at hand. This disciplined approach keeps outputs consistent across devices and tasks, from invoices to photos.
Core printer settings you should know
The most impactful printer settings live in the print dialog and the printer driver. Understanding these options helps you optimize for clarity, color accuracy, and paper economy. Key settings include paper size and type, print quality, color mode, and margins. You’ll also encounter scaling, orientation, duplexing, and the choice of the output tray. While it’s tempting to leave everything at the default, a quick pass through these controls can dramatically improve results. Printer settings influence every job, from simple text documents to high-resolution photos. For consistent results, develop a small checklist of the settings you use most often and save it as a preset in your printer driver or app. This reduces drift between prints and makes your workflow faster. Print Setup Pro emphasizes documenting which presets you rely on for each task to ensure easy replication across workstations.
How to access and adjust common settings
You’ll adjust most printer settings through the Print dialog. On Windows, press Ctrl+P in the document, select Preferences or Properties, and explore Paper, Quality, and Color tabs. On macOS, choose File > Print, then use the Settings pop-up to adjust Layout, Paper Type, and Color. If your printer supports presets, save a named configuration (e.g., Text-Draft, Photo-High) to apply it with a single click. Pro tip: always run a test page after changing any major option, especially when switching media or color profiles. If you print from apps like Google Docs or Microsoft Word, check whether the app’s own print settings override the driver defaults and adjust accordingly. For tricky media like envelopes or label sheets, preview the margins in the print dialog to avoid clipping.
Troubleshooting common print issues
If prints look faded or washed out, the issue is often ink/toner levels or the color profile. Check that you are not in Economy/Draft mode and verify the selected color profile matches your media. Color shifts can occur if you switch paper type without adjusting Color or Photo settings. Banding, streaks, or unresolved lines usually mean the print head needs cleaning or a nozzle check. Ensure the device is not using low-resolution settings for high-detail images. Margins that appear cropped typically result from 'fit to page' scaling or non-default paper size. Finally, if jams occur after changing settings, revert to a known-good preset or restore defaults before reattempting with the correct media type.
Optimizing for different tasks
Different jobs demand different combinations of printer settings. For text documents, choose a crisp black-and-white mode, normal or high-quality text, and standard margins to maximize legibility while conserving ink. For photos, switch to a color mode with higher resolution (DPI), choose premium media, and consider using a color-managed profile calibrated for your printer. Label printing requires accurate margins and a slightly smaller scale to avoid cutting off text. When printing on envelopes or unusual media, use the correct media type, enable borderless (if supported), and run a test sheet first. If you regularly print a mix of tasks, create at least three presets—Text, Photo, and Label—and switch between them as needed. Print Setup Pro notes that calibrating color profiles after media changes yields the most consistent results.
Saving presets and workflow boosts
Presets save you from repeating the same settings for every job. After configuring Paper Size, Paper Type, Color, and Quality, save the configuration under a descriptive name (e.g., Text-HighRes). You can typically save multiple presets within the printer driver or your OS print dialog. Using presets reduces human error, speeds up your print workflow, and makes it easier to standardize outputs across devices. Keep a small digital log of which preset works best for each task and update them if you install new media or adjust a driver update. Print Setup Pro recommends validating presets with a quick test page whenever you install new media or update firmware.
Maintenance and best practices
Printer settings are only part of the story—maintenance keeps the output consistent. Regularly perform nozzle cleanings and alignment checks as described in your user manual. Keep drivers up to date, especially after firmware releases, to ensure the driver’s interpretation of settings remains accurate. Use high-quality media that matches your printer’s recommendations, and avoid mixing brands for critical jobs. Store presets and profile files in a dedicated folder for easy backup. Finally, if you notice persistent discrepancies, document the scenario (media, settings, firmware version) and consult the printer’s support resources or community forums for calibration tips.
Tools & Materials
- Printer(Ensure it is powered on and connected to your computer or network)
- Computer or mobile device(With access to printer drivers or a print app)
- USB cable or network connection(Wired or wireless setup for initial configuration)
- Printer paper (various sizes and types)(Use recommended media for the task)
- Replacement ink/toner cartridges(Keep on hand to avoid mid-task shortages)
- Updated printer drivers/software(Check for firmware and driver updates regularly)
Steps
Estimated time: 15-30 minutes
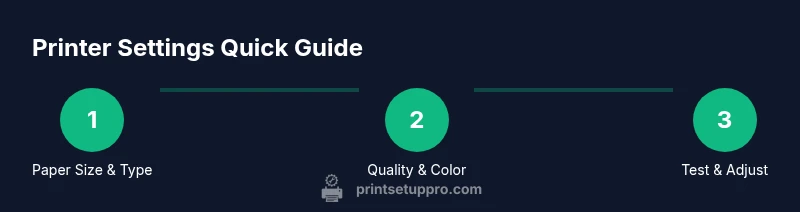
- 1
Prepare workspace and materials
Clear your workspace, gather media, and ensure the printer is plugged in and connected. Confirm you have the correct paper type and the printer is not in an error state before proceeding.
Tip: Have a spare blank page for quick test prints. - 2
Open the Print dialog and select a preset
Open your document and trigger the print command (Ctrl+P or Cmd+P). Choose a suitable preset or device-specific preferences to start from a known baseline.
Tip: If you don’t have a preset, start with Text or Standard Quality to test basics. - 3
Set paper size, type, and print quality
In the printer properties, select the correct paper size and media type. Choose an appropriate print quality for the task (e.g., Normal text, Photo High).
Tip: Match the profile to the actual media for best results. - 4
Preview margins and scaling
Review the preview to ensure margins aren’t cropped and that the content fits the page. Avoid 'Fit to Page' for precise layouts unless needed.
Tip: Use Actual Size to verify margins before printing a full page. - 5
Print a test page and evaluate
Print a single test page that includes text, color blocks, and a photo segment if applicable. Inspect for alignment, color accuracy, and density.
Tip: If colors look off, adjust the color profile and retry with the same media. - 6
Save presets for future tasks
Once satisfied, save the configuration under a clear name (Text-HighRes, Photo-Standard, etc.). This creates a repeatable workflow.
Tip: Document which preset works best for each media type.
People Also Ask
What are printer settings and why do they matter?
Printer settings are the options in the print dialog and printer driver that control output, ink usage, and margins. They determine how text, images, and colors render on paper.
Printer settings control output quality and ink use, shaping text sharpness, colors, and margins.
How do I access printer settings on Windows?
Open the Print dialog with Ctrl+P and select Preferences or Properties to adjust Paper, Quality, and Color tabs.
In Windows, press Ctrl+P, then Preferences to adjust your settings.
How do I access printer settings on macOS?
In macOS, choose File > Print, then use the Settings to adjust Layout, Paper Type, and Color. Save presets if available.
On a Mac, use the Print dialog to adjust settings and save presets.
How can I reset printer settings to default?
Use Restore Defaults in the printer driver or app, then reconfigure the needed options for your task.
To reset, restore defaults in the printer driver and reconfigure as needed.
Why are colors off after changing settings?
Color issues often come from color profiles or wrong paper/media selections. Recheck Color/Photo settings and select a suitable profile for the media.
Color shifts usually come from color profiles or media type mismatches.
What is the best practice for testing prints?
Always print a test page that includes text, color blocks, and a sample image to check margins, density, and color balance.
Always start with a test page to verify all aspects before a final print.
Watch Video
Quick Summary
- Master core settings (paper, quality, color) for each task
- Use presets to quick-switch between common workflows
- Always test with a sample page before a full print job
- Keep drivers and media profiles up to date