Program Printer Brother: Step-by-Step Setup and Troubleshooting
A complete guide to program a Brother printer for reliable wireless setup, driver installation, and ongoing maintenance. Learn step-by-step methods, common pitfalls, and tips from Print Setup Pro to keep your printer running smoothly.

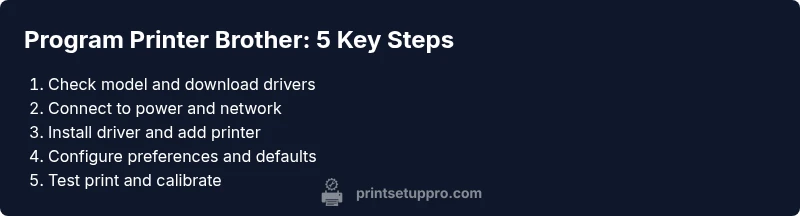
In this guide you will program a Brother printer for reliable wireless and USB printing, covering driver installation, network configuration, and basic maintenance. You’ll learn how to choose the right connection, install official drivers, add the printer to your devices, and verify everything with a test page. By following these steps, home offices, students, and small businesses can achieve a stable, repeatable setup.
What does it mean to program a Brother printer?
Programming a Brother printer means configuring the device so it communicates correctly with your computer, laptop, tablet, or mobile phone. You tailor drivers, network settings, print defaults, and firmware updates to ensure reliable, predictable output. This Process is essential whether you print over USB, Wi-Fi, or an ecosystem of cloud apps. According to Print Setup Pro, clear, structured guidance reduces friction and speeds up the path from unbox to ready-to-print. For home offices, students, and DIY enthusiasts, a well-planned setup translates into fewer jams, fewer errors, and faster print times. The goal is consistency across devices and applications, so every job looks the same no matter where you print from.
Preparing for success: model, drivers, and network basics
Before you start, identify your Brother printer model and check its support resources. Download the official driver package that matches your operating system (Windows or macOS) and the exact model. If you’re wiring the printer, have the USB cable handy; for wireless setups, confirm your home or office Wi-Fi network name (SSID) and password. This preparation minimizes interruptions during installation and helps you avoid driver conflicts. Print Setup Pro recommends pairing the right driver with the right model to prevent mysterious print errors down the line.
Why network choice matters: USB vs Wi‑Fi vs Ethernet
Choosing the right connection impacts how you print and manage the device. USB is straightforward and isolates the printer from network issues, but it limits sharing. Wi‑Fi or Ethernet enables multi-user access and mobile printing, yet requires correct network configuration. In practice, many users start with a USB connection for driver installation, then switch to Wi‑Fi for shared usage. Understanding these options helps you plan a scalable setup from day one.
Driver installation and software integration: step-by-step overview
Installing the official Brother drivers ensures proper communication with your PC, Mac, or mobile device. Use the driver package that corresponds to your OS and printer model, then follow on-screen prompts to complete the installation. You may be asked to install additional utilities that facilitate printer management, firmware checks, and print queues. After installation, test a print job to confirm the device responds to commands and media settings align with your paper and ink/toner configurations.
Adding the printer to devices: Windows, macOS, and mobile printing
Adding the printer to your devices is a two-part process: the host (your computer or phone) must recognize the printer and the printer must recognize the host. On Windows, you typically add a printer via Settings > Devices > Printers & scanners. On macOS, go to System Preferences > Printers & Scanners. For mobile printing, install the Brother app or use built-in print services, ensuring permissions and network access are granted. Once added, designate defaults for paper size, print quality, and color settings as needed.
Testing, calibration, and ongoing maintenance: keep it reliable
Print a test page to verify alignment, margins, and color accuracy. If something looks off, run the printer’s calibration tools or adjust margins and print density in the driver. Schedule firmware checks and driver updates to maintain compatibility with new OS versions and apps. Regular maintenance includes cleaning print heads (as per the model’s manual), updating drivers, and saving a quick configuration page for reference.
Recap of practical tips and common pitfalls
Be mindful of model-specific steps and always use official Brother software to avoid counterfeit or corrupted drivers. Keep a record of your network credentials and printer IP address for future troubleshooting. Finally, avoid attempting firmware updates when your connection is unstable to prevent partial installations that can leave the printer in a non-functional state.
Tools & Materials
- Computer or mobile device with internet access(OS-aware; Windows/macOS for desktop, iOS/Android for mobile)
- Official Brother driver and software package(Download from Brother support site matching model)
- Brother printer power cable(Ensure a steady power source)
- USB cable (optional, for initial USB setup)(Only if you start with USB installation)
- Wi‑Fi network with password (or Ethernet network)(Network access for wireless or shared printing)
- Printer manual or quick start guide(Helpful for model-specific steps)
- Test paper and a computer-compatible page(Used for the test print)
- Brother mobile printing app (optional)(Facilitates mobile printing workflows)
Steps
Estimated time: 45-75 minutes
- 1
Verify prerequisites and model compatibility
Identify your Brother printer model and confirm OS compatibility. Download the official driver package and make sure you have the network password handy. This early check prevents driver mismatches and keeps the process moving smoothly.
Tip: Have the model number and Wi‑Fi password ready before starting. - 2
Connect power and prepare the printer
Plug in the printer and power it on. If you plan to use USB, connect the cable to the computer; for wireless setup, keep the printer near the Wi‑Fi router during initial steps.
Tip: Avoid using extension cords after power on to reduce power instability. - 3
Install drivers and software
Run the downloaded installer and follow prompts to install drivers and utilities. If prompted, allow firmware checks and ensure security prompts are acknowledged. A clean install reduces residual conflicts from previous software.
Tip: Close other apps during installation to prevent conflicts. - 4
Add the printer to your device
On Windows: Settings > Devices > Printers & scanners > Add a printer. On macOS: System Preferences > Printers & Scanners > +. Choose the Brother printer and complete the setup wizard.
Tip: Set as default printer if you print frequently from the same device. - 5
Configure network settings and IP address
If using Wi‑Fi, connect to your network via the printer’s control panel or the driver wizard. Consider assigning a static IP to avoid address changes after reboots. Print a configuration page to verify the network details.
Tip: Note the IP address for future management. - 6
Run a test print and calibrate
Print a basic test page to check alignment, margins, and color. If required, run built-in calibration tools or adjust printer settings (paper size, margins, color). Repeat until the output matches expectations.
Tip: Perform at least two test prints to confirm stability.
People Also Ask
What does it mean to program a Brother printer?
Programming a Brother printer means configuring drivers, network settings, and default preferences so the device communicates correctly with your devices. It also includes firmware updates and maintenance tasks.
Programming means setting up drivers, network, and defaults so the printer talks to your devices reliably.
Do I need to install drivers before adding the printer?
Yes. Install the official Brother drivers that match your model and OS, then add the printer to your device. This avoids compatibility problems and ensures proper communication.
Yes, install the official drivers before adding the printer.
Can I program Brother printer for Wi‑Fi Direct?
Most Brother models support Wi‑Fi Direct or standard Wi‑Fi networking. Enable the desired option from the printer's control panel or driver settings, then connect your device accordingly.
Yes, you can use Wi‑Fi Direct for direct printing when needed.
What if the printer isn't detected after setup?
Check power, connection type (USB vs network), and verify the correct driver is installed. Re-run the add printer wizard if necessary and confirm the device appears in your network list.
First check connections and drivers, then re-run setup if needed.
Is setup different on Windows vs macOS?
Core steps are similar, but paths and installers differ. Windows uses Settings and built-in add-printer wizards; macOS uses System Preferences and AirPrint if available.
Both use drivers, but the steps differ by OS.
How often should I check for firmware updates?
Check for updates monthly or when Brother releases important improvements. Regular updates boost compatibility and performance.
Check updates when available; monthly checks are a good rule.
Watch Video
Quick Summary
- Identify model and download the official drivers.
- Connect power and choose the right network path.
- Add the printer to devices and configure defaults.
- Test print and calibrate for accurate output.
- Keep firmware and drivers up to date for reliability.