Scanner on Printer: A Practical How-To Guide for Scanning
Learn how to use your printer's built-in scanner, troubleshoot connectivity, and optimize scanning workflows with practical steps and expert tips from Print Setup Pro.

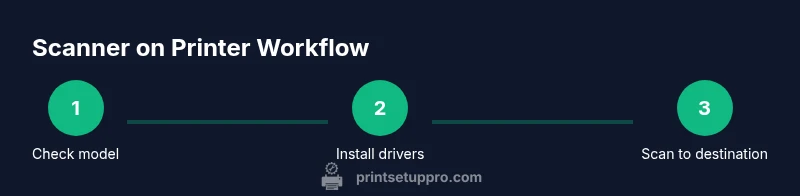
With a built-in scanner, many printers let you digitize documents directly to your computer or cloud storage. In this quick guide you’ll confirm your model supports scanning, connect it properly, and pick the right scan settings for photos or text. According to Print Setup Pro, most users can start scanning in under 10 minutes once the driver and software are installed.
Understanding the scanner on a printer
A scanner on a printer, commonly found in all-in-one devices, combines traditional flatbed scanning with optional automatic document feeding to offer a flexible workflow. Flatbed scanning is ideal for single pages, photos, or delicate documents that you want to inspect closely or edit, while the automatic document feeder (ADF) is best when you have multiple pages to process quickly. The built-in scanner can often save scans as a variety of destinations, including your computer, network folders, email, or cloud storage. You may also find options to save as PDF, JPEG, or TIFF, and to apply basic enhancements like edge cleanup or color correction. Print Setup Pro notes that understanding your model’s scanner type and destinations helps you pick the right settings from the start, avoiding repetitive adjustments later. When you plan a scanning task, consider the document type (text vs image), desired output (editable text vs archival image), and your preferred destination. This sets the foundation for a smooth workflow and reduces the need for post-scan editing.
In practice, your scanner is only as useful as the software that talks to it. Drivers and companion apps translate button presses or menu selections into actions the device can perform. For Windows users, TWAIN or WIA drivers are common interfaces; on macOS you’ll often rely on built-in Image Capture or Preview, or vendor apps. Some printers also support direct scanning to email or to cloud services. The key is to ensure the scanner is discoverable by your computer and that the software understands where to send the scanned file. If your goal is quick, repeatable scans, map a single destination (e.g., a specific folder on your PC) to minimize clicks. Print Setup Pro recommends validating connectivity with a quick test scan before configuring any automation.
Finally, consider the security and privacy implications of scanning to cloud storage or email. If you work with sensitive documents, keep local destinations as the default and enable encryption when available. As you gain comfort with the device, you can gradually expand to cloud destinations or OCR-powered workflows. The basic idea is to start simple and build up as needed, rather than overloading the setup with too many complex destinations at once.
note_nullability":null},{
Tools & Materials
- Printer with built-in scanner (flatbed and/or ADF)(Ensure the model actually includes a scanner and supports at least one scan destination.)
- Computer or mobile device(Windows, macOS, or a mobile OS with scanning app support.)
- Power and network connections(Wi-Fi or Ethernet connected; USB may be used for direct connection where supported.)
- Pre-installed scanning software or drivers(TWAIN/WIA compatible drivers or vendor-supplied apps.)
- Account for cloud storage (optional)(If you plan to scan directly to cloud, have a cloud account ready.)
- USB cable (optional)(Use if your printer connects via USB rather than over a network.)
Steps
Estimated time: 30-60 minutes
- 1
Verify scanner capability and connectivity
Check your printer’s manual or vendor site to confirm it has a scanner and the available scan destinations. Power on the device, connect it to the computer or network, and look for a Scan option on the printer display or in the software. Doing this first avoids chasing non-existent features later.
Tip: If you’re unsure about the model, search for the exact model number plus the word “scanner” to confirm supported destinations. - 2
Install or update scanning software
Install the manufacturer’s scanning software or update the printer drivers on your computer. Ensure the software exposes a TWAIN/WIA interface or a compatible app that can receive scans from the printer. A clean installation reduces driver conflicts and improves discovery.
Tip: Always download from the official vendor site to avoid bundled adware or outdated drivers. - 3
Choose a default scan destination
Select where you want scans to go by default—local folder, email, or cloud. This minimizes clicks during routine scans. If you plan to scan multiple pages, consider setting a dedicated folder for easier organization.
Tip: For frequent tasks, create a named profile (e.g., “Invoices_Q2”) to speed up future scans. - 4
Perform a test scan
Place a page on the scanner and run a test scan to verify alignment, brightness, and contrast. Review the resulting file to determine if you need to adjust the color mode (color vs grayscale) or resolution.
Tip: Check both sides if your document has a two-sided page; some devices require you to flip the page manually for each side. - 5
Save and organize scanned files
Save the test scan to the chosen destination and confirm access permissions. Create a simple naming convention (date_project_doc) to keep files easy to locate later.
Tip: Consider adding a short tag to the filename (e.g., “PO-501”) to support quick search later. - 6
Enable automation for frequent tasks
If your printer supports automation, set up a routine that scans to a specific folder at a scheduled time or triggers OCR for editable text. This is especially helpful for receipts or multi-page documents.
Tip: Test automation with a single document first to ensure everything routes correctly before scaling up.
People Also Ask
Can I scan directly to my computer from a printer with built-in scanner?
Yes. Most all-in-one printers offer direct scanning to a connected computer via software or built-in apps. If the device is on the same network, you can usually send scans to a local folder or open them with a connected application. Some models also support TWAIN/WIA interfaces for seamless integration with Windows or macOS apps.
Yes. Most built-in scanners can send scans directly to your computer using the vendor’s software, or through TWAIN/WIA interfaces on Windows and macOS.
What should I do if the scanner isn’t showing up in Devices and Printers?
Check that the printer is powered, connected to the same network, and that the correct drivers are installed. Restart the printer and computer, and reinstall the scanner software if necessary. Ensure firewall settings aren’t blocking the connection.
If the scanner isn’t listed, verify network connectivity and reinstall the scanner software, then retry discovery.
Do I need a dedicated app for scanning, or can I use generic tools?
Many printers work with generic scanning tools (like Windows Scan or macOS Preview), but vendor apps and TWAIN/WIA drivers usually provide better compatibility and features. Consider using the vendor app for reliable access to all destinations and settings.
You can use built-in tools, but vendor apps usually give the best compatibility.
Why are my scans blurry or washed out?
Check the scan resolution and color mode settings, clean the scanner glass if needed, and ensure the document is flat and properly aligned. A misaligned page can cause skewed or blurred results.
Blurry scans are often caused by bad alignment or wrong color settings; adjust those in the software and try again.
Can I scan documents to email directly from the printer?
Yes, many printers support scanning to email directly. You may need to configure SMTP settings or use the vendor app to send the file as an attachment. Ensure network access and address restrictions are set correctly.
Yes, most printers can email scans directly if SMTP is configured.
Is OCR required to edit scanned text?
OCR converts scanned images into editable text. It’s most effective with high-quality scans and clear documents. You can run OCR via dedicated software or the vendor’s app to produce editable PDFs or Word/Text files.
OCR makes your scans editable; use it if you need to edit the text later.
Watch Video
Quick Summary
- Verify your scanner type and destinations before setup
- Install correct drivers/software to ensure reliable connectivity
- Choose a primary destination to simplify workflows
- Test scans with a representative document before building automation
- Organize files with consistent naming for easy retrieval