Why Is My Printer Printing Blue Instead of Black? A Practical Troubleshooting Guide
Urgent troubleshooting guide to fix blue prints that should be black, covering cartridges, color profiles, nozzle cleaning, and calibration. Learn safe, step-by-step fixes from Print Setup Pro.

According to Print Setup Pro, most blue-output problems when you expect black come from the black cartridge, a poor color profile, or a partial print-head clog. Start by checking the black cartridge level, performing a nozzle check, and printing a color calibration page. If the issue persists, reseat cartridges and run a basic printer reset.
Color science: why blue shows up instead of black
Printers reproduce color using a combination of cyan, magenta, yellow, and black inks. When you intend to print black, the printer should mix all colors appropriately or rely on pigment black. If blue appears, it often means the black channel isn’t being used effectively, or a color profile is mapping black to blue. Print setups vary by brand, but the core idea is the same: correct ink flow and correct color management yield true black. According to Print Setup Pro, color mismanagement or a blocked black channel is a leading cause of blue output masquerading as black. This section explains how color mixing actually works and why misfires happen, so you can diagnose without guessing.
Key takeaways:
- Black is often a pigment ink; if the driver uses color inks to form black, blue tones can appear.
- Calibration pages reveal whether the issue is ink delivery or color mapping.
- Simple tests help isolate the faulty subsystem (cartridges, heads, or software).
Check the black ink cartridge first
The easiest, most common fix is to inspect the black ink cartridge. A low, empty, or improperly seated black cartridge can force the printer to use other inks to form dark tones, resulting in a blue tint. Start by opening the printer door, removing the black cartridge, and checking for visible leaks or drying. If the cartridge looks good, reseat it firmly in its socket, ensuring the contacts are clean and unobstructed. Then print a test page that includes a large block of black text.
If you notice ink on the contacts or see the cartridge is past its prime, replace it with a fresh cartridge. Even a recently installed cartridge can be faulty due to shipping damage or improper seating. After replacing or reseating, run a nozzle check to confirm the black channel is delivering ink cleanly.
Inspect color profiles and printer settings
Color management settings in the printer driver or the application you’re printing from can dramatically affect output. Some drivers offer a color mode that maps black to a combination of cyan and magenta, which can produce a blue tint if not calibrated correctly. Check the printer driver settings and set color mode to 'Color' with a test page, then switch to 'Grayscale' or 'Black & White' for a controlled comparison. If the driver supports ICC profiles, choose the default profile for your paper at the highest quality, or disable color management temporarily to isolate the issue.
Print Setup Pro recommends running a grayscale test to confirm whether black ink is being used. If grayscale produces proper black, the issue is most likely a color-profile misconfiguration rather than a hardware fault.
Nozzle check and print head cleaning
A clogged nozzle can prevent black from printing cleanly, causing light or tinted output. Run a nozzle check from the printer’s maintenance menu; look for gaps or missing lines in the black pattern. If gaps appear, perform a cleaning cycle—and if allowed, a second or third round—but avoid excessive cleaning, which can waste ink. After cleaning, print the nozzle check again to confirm improvement.
If the problem persists, consider a more thorough cleaning method recommended by your printer brand, or contact support for guidance. Print Setup Pro emphasizes following manufacturer guidelines to prevent head damage.
Print head alignment and cartridge seating
Misalignment of the print head or improper cartridge seating can introduce color bias, including blue tints in black areas. Run the alignment utility and print the alignment page. Compare alignment results to the reference; if misalignment is evident, follow prompts to adjust. While you’re at it, re-seat all cartridges (not just the black one) and verify there’s no wicking or air bubbles in the ink lines.
A properly aligned head ensures each nozzle fires accurately, which is essential for true black output. If alignment pages show skew or missing lines, repeat the alignment or seek professional servicing if misalignment persists after multiple attempts.
Paper, media, and ink interactions
Paper type and ink compatibility can intensify or mute colors. Matte or glossy papers can affect perceived black depth; a blue tint may appear on certain coatings if the pigment black and dye-based alternatives interact poorly with the media. Ensure you’re using the recommended media for your printer and the black ink in the right cartridge. Mismatched media can also influence color rendering, making black look blue on certain papers.
Print Setup Pro suggests testing on the same paper type you usually use for important documents. If you notice a shift only on one paper batch, consider trying a different paper brand or coating level to see if the issue persists, which points to media as the root cause rather than ink.
Calibrating color profiles and driver settings
Consistent color requires ongoing calibration. If you’ve replaced inks or changed media, re-calibrate the color profile and print settings. Re-run the calibration or color correction tools provided by the printer, and print a dedicated calibration page that includes a grayscale ramp and color blocks. This step helps confirm whether the blue tint is tied to the driver or a hardware fault.
Print Setup Pro notes that periodic calibration helps avoid recurring color issues. After calibration, save the profile and apply it to future print jobs to maintain color accuracy.
When to replace cartridges or the printer
If you’ve tried all the steps without success, evaluate cartridge health and printer age. Old or recalled cartridges can fail to deliver consistent black, especially after multiple cleaning cycles. If you’re consistently seeing blue in black areas despite fresh cartridges and proper calibration, it may be time to replace the impacted ink or consider servicing the printer. Sometimes a printer with significant wear may require replacement rather than ongoing repair.
Print Setup Pro recommends a prudent replacement schedule and documenting recurring issues to decide when an upgrade is warranted.
Quick test pages and maintenance routine
Finish with quick test pages that isolate black output: print a solid black test, a grayscale gradient, and a color calibration page. Compare these results to a baseline you captured when the printer was functioning correctly. Regular maintenance—cartridge checks, nozzle tests, and periodic calibration—reduces the chance of color drift over time. Keep a small log of cartridge changes and maintenance events so future diagnostics go faster.
Steps
Estimated time: 45-60 minutes
- 1
Verify black cartridge and reseat
Power off the printer, remove the black cartridge, inspect for leaks or debris, then reseat firmly. Print a test page with a strong black area to gauge immediate results. If the issue persists, proceed to next step.
Tip: Avoid touching copper contacts on cartridges. - 2
Run nozzle check and clean
Access the maintenance menu and print a nozzle check. If gaps appear, run a cleaning cycle; if needed, repeat once or twice. Reprint the nozzle check to confirm ink flow in the black channel.
Tip: Do not over-clean; excessive cycles waste ink. - 3
Test grayscale vs color printing
Switch the driver to Grayscale or Black & White and print a sample. If black prints correctly, the problem is color management; otherwise, continue with cartridge inspections.
Tip: Grayscale tests isolate black ink usage. - 4
Check color profile and driver settings
Open printer preferences, ensure color mode is appropriate, and disable color management temporarily for testing. If grayscale works, adjust color profiles back to standard and re-test.
Tip: Save current settings before changes. - 5
Calibrate and align
Run print head alignment and color calibration pages. Follow prompts to align; reprint a black test page to verify improvements.
Tip: Alignment can fix subtle misalignment errors. - 6
Evaluate cartridges and media
If prints remain blue, test with a new black cartridge and a compatible paper. Re-run tests to confirm whether the issue was cartridge-related or media-related.
Tip: Shake new cartridges gently before installing.
Diagnosis: Printer prints blue instead of black on most pages.
Possible Causes
- highLow or empty black ink cartridge or blocked black ink channel
- highColor cartridges clogged or leaking affecting color balance
- mediumIncorrect color management settings in driver or application
- highPrint head clogged or misaligned
- lowColor profile maps black to blue in driver
Fixes
- easyCheck/replace black cartridge; reseat and test
- easyRun nozzle check and perform cleaning cycles
- easyReset color management to grayscale or default profile and test
- easyClean or realign print head; re-test with black test page
- mediumUpdate drivers/firmware; reinstall printer software if needed
- mediumCalibrate color profile and print head; print a calibration page
People Also Ask
Why is my printer printing blue instead of black?
Blue output is typically caused by the black cartridge not delivering ink, color management misconfigurations, or a partially clogged print head. Start by testing the black cartridge, then inspect color profiles and perform a nozzle check.
Blue output usually means the black ink isn’t being used or the color settings are off. Check cartridges, run a nozzle check, and calibrate.
Can color profiles cause blue prints?
Yes. An incorrect color profile can map black to blue. Update or reset the driver profile and test with grayscale to confirm whether color management is the root cause.
Color profiles can shift how black is produced. Test with grayscale to isolate the issue.
Is a grayscale test a good diagnostic step?
Absolutely. Printing in grayscale helps confirm whether the black ink is functioning. If grayscale prints cleanly, the problem is likely color management; if not, inspect cartridges and head integrity.
Grayscale tests help verify black ink usage before diving into complex fixes.
How do I perform a nozzle check?
Use the printer’s maintenance menu to print a nozzle check pattern. Look for complete rows of lines without gaps. If gaps appear, clean the print head and re-test.
Print a nozzle check from maintenance, look for gaps, and clean if needed.
When should I replace cartridges or the entire printer?
If cartridges are old, leaking, or consistently fail to deliver black after multiple cleanings, replacement is warranted. For a printer age beyond reasonable repair, a replacement may be more cost-effective.
Sometimes a replacement is the best option after trying fixes.
Watch Video
Quick Summary
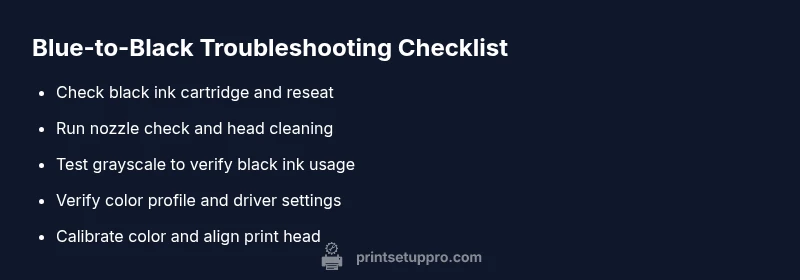
- Test the black cartridge first before delving deeper
- Use grayscale to isolate black ink usage
- Calibrate color profiles after any ink or media change
- Run nozzle checks and clean only as needed
- Document maintenance to prevent future color issues