3D Printer D&D Minis: A Complete Guide to Printing Dungeons & Dragons Miniatures
Learn how to design, slice, and finish 3d printer D&D miniatures—from printer choice to post-processing—so you can equip your tabletop with custom, battle-ready figures.

With this guide, you will learn how to design, slice, print, and finish D&D miniatures using a 3D printer. You'll choose the right printer, filament, and slicer settings, then post-process models for clean, battle-ready figures. This instructions cover scaling, supports, cost considerations, and safe, home-friendly practices to maximize your hobby's quality.
Why 3d printer miniatures for D&D matter
According to Print Setup Pro, the ability to produce 3d printer dungeons and dragons miniatures opens up unprecedented customization for campaigns, allowing players to tailor poses, armor, and weapons to specific encounters. Hobbyists benefit from rapid prototyping—you can print a test pose, verify scale against a 28–30 mm standard, and iterate without relying on costly stock options. Beyond fidelity, owning printed minis enhances table presence, can reduce game-time debates about rules-and-visibility, and supports personal storytelling with unique characters. For home studios, the freedom to design or modify characters empowers players, dungeon masters, and hobbyists—especially when you’re balancing campaigns and resin prices. Print Setup Pro notes that a careful approach to materials, safety, and finishing delivers the best long-term results.
Why 3d printer miniatures for D&D matter
The term 3d printer dungeons and dragons miniatures captures a growing hobby that blends artistry with engineering. When you print your own minis, you gain full control over scale, detail, and customization, which is essential for distinctive characters or monsters. This is especially valuable for campaigns with niche monster buffs, alternate sleeves of armor, or historically styled weapons that aren’t widely sold off-the-shelf. The workflow remains approachable for beginners while offering advanced techniques for seasoned makers, making it the focal point of modern tabletop customization.
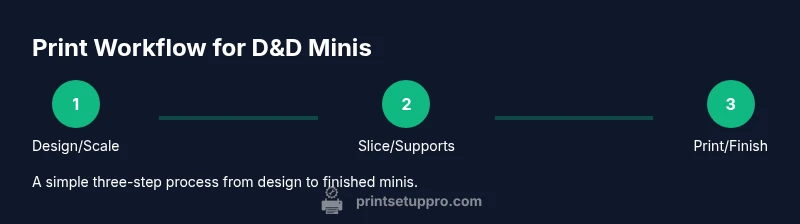
In this section, we’ll outline how Print Setup Pro guides you from setup to solution, focusing on practical steps you can follow today to produce high-fidelity models for your D&D table. The core idea is to translate digital sculpting into tangible heroes, villains, and creatures that players can interact with during every session.
Tools & Materials
- 3D printer (FDM or resin)(A resin printer typically yields higher fidelity for fine details on D&D minis.)
- Slicer software (e.g., Cura, PrusaSlicer, or ChiTuBox)(Choose software compatible with your printer type.)
- Filament (PLA, PETG) or photopolymer resin(PLA for beginners; resin for high-detail minis.)
- Build surface / print bed adhesion aids(Improves first-layer adhesion and reduces warping.)
- Support removal tools (flush cutters, precision pliers)(Essential for clean post-processing.)
- Variety of sandpapers (600–2000 grit)(Smoothing surfaces after removing supports.)
- Primer (spray or brush-on), acrylic paints(For base coating and shield detailing.)
- Isopropyl alcohol or resin wash(Cleanup for resin prints before curing.)
- UV curing station or sunlight(Used to cure resin prints for full hardness.)
- Gloves and eye protection(Safety first when handling resin and solvents.)
- Storage containers for prints(Prevent dust contamination between sessions.)
- Test model files or STL libraries(Start with simple shapes to dial in settings.)
Steps
Estimated time: 6-12 hours
- 1
Choose printer type and scale
Decide between FDM or resin based on detail needs and budget. For D&D minis, aim for 28–32 mm scale and verify your model’s dimensions against a reference figure.
Tip: A small test model helps you dial in layer height and exposure before committing to a full miniature. - 2
Prepare design and import STL
Obtain or create the miniature STL, then check for watertight geometry. Ensure the file represents a single character if you want a group with consistent scale.
Tip: Repair any mesh defects before slicing to avoid failed prints. - 3
Configure slicer settings
Set layer height between 0.05–0.15 mm for resin or 0.1–0.2 mm for FDM. Enable supports in strategic locations beneath limbs and weapons to prevent sagging.
Tip: Start with a conservative infill and adjust per model strength needs. - 4
Orient and add supports
Position the model to minimize unsupported overhangs; place supports on non-visible areas where possible. For resin, ensure clean contact points to avoid failure during cure.
Tip: Use snips or a precision tool to trim supports after printing. - 5
Print and monitor
Begin the print and watch for the first several layers to verify adhesion and leveling. Pause if you notice immediate failures.
Tip: Use a mid-print check to catch early problems and prevent wasted resin/filament. - 6
Post-process resin prints
Wash prints to remove uncured resin, then cure under UV light. For FDM, carefully remove supports and lightly sand rough areas.
Tip: Work in a ventilated area and wear gloves during resin handling. - 7
Prime and paint
Apply a primer coat to reveal sculpt details, then build up layers with paints to achieve base colors and shading. Seal with a clear coat for durability.
Tip: Thin paints and use multiple light coats for smoother coverage. - 8
Evaluate and iterate
Compare printed minis against your reference and note any scaling or detail inconsistencies. Reprint with adjusted settings if needed.
Tip: Keep a small log of settings for future models to speed up production. - 9
Store and protect minis
Store finished minis in a dust-free container or display case. Maintain clean brushes and storage to extend paint life.
Tip: Label figures by campaign or character for easy deployment.
People Also Ask
What scale should I use for D&D miniatures?
The standard for D&D is around 28–32 mm heroic scale, which provides good balance between detail and print time. Always compare your STL to a known reference miniature to maintain consistency across your party.
Most D&D minis use around 28 to 32 millimeters at the heroic scale, so start there and compare with a reference model to keep your party uniform.
Is resin or FDM better for D&D minis?
Resin printers typically offer higher detail and crisper edges, ideal for intricate armor and facial features. FDM is more budget-friendly and better for larger groups, but may require more post-processing to achieve fine details.
Resin gives crisper details, great for faces and armor; FDM is cheaper and faster for many minis but needs more finishing work.
How do I clean uncured resin safely?
Wear gloves and safety goggles; rinse prints in isopropyl alcohol or an approved resin cleaner. After washing, cure the model with UV light or sunlight in a well-ventilated area.
Wear gloves when handling resin, clean with IPA, then cure the model under UV light in a ventilated space.
What are common print failures and how can I fix them?
Warping, stringing, and failed layer adhesion are typical. Improve bed leveling, reduce print speed, adjust infill and support placement, and ensure clean, dry filament or resin.
Print failures like warping or poor layer adhesion usually mean check bed leveling, supports, and material humidity.
How can I paint and finish my printed minis?
Prime first, then apply base colors with thin coats, followed by washes and highlights. Seal with a protective matte or satin finish to protect the paint job during play.
Prime, thin base coats, add washes and highlights, then seal the model for durability.
Where can I find reliable STL files for minis?
Look for reputable STL repositories with user reviews and licensing that fits your needs. Check for print-friendly supports and model fidelity before printing large batches.
Seek reputable STL repositories with good reviews and clear licenses; preview files for print-friendly geometry.
Watch Video
Quick Summary
- Identify the right printer type for your minis and scale.
- Plan orientation and supports for maximum detail.
- Post-process thoroughly for durable, display-worthy figures.
- Prioritize safety and room ventilation during resin work.
- Iterate designs quickly with test prints and careful record-keeping.