How to Get Started with Resin Printing: A Beginner Guide
Kick off your resin printing journey with a clear setup, safety basics, and practical first-print steps. Learn printer choice, resin options, post-processing, and troubleshooting from Print Setup Pro.

Learn how to get started resin printing: pick a beginner-friendly MSLA printer and resin, set up a ventilated workspace with PPE, learn basic slicing, and perform safe post-processing. Before you begin, ensure you have gloves, goggles, and good ventilation. According to Print Setup Pro, a solid setup reduces failed prints and waste.
What resin printing is and why it's worth it
If you’re wondering how to get started resin printing, this guide begins with the basics of photopolymer printers and what makes resin prints so detailed. Resin printing uses liquid resin that is cured layer by layer under a light source, typically UV. When done well, you can achieve incredibly smooth surfaces, crisp edges, and fine feature detail that’s hard to match with filament-based methods. For many hobbyists and professionals, resin printing unlocks rapid prototyping of miniatures, jewelry models, and functional parts with complex geometries.
According to Print Setup Pro, resin printing is approachable for beginners when you choose a simple printer, a reliable resin, and a safe workspace. You’ll still need to plan for post-processing, storage, and cleanup, but the core steps are straightforward: set up your printer, prepare models, print with sensible supports, then wash and cure. With patience and practice, your first few prints become repeatable and predictable, setting the stage for more ambitious projects.
Safety first: workspace, ventilation, PPE
Working with uncured resin means managing exposure to chemicals and fumes, handling spills, and avoiding skin contact. Create a dedicated work area, ideally with a small ventilation fan or hood, and keep food away from the workspace. PPE is essential: nitrile gloves, safety goggles, and a respirator or mask when you’re sanding or curing. Store resin containers upright and tightly sealed, and label them clearly. If a spill happens, contain it with absorbent towels and dispose of contaminated materials following local rules. By building a safety-first habit, you protect yourself and others while you learn resin printing.
Picking your first printer and resin
Choosing your first printer and resin sets the tone for your learning curve. Look for a beginner-friendly MSLA printer with a small build volume, good community support, and reasonable resin costs. For resin choices, start with a clear or pale resin with low viscosity; pigmented resins can hide print defects but may affect cure time. Read the manufacturer’s guidelines on layer height and exposure, and select a resin that is easy to clean and store. As Print Setup Pro notes, sticking with a simple, well-supported combination reduces the chances of early print failures and speeds up your learning.
Workspace setup and printer calibration
Set up your printer on a stable, level surface, away from direct sunlight. Level the build plate according to the manual, checking that the vat is clean and free of debris before any print. Prepare a dedicated wash station using IPA or an equivalent cleaner, and set up a curing area with adequate light. Calibrate basic settings in your slicer: orientation, supports, and initial layer exposure tailored to your resin. Label your tools and keep spare parts handy so you can recover quickly if a print fails.
Slicing basics: supports, orientation, and exposure settings
A good resin print starts in the slicer. Import your model, orient it to minimize the need for supports on visible surfaces, and add supports where geometry requires them. Start with a conservative layer height and follow the resin manufacturer’s and printer manual guidelines, then run a test print. Check the first layers on the LCD for proper adhesion; adjust exposure incrementally if you see thin or failed layers. You’ll find that small changes to orientation and supports yield big gains in success rates.
Post-processing: washing, curing, and cleanup
Post-processing is not optional—it's part of the process. After printing, rinse the model in IPA to remove residual resin, then air- or towel-dry. Cure the print under UV light for the recommended duration, ideally in a dedicated curing station with consistent illumination. Once cured, remove supports and inspect for any blemishes, then perform light sanding or painting as needed. Keep your washing and curing area clean, and dispose of used IPA and resin waste according to local guidelines.
Maintenance and troubleshooting basics
Keep your printer in good condition with regular maintenance. Clean the build plate and vat to prevent residue buildup, check seals for leaks, and replace worn consumables as needed. Common issues include failed adhesion, supports popping, and prints sticking to the FEP film; most problems resolve with leveling, exposure adjustments, and re-arming the print with fresh resin. If you encounter persistent issues, consult the printer’s community forums or Print Setup Pro resources for step-by-step troubleshooting.
Tools & Materials
- MSLA resin 3D printer(budget-friendly models with a resin tray and masking film)
- Resin (photopolymer)(clear or pigmented resin compatible with your printer)
- Isopropyl alcohol (IPA), 70% or higher(for washing prints)
- Nitrile gloves(for handling uncured resin)
- Safety goggles(eye protection)
- Face mask/respirator with organic vapor cartridges(for improved fumes control)
- UV curing station or sunlight(to cure prints after washing)
- Plastic spatula or scraper(for removing prints and cleaning)
- Lint-free cloth or paper towels(for drying and cleaning)
- Silicone mat or tray(protect surfaces during washing)
- Leveling tool or card(for bed leveling if needed)
Steps
Estimated time: 2-4 hours
- 1
Set up a safe workspace
Before starting any print, prepare a well-ventilated workspace and put on PPE. This reduces exposure to fumes and skin contact with resin. Check that your printer is on a stable, level surface.
Tip: Ensure your workspace has a dedicated waste container and easy access to a sink for cleaning. - 2
Choose your printer and resin
Select a beginner-friendly MSLA printer and a compatible resin. Review layer height, exposure settings, and resin compatibility to avoid failed prints at the outset.
Tip: Stick to a single resin type for your first tests to limit variables. - 3
Level the build plate and resin tray
Follow the printer's manual to level the build plate. Check the resin tray for leveling, ensuring the tank is clean and free of debris before any print.
Tip: Run a test print after leveling to verify even adhesion. - 4
Prepare the model in your slicer
Import STL/OBJ files, orient for minimal supports, and add necessary supports. Choose a conservative layer height for your first print.
Tip: Enable a light support density to reduce post-processing time. - 5
Slice and transfer to printer
Export the sliced model to the printer’s SD card or transfer via USB. Double-check resin temperature and printer settings before starting.
Tip: Preview the toolpath if your slicer offers it. - 6
Start the print and monitor briefly
Start the print and monitor the initial layers to confirm proper adhesion. If you see peeling or misalignment, pause and adjust exposure or tilt.
Tip: Avoid leaving the printer unattended for long periods during the first few prints. - 7
Post-process: wash, cure, and dry
After printing, wash the part in IPA to remove uncured resin. Cure under UV light as per resin guidelines, then dry and inspect.
Tip: Use a dedicated wash station and avoid skin contact with uncured resin.
People Also Ask
What is resin printing and how does it differ from FDM printing?
Resin printing uses photopolymer resin cured by UV light in thin layers, producing high-detail prints. FDM builds objects by extruding melted plastic layer by layer. Resin generally offers finer resolution but requires more post-processing and safety considerations.
Resin printing uses liquid resin cured by light for high detail, unlike FDM which extrudes plastic.
What safety gear do I need for resin printing?
Wear nitrile gloves, safety goggles, and a respirator mask in a well-ventilated area. Avoid skin contact with uncured resin and never eat while handling resin.
Gloves and eye protection are essential; ventilate and avoid skin contact.
Do I need a post-processing station and what does it include?
Yes. You’ll need a wash station (IPA), a UV curing setup, paper towels, and brushes. Proper post-processing improves strength, clarity, and detail.
Yes, a wash and UV curing setup are essential for finishing prints.
How do I cure resin prints properly?
Rinse prints to remove resin, dry, and cure under UV light for the recommended duration. Avoid overheating or prolonged exposure to prevent brittleness.
Rinse, dry, and cure under UV light as recommended by the resin manufacturer.
What are common beginner mistakes?
Overlooking bed leveling, insufficient supports, improper cleaning, and rushing post-processing. Start with small test prints to dial in settings.
New users often skip leveling or rush post-processing.
How should I dispose of resin waste?
Do not pour uncured resin down the drain. Follow local hazardous waste guidelines for disposal and recycle containers when possible.
Don’t pour resin waste down the drain; follow local disposal rules.
Watch Video
Quick Summary
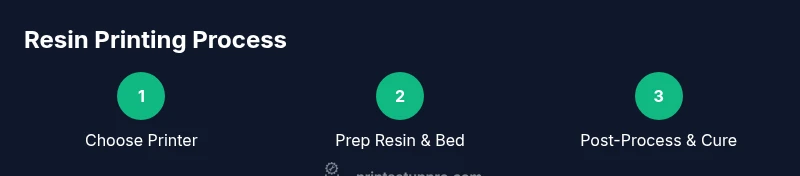
- Choose a beginner-friendly resin and printer
- Set up a ventilated workspace with PPE
- Master basic slicing and supports
- Perform proper post-processing and curing
- Dispose of resin waste responsibly