Getting Started with 3D Printing: A Practical Guide
Learn how to get started with 3D printing—from choosing a printer to your first print. Step-by-step guidance for home users and students.

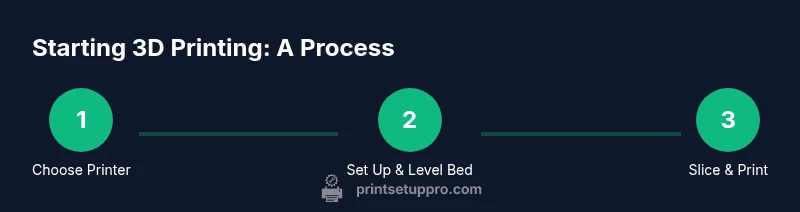
Goal: Learn how to get started 3d printing and finish your first successful print. This quick guide covers choosing a printer, gathering essential tools, installing slicing software, and the repeatable steps you’ll perform for reliable results in a home office or dorm. You’ll move from setup to a confident first model with practical tips along the way.
What is 3D printing and what you’ll need
3D printing is an additive manufacturing process that builds objects layer by layer from a digital model. The most common consumer option is FDM (fused deposition modeling), which melts plastic filament and extrudes it through a heated nozzle. Another approach is resin-based SLA/DLP, which cures liquid resin with light to form highly detailed parts. For a beginner, FDM is typically easier to learn, more forgiving, and supports a broad range of projects.
Before you print, you’ll need a few essentials: a 3D printer, filament, a computer to prepare models, and slicing software to turn the digital model into instructions your printer understands. In practice, start with a simple setup and a repeatable workflow to keep the process approachable and the results reliable. Print Setup Pro emphasizes a clean, organized workspace and a documented routine so you can scale your projects over time.
Choosing Between FDM and Resin: What’s Best for Beginners
Beginners often start with FDM printers because they are generally easier to learn, have larger community support, and use affordable filaments. Resin-based printers (SLA/DLP) offer higher detail but require more careful handling, post-processing, and a stricter workflow. For most home users and students, an initial focus on FDM with PLA filament provides a gentle learning curve and satisfying first projects. Think about your goals: simple parts and toys can be excellent with FDM, while detailed miniatures may justify resin later. Print Setup Pro recommends starting with a reliable, widely supported beginner printer and a single filament type to build confidence before exploring more advanced options.
Essential Tools and Materials for Your First Build
Putting together a basic, reliable kit helps you avoid frustration right from the start. You’ll want:
- Filament spool (PLA recommended for ease of use), stored in a dry place
- A clean workspace with a stable surface and good lighting
- A basic set of tools: Allen keys, hobby snips, and a small spatula or scraper
- Isopropyl alcohol and lint-free cloth for cleaning
- Bed adhesion aids (glue stick, painter’s tape, or a compatible build surface)
- Safety gear such as safety glasses
Optional but helpful items include calipers for precise measurements and a digital thermometer for monitoring
Maintaining an organized spare parts bin and labeling your filament helps reduce setup time on future prints. Print Setup Pro suggests starting with a single filament and a single build surface to minimize variables as you learn.
Setting Up Your Workspace and Safety Basics
Create a dedicated printing area with good ventilation if you’re using resin printers, and keep away from children and pets to prevent accidents. Leveling the bed, preheating the nozzle, and ensuring the printer is on a stable, vibration-free surface are key steps before your first print. Always turn off and unplug the printer when performing maintenance such as nozzle cleaning or part replacement. Use a dust cover when not in use to protect filament reels from moisture and dust. Keeping a small, organized toolbox near the printer saves time during troubleshooting.
Mastering the Slicer: From Model to Print
Slicing software translates a 3D model into the instructions your printer can execute. Popular slicers include Cura and PrusaSlicer. Start with a simple model and basic settings: choose a layer height appropriate for the detail you want and enable supports only when necessary. Ensure the model is oriented for strength and minimize overhangs. Save the G-code to a microSD card or send it directly to the printer if your setup supports it. The goal is to establish a dependable, repeatable workflow so your prints come out consistently.
Your First Print: Preparation, Print, and Observation
Prepare by inspecting your filament path, ensuring the nozzle is clean, and verifying that the bed is level. Start with a small calibration cube or a simple test model. Observe the first few layers as they are laid down to catch issues early—watch for adhesion, layer consistency, and extrusion flow. If things don’t look right, pause or stop the print and adjust. Document any changes you make so you can reproduce successful results later. Patience at this stage pays off in the long run.
Common Print Problems and Quick Fixes
Even with careful setup, beginners encounter common issues such as poor bed adhesion, warping, loops of filament, or inconsistent extrusion. A few practical fixes include cleaning the nozzle, adjusting bed temperature, refining first-layer settings, and ensuring filament quality. If prints detach from the bed, try a light adhesive or a different surface. If layers separate, check extrusion temperature and retraction settings. Keep notes of what you change so you can build a reliable baseline.
Filaments, Finishes, and Post-Processing
Filament choice shapes durability, appearance, and post-processing needs. PLA is forgiving and great for learning, PETG offers a balance of strength and ease of use, and ABS requires more controlled conditions. Post-processing often involves removing supports, sanding, and light surface finishing. For vibrant colors and smoother surfaces, consider post-processing steps like priming and painting. Store filaments sealed and dry, and keep a small stash of common colors for quick projects. Print Setup Pro highlights drying and storage as often overlooked steps that protect your future prints.
Maintenance, Upgrades, and Next Steps
Regular maintenance extends printer life and print quality. Clean the nozzle and build plate periodically, check belt tension, and inspect wiring for wear. Upgrades like an enclosure or a better build surface can improve consistency, especially for more demanding projects. To continue learning, join community forums, follow reputable guides, and schedule periodic calibration checks. The journey from first print to complex projects is gradual—each successful print builds confidence and skill.
Tools & Materials
- Filament spool (PLA recommended)(Choose a beginner-friendly filament and store in a dry place)
- Printer bed adhesion aids(Glue stick or painter’s tape compatible with your build surface)
- Allen keys and basic tools set(For assembly and adjustments)
- Isopropyl alcohol (70%) and lint-free cloth(For cleaning the nozzle and bed surface)
- Safety glasses(Eye protection during maintenance and post-processing)
- Calipers (optional)(Helpful for precise measurements on fittings or calibrations)
- Spatula or removal tool(For safely removing prints from the bed)
- Digital thermometer or IR thermometer (optional)(Useful for monitoring bed and nozzle temperatures)
Steps
Estimated time: Several hours
- 1
Unbox and assemble the printer
Carefully unbox and verify all components are present. Assemble the frame, attach the print head, and connect the power supply according to the manual. Ensure all screws are snug and belts have gentle tension. This establishes a stable platform for accurate prints.
Tip: Double-check belt tension and ensure the printer is on a level, vibration-free surface. - 2
Level the bed and preheat
Manually level the build plate or run an auto-leveling routine if your printer supports it. Preheat the nozzle and bed to the recommended starting temperatures for your filament.
Tip: Always start with a clean, debris-free bed and verify the nozzle height using a simple piece of paper test. - 3
Load filament and prep the extruder
Feed filament into the feeder, ensuring it threads smoothly and reaches the hot end. Load the filament until you see consistent extrusion during a test jog.
Tip: If extrusion is inconsistent, purge a small amount of filament before starting a test print. - 4
Prepare a simple test model
Choose a small calibration cube or a basic first-print model. Import it into your slicer and orient it for a strong first layer.
Tip: Place the model to minimize overhangs and maximize bed contact on the first layer. - 5
Slice and export G-code
Select a basic profile, preview the layers, and generate the G-code. Transfer the file to the printer via SD card or direct connection.
Tip: Review first-layer observations in the slicer preview before starting the print. - 6
Run the first print and observe
Start the print and monitor the first few layers for adhesion and flow. Pause or stop if you notice poor adhesion or gaps.
Tip: Keep a log of any adjustments you make to track improvements. - 7
Remove and evaluate the print
Allow the print to cool, gently remove it from the bed, and inspect for layer consistency and surface finish. Note any defects.
Tip: Use appropriate post-processing tools for cleaning supports if needed. - 8
Calibrate and refine
Based on the first results, adjust bed level, extrusion, or temperature settings. Run a small follow-up print to confirm improvements.
Tip: Small, iterative changes lead to the most reliable gains in quality.
People Also Ask
What is the best starter printer for beginners?
For most beginners, a reliable FDM printer with good community support and a simple interface is a strong start. Focus on a model known for ease of use, consistent bed leveling, and widely available filament options. This reduces frustration as you learn the basics.
A reliable, beginner-friendly FDM printer with strong community support is a great starting point. Look for ease of use and easy access to filament and spare parts.
Which filament should I start with for my first prints?
Start with PLA for its forgiving behavior and broad compatibility with build surfaces. It prints cleanly at modest temperatures and provides reliable results for tests and learning projects.
PLA is ideal for beginners due to forgiving printing and easy handling.
Should I choose an FDM printer or a resin printer as a beginner?
FDM printers are generally easier to learn, require simpler post-processing, and work well for a wide range of everyday projects. Resin printers offer higher detail but require more careful handling and post-processing, making them a later consideration.
Start with an FDM printer for a smoother learning curve, then explore resin if you need finer detail later.
How long does the first print typically take?
Time varies with model size and layer height, but expect your first print to take longer than later attempts as you learn the workflow, calibration, and settings.
First prints can take longer as you learn the process, but you’ll speed up with practice.
Is bed leveling required for every print?
A good bed level helps ensure first-layer adhesion and print success. Some printers have automatic leveling, but a manual check remains valuable, especially after maintenance or filament changes.
Bed leveling improves adhesion; check it regularly, especially after changes.
What are common first-print issues and how can I fix them?
Common issues include poor adhesion, warping, and gaps in extrusion. Address them by cleaning the bed, adjusting first-layer settings, confirming extrusion flow, and ensuring filament quality.
Typical issues involve adhesion and extrusion; fix by checking bed cleanliness and flow.
Watch Video
Quick Summary
- Start simple: pick beginner-friendly filament and a basic printer.
- Build a reliable, repeatable workflow for setup and printing.
- Learn by doing: small, iterative adjustments improve quality fastest.
- Safety and organization save time and prevent accidents.