Mastering a Large-Scale 3D Printer: Setup, Calibration, and Printing
Discover how to select, set up, calibrate, and maintain a large scale 3d printer for home offices or small businesses. This step-by-step guide covers enclosure, build volume, materials, safety, budgeting, and practical tips to maximize uptime.

This guide helps you select, set up, and operate a large scale 3d printer for home offices or small businesses. You’ll evaluate enclosure size, build area, and material compatibility, then calibrate, level the bed, and run a first test print. Safety, maintenance, and budgeting considerations are included for long-term reliability.
What defines a large scale 3d printer?
A large scale 3d printer is a class of additive manufacturing machines designed to create objects with substantial build volumes. They typically feature an oversized build area measured in hundreds of millimeters per axis, a rigid frame, an actively heated bed, and often an enclosed chamber to stabilize temperature and reduce fumes. For home offices and small businesses, this capability translates to fewer resets, faster iteration on big parts, and the ability to prototype end-use components in one go. According to Print Setup Pro, the decision to invest hinges on matching print volume with your typical part size, ensuring stability under longer print times, and confirming ongoing support for parts and firmware updates. When shopping, assess enclosure quality, motion system rigidity, bed leveling reliability, and compatibility with varied materials. Also verify software compatibility and the availability of spare parts. Most importantly, align the printer’s capabilities with your project scale, post-processing needs, and workspace footprint so uptime stays high and results stay repeatable.
How a large scale printer differs from hobbyist models
Compared to desktop systems, large scale printers emphasize stable motion control and robust heat management. They often offer higher wattage heaters, reinforced frames, and improved cable management to handle long prints without creeping tolerances. While the upfront cost is higher, the reduction in assembly steps for large prototypes and the ability to print functional fixtures can drive faster time-to-market. Print Setup Pro notes that evaluating total cost of ownership—considering filaments, power, and parts over time—is essential to avoid surprises after purchase.
Tools & Materials
- Large-scale 3d printer (build volume 400x400x400 mm or larger)(Essential; ensure power supply capacity and enclosure compatibility.)
- Safety glasses(Protect eyes during nozzle maintenance and filament changes.)
- Digital caliper(Accurate measurements for bed leveling and extrusion checks.)
- Calibrated ruler or feeler gauges(Assist with first-layer height checks and bed-travel clearances.)
- Allen wrench set and metric screwdrivers(Tighten frame components and hot-end hardware as needed.)
- Spare nozzles (0.4 mm recommended)(Have replacements on hand for wear or clog prevention.)
- Filament spools (PLA, PETG, and/or ABS)(Choose materials you plan to print with; store dry to minimize moisture.)
- Filament dry box or desiccant storage(Optional but helps maintain filament quality for long prints.)
- Surge protector and power strip(Protect equipment from power spikes; keep cables tidy.)
- Ventilation/air filtration ( enclosure ducting or fan system )(Important for fumes with ABS/nylon and to maintain air quality.)
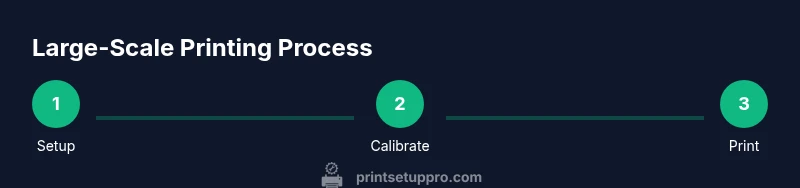
Steps
Estimated time: 2-3 hours
- 1
Unbox and position the printer
Place the printer on a level, sturdy surface with adequate clearance on all sides. Verify the machine is stable, ports are accessible, and there is space for spool storage and post-processing. If you’re upgrading an existing setup, document any changes to the location or cabling before powering up.
Tip: Use a level and check floor vibration; even small shifts can affect print quality on large parts. - 2
Power, safety, and initial inspection
Connect to a surge-protected power source and inspect all cables for wear. Check the enclosure seals, door latches, and any smoke/temperature sensors. Confirm firmware is current and that the printer reads input filament correctly.
Tip: Do a quick safety check before every print: enclosure closed, doors latched, and the area clear of obstructions. - 3
Bed leveling and axis homing
Home all axes and perform bed leveling using a large square or calibration sheet. Iterate until the nozzle-to-bed gap is uniform across the bed. This step is critical for adhesion on big parts and helps prevent warping.
Tip: If your bed is not perfectly flat, consider reworking the leveling sequence or adding shims for a flatter reference plane. - 4
Load filament and preheat
Load your chosen filament and preheat to the target temperatures. Inspect the filament path for tangles, and ensure the drive gears grip the filament without slipping. Run a dry run to verify extruder movement without any material.
Tip: Softly purged the extruder before actual printing to purge any old filament residue. - 5
First calibration print
Print a large calibration model (a cube or a simple bridge) to verify dimensional accuracy and layer adhesion. Observe for under/over extrusion, bed adhesion, and any unusual artifacts. Record measurements and adjust extrusion multiplier and first-layer height if necessary.
Tip: Take notes on layer consistency, then apply targeted tweaks in the slicer for a clean first layer. - 6
Print profile optimization
Refine layer height, infill, wall thickness, and cooling based on the material and model. For large prints, consider slower initial passes to prevent thermal shocks and improve consistency. Run a mid-size demo piece to validate overall print behavior before large projects.
Tip: Save profiles per material and model type to speed future setups. - 7
Ongoing validation and maintenance
Establish a routine for calibration checks, belt tension, nozzle wear, and enclosure cleanliness. Schedule preventative maintenance and keep a spare parts kit on hand. Plan for post-processing needs (support removal, sanding, sealing) to finish large prints.
Tip: Maintain a dashboard of maintenance tasks and replace worn parts proactively.
People Also Ask
What counts as a large-scale 3d printer?
A large-scale 3d printer typically has a build volume far larger than desktop models, enabling bigger parts in a single print. These machines emphasize stable motion systems, robust heat management, and enclosure controls for safer, higher-quality outputs.
A large-scale 3d printer is a bigger printer with a larger build volume, focused on stability, heat management, and safety.
How much does a large-scale printer cost?
Prices vary based on size and features, but expect a wide range driven by enclosure quality, reliability, and service plans. Look at total cost of ownership rather than just the upfront price.
Prices vary widely; focus on total cost of ownership and support when budgeting.
Do I need a heated enclosure?
For materials like ABS or nylon, a heated enclosure improves layer adhesion and reduces warping. Ventilation becomes important to manage fumes, especially on larger builds.
Yes, a heated enclosure helps with tougher materials and safer printing.
What maintenance is required for large printers?
Regularly inspect belts, lubricate rails, clean the nozzle, and update firmware. Keep a spare parts kit and schedule preventive maintenance to minimize downtime.
Keep up with maintenance to prevent unexpected downtime.
Can I print with multiple materials on a large printer?
Some large printers support multi-material or dual-extrusion setups. Check compatibility with your slicer, ensure reliable filament switching, and manage material compatibility.
Some models support multiple materials; verify compatibility and setup.
Is a large-scale printer suitable for a home office?
Yes, with adequate space, ventilation, and a stable workspace. Consider noise, enclosure temperature, and safety when placing it in a home environment.
It can fit a home office if space, ventilation, and safety requirements are met.
Watch Video
Quick Summary
- Define your print volume to match project needs.
- Calibrate bed height and extrusion for consistent big prints.
- Maintain safety and enclosure ventilation for long prints.
- Budget for maintenance and upgrades to protect ROI.
- Follow a documented calibration and workflow for repeatable results.