Large-Format 3D Printing with a 3d Large Printer: A Complete Guide
Comprehensive, step-by-step guide to planning, setting up, and operating a 3d large printer for large-format prints. Learn bed leveling, enclosure use, slicing, and post-processing for reliable results.

This guide teaches you how to successfully print large parts with a 3d large printer, covering proper bed leveling, enclosure usage, filament management, oversized print slicing, and post-processing. Key requirements include a stable, level print surface, a heated or enclosure-equipped build area, reliable power, and durable filament suited for large builds.
What makes a 3d large printer different from regular desktop printers
In the realm of home offices and small workshops, a 3d large printer stands apart from standard desktop machines. These units offer substantially bigger build volumes, often achieved with rigid frames built from aluminum extrusions and heavy duty drive systems that minimize vibration. Enclosures are common to stabilize temperature and reduce drafts that can warp large parts. The term 3d large printer is a practical shorthand for this class, and understanding its specifics helps you plan projects, choose models, and optimize prints. According to Print Setup Pro, mastering large-format 3d printing hinges on reliable bed leveling, consistent temperature control, and robust filament management. If you’re upgrading from a smaller machine, expect higher upfront costs but a higher ceiling for durable prototypes and end-use parts. In this section we explore what sets these machines apart, the constraints you’ll face, and how those factors translate to real-world outcomes for home offices and small shops.
Planning your large-scale print: design and build volume planning
Before you press print on a chunk-sized model, plan for build volume and assembly strategy. Large objects often require splitting a model into compatible parts, aligning joints, and designing features such as dovetails or tabs for easy assembly. You’ll also want to consider orientation: laying a part flat can improve bed adhesion and surface finish, but may require supports that complicate post-processing. When slicing, think about how layers will print across the X, Y, and Z axes and how heat buildup will travel through the object. Print Setup Pro recommends mapping your model to the printer’s maximum axis limits and verifying that the model can be printed in fewer pieces if possible, to reduce risk. Factor in your printer’s enclosure, nozzle temperature, and cooling profile to minimize warping. This planning stage is critical for large prints, where a single failure can waste hours or days of work.
Essential hardware and materials for a 3d large printer
A true 3d large printer relies on sturdier hardware than a typical desktop device. Look for a rigid frame, precise linear motion components, powerful stepper motors, and a heated, stable bed. A reliable enclosure helps maintain consistent temperature and reduces drafts that cause warping on large parts. Filament choices matter, as larger prints use more material and may require filaments with low shrinkage and good dimensional stability. In addition to the printer, you’ll need a quality build surface, a way to manage filament spools, and a smoke-free workspace with good ventilation. Keep tools on hand for quick maintenance: Allen wrenches, calipers for precise measures, and cleaning supplies for nozzles and beds. A well-planned power setup, surge protection, and cable management keep the system safe during long prints. Remember: large-format printers bring more heat, more moving mass, and more potential failure points, so invest in reliability from the start.
Slicing and print settings for large parts
Large prints respond differently to default desktop printer settings. Start with conservative layer height to balance surface finish and print time, then adjust per your model and material. Increase wall thickness and frame perimeters to improve strength, and choose an infill pattern that distributes loads evenly. Supports may be necessary for overhangs; plan breakaway supports if possible and orient models to minimize bridge spans. For materials prone to warping, enable enclosure and consider heated bed temperatures that remain stable. Calibrate extrusion multiplier to avoid over-extrusion across long toolpaths, and run test prints to validate dimensional accuracy before committing to a full-size piece. Finally, program pauses for cooling or color changes as needed, especially on large multi-material projects.
Bed leveling, calibration, and printer enclosure strategies
Bed leveling is even more essential on large builds than on small ones, because any deviation is amplified over the footprint. Use a feeler gauge or bed-leveling sensor to confirm uniform distance across the bed. After leveling, re-check Z-offset at multiple points and run a first-layer test to ensure good adhesion. Enclosures help stabilize temperature and reduce drafts; they also improve safety by keeping hot components contained. If your enclosure is modular, seal gaps to prevent air leaks and set up a heated curtain to cycle warm air around the build area. Periodically inspect belts, pulleys, and screws—vibration will degrade accuracy on long jobs. For heavy prints, consider vibration-damping feet or pads to keep the machine steady on concrete or wooden workbenches.
Post-processing, inspection, and ongoing maintenance for large prints
Post-processing large prints can be time-consuming but adds significant value. Remove supports carefully and sand edges in stages to avoid gouging surfaces. If a print shows slight dimensional creep, use light sanding and primer before painting. Inspect the finished piece for warping, delamination, or cracks along seams and joints; address issues in future prints by adjusting temperature, cooling, or model orientation. Maintenance is ongoing: clean the nozzle, run a calibration cube every few prints, and replace worn components before they fail. Create a maintenance log to track part wear, filament usage, and machine performance. With careful planning and routine care, a 3d large printer becomes a reliable workhorse for home offices and small businesses.
Tools & Materials
- Feeler gauge for bed leveling(0.2-0.3 mm feeler gauge; use a multi-tool set if available)
- Filament spool (PLA, PETG, or engineering filament)(Large spools; estimate material length for your model)
- Enclosure panels or curtains(To maintain stable temperature)
- Heated build plate or stable bed(Maintain consistent temperature during long prints)
- Allen wrench set (hex keys)(For frame assembly and adjustments)
- Calipers for precise measurements(Check tolerances and joint fits)
- Spare nozzle(Useful for long or demanding jobs)
- Isopropyl alcohol and lint-free wipes(Clean nozzle and bed surface before print)
- Digital scale or filament measuring tools(Estimate filament usage and weight)
- Surge protector or reliable power strip(Protect against power surges during long prints)
- Quality build surface (PEI sheet or glass)(Ensures adhesion and easy part removal)
- Slicer software with large-model support(Cura, PrusaSlicer, or equivalent with large-build profiles)
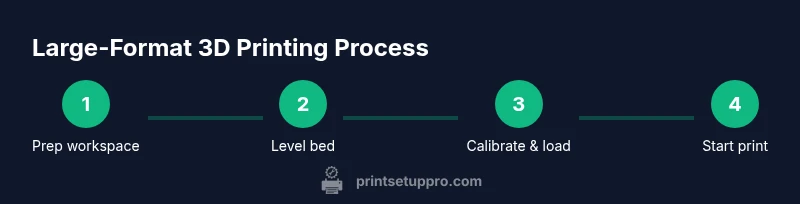
Steps
Estimated time: 3-5 hours
- 1
Prepare workspace and safety checks
Clear the area, ensure good ventilation, and put on heat-resistant gloves. Inspect cables, power, and enclosure seals to prevent drafts or loose connections. Have a fire extinguisher or smoke detector within reach and plan for emergency shutoff.
Tip: Wear PPE and verify exit routes before starting. - 2
Position the printer and connect power
Place the printer on a vibration-damping surface with level flooring. Route power and data cables away from the moving axes to prevent snagging. Power the machine and verify firmware boot without errors.
Tip: Use a dedicated circuit to avoid voltage dips during long prints. - 3
Level the bed and set Z-offset
Run a bed-leveling routine or manually adjust to achieve a consistent first layer across the build surface. Verify the Z-offset at multiple points and perform a small test print to confirm adhesion.
Tip: Perform a 2-3 point check and re-level if any point differs more than a hair's width. - 4
Load filament and prime the nozzle
Pre-heat the nozzle to the material’s target temperature and feed filament until it extrudes cleanly. Purge a short segment on a scraper to ensure smooth flow and clear any old material from the path.
Tip: Always purge before a long print to avoid cold pull issues. - 5
Slice model for large print
Import the model into your slicer, orient for best bed adhesion, and split into parts if necessary. Choose supports carefully and test a small-scale version if possible. Save the G-code with a suitable path that minimizes retractions across long travels.
Tip: Split models to reduce risk; multi-part assemblies can simplify post-processing. - 6
Start print and monitor progress
Begin the print and enable monitoring alerts. Check first layer adhesion, extrusion consistency, and filament path for the initial 1-2 layers. Plan for intermittent supervision during the early stages of large prints.
Tip: Set up a camera or remote monitor for long jobs. - 7
Post-process and evaluate
Once complete, let the part cool slowly, remove supports, and perform light sanding or finishing as needed. Inspect for warping, cracks, or delamination and log any issues for future prints.
Tip: Document settings and outcomes to improve future large-format prints.
People Also Ask
What exactly qualifies as a 3d large printer?
A 3d large printer has a significantly larger build volume than standard desktop printers, enabling bigger objects and parts. It uses a sturdier frame and often an enclosure to maintain temperature stability for better print quality.
A 3d large printer has a bigger build area than typical home printers, enabling bigger parts.
Can I print large objects without an enclosure?
Enclosures improve temperature stability and reduce warping on large prints. If you print without one, you may see more warping or layer adhesion issues, especially with ABS-like materials.
Enclosures keep heat in and drafts out, helping big prints stay stable.
How long does a large print take?
Large prints take longer due to higher layer counts and longer perimeters. Time varies with model complexity, material, and printer performance.
Time depends on size and settings; expect longer durations for big parts.
What materials work best for large-format prints?
Materials with low shrinkage and good dimensional stability, such as PETG or ASA, are popular for large-format prints. Consider the thermal requirements of the object and enclosure temperature.
PETG and ASA are common choices for large prints due to stability.
How can I prevent warping on large prints?
Enable enclosure, maintain a stable bed temperature, use a reliable build surface, and orient the model to minimize large flat spans. Proper adhesion and controlled cooling are key.
Keep heat steady with an enclosure and solid adhesion; avoid abrupt cooling.
How often should I calibrate a large-printer?
Calibrate after major changes to hardware or software, after long prints, and when you notice dimensional drift. Regular bed leveling and Z-offset checks help maintain accuracy.
Do calibration after changes or noticeable shifts in accuracy.
Watch Video
Quick Summary
- Verify bed level and enclosure before starting.
- Plan large prints by splitting models and orienting for adhesion.
- Use appropriate materials with low shrinkage for large parts.
- Monitor prints and perform consistent post-processing.