3d Printer Build: A Complete Step-by-Step Guide
Learn how to plan, assemble, and calibrate a DIY 3d printer build with clear steps, safety tips, and troubleshooting from Print Setup Pro.

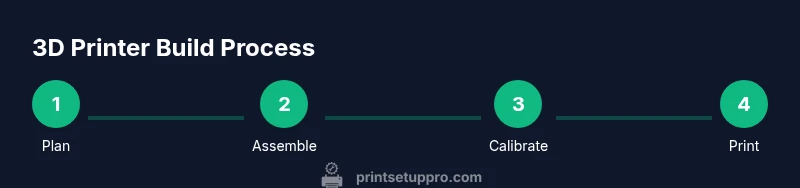
By the end, you will have a tested bill of materials, a step-by-step build plan, and calibration procedures to produce consistent prints. This guide emphasizes safe handling of hot ends, correct wiring, firmware setup, and proper belt tension. You’ll follow practical checklists, alignment routines, and troubleshooting tips for common early failures, ensuring your 3d printer build is reliable from the first layer.
Understanding the 3d printer build: goals, scope, and outcomes
Embarking on a 3d printer build begins with clear goals. Whether you want to reproduce prototypes for a home workshop, teach students, or customize a personal machine, a well-scoped plan reduces waste and accelerates progress. According to Print Setup Pro, a successful build starts by defining print volume, layer-height flexibility, and material compatibility. Decide between FDM, resin, or hybrid approaches and set a budget that aligns with your ambitions. Outline safety boundaries—hot-end exposure, electrical wiring, and enclosure needs—to protect users and hardware. Map the project with specific outcomes, a sourcing plan, an assembly sequence, and calibration milestones. Documenting this plan creates a reference for parts sourcing, step order, and test prints. Framing the project this way increases your odds of finishing with a reliable machine that produces usable parts, from basic test cubes to complex functional prints.
Planning the build: selecting components and BOM
A thorough Bill of Materials (BOM) is the backbone of a successful 3d printer build. Start with a core frame kit or robust frame components, then add a motion system (linear rails or rods, belts, pulleys), a heated bed, and a reliable power supply. For the extruder and hotend choose a compatible assembly with a reliable thermistor and a nozzle size that matches your intended materials. Electronics should include a capable control board with enough stepper drivers, quiet drivers if you value noise reduction, and a stable mains filter. Don’t forget firmware, cooled stepper drivers, and test electronics. Print Setup Pro suggests balancing performance and maintainability: pick parts that can be swapped or upgraded without tearing the machine apart. Create a staged BOM with optional upgrades and a budget for tools, cable management, and enclosure materials. This discipline saves time and reduces the risk of missing critical components before the first build attempt.
Mechanical frame and motion system basics
Your frame defines rigidity, accuracy, and vibration behavior. A sturdy metal or well-braced aluminum frame reduces wobble during fast prints. Motion components include the X, Y, and Z axes, linear rails or guides, belt-driven or lead-screw configurations, and endstops to calibrate travel limits. Pay attention to belt tension—too loose leads to ghosting; too tight wears components prematurely. A quality motion system supports consistent layer alignment and minimizes ringing. Mount fans and ducting to manage heat while preserving clearances for moving parts. When planning cable routing, use channel guides and strain relief to prevent wear. In a well-executed build, the mechanical portion aligns with the electronics for smooth, repeatable motion, which is essential for precise calibration and repeatable prints.
Extruder, hotend, and nozzle selection
Choosing the correct extrusion path and nozzle geometry is central to print quality. A direct-drive or Bowden extruder depends on filament types and desired print speeds. The hotend temperature range must accommodate your target materials, with a reliable thermistor and heater cartridge. Nozzle size affects layer resolution and print strength; common starting sizes are 0.4 mm for general use, with 0.3 mm for finer details and 0.6 mm for faster, bulk prints. Consider thermal performance and heat break design to avoid heat creep. Mounting hardware should be compatible with your frame and allow easy hotend swaps for maintenance. Finally, ensure the filament path is clean and free of jams and that retraction distances are tuned to minimize stringing. The right combination of extruder, hotend, and nozzle sets a solid foundation for accurate extrusion and overall print quality.
Electronics and control board decisions
Your control board is the brain of the printer. Evaluate stepper motor drivers, microcontroller capacity, firmware compatibility, and I/O options such as LCD screens or Wi‑Fi modules. Power distribution must be safe and well shielded, with fusing and proper wire gauges. Choose a firmware like Marlin or RepRapFirmware that matches your hardware and comfort level; plan for configuration files describing steps/mm, axis directions, and thermistor models. Add a reliable power supply, proper cooling, and a quiet fan strategy if noise matters in a home office or classroom. Cable management is not cosmetic—tangled cables cause signal interference and difficult maintenance. A thoughtful electronics setup reduces debugging time and supports future upgrades, such as auto-bed leveling sensors or servo-based endstops.
Firmware setup and configuration
With hardware in place, firmware setup translates hardware choices into real-world motion. Begin by calibrating steps-per-millimeter for each axis, then configure thermistor and PID settings for stable hot-end temperature. Enable features such as bed leveling, mesh compensation, and filament runout detection if your board supports them. Connect to your preferred slicer, load a calibration cube, and watch for under- or over-extrusion. Make small adjustments to steps/mm or feed rate based on test prints. Document your configuration changes so future maintenance is straightforward. The goal is to reach a stable baseline where test prints consistently reach expected dimensions and surface finish.
Calibration workflow: bed leveling, endstops, and accuracy
Calibration is a multi-step ritual that pays off with consistent prints. Start with a reliable bed leveling method—manual, sensor-assisted, or automatic—ensuring the nozzle is at the correct distance from the bed at multiple points. Check endstop position zeroing so the printer knows its true home coordinates. Validate axis perpendicularity using simple square tests and verify that the extrusion multiplier yields correct extrusion width. Run a few test cubes and simple towers, documenting any deviations. Revisit belt tension and idle friction in the drive system if necessary. A disciplined calibration routine reduces print failures and speeds up production of accurate parts.
First prints and debugging common failures
Your first prints will teach you a lot about your build. Expect minor calibration issues such as under-extrusion, poor adhesion, or warping on larger beds. Adjust cooling, bed temperature, and first-layer height to improve adhesion. If you notice layer shifts or ringing, inspect belt tension, pulleys, and z-axis alignment. Watch for filament jams and retraction glitches; clean and trim filament ends to ensure smooth feeding. Document failures and fixes, because repeatability depends on tracking what mattered and what didn’t. Patience and methodical testing are your best tools in this stage.
Maintenance, upgrades, and upgradability
Even a well-built 3d printer benefits from routine maintenance and thoughtful upgrades. Regularly inspect belts and pulleys, lubricate linear guides, and clean the nozzle. Plan for future improvements such as an enclosure, better cooling, or a higher-grade feeder. Versioning your components helps with compatibility across firmware and slicer upgrades. When considering upgrades, prioritize reliability and ease of future maintenance over raw speed. Keep spare parts and tools on hand and document all changes for future troubleshooting.
Final checks and ready-to-print checklist
Before you call the build complete, perform a comprehensive readiness review. Verify mechanical alignment, electronics safety, firmware baselines, and a controlled first print with a small calibration object. Confirm bed adhesion, proper extrusion, and consistent layer heights across the print area. Run simple tests for repeatability, such as a benchy or cube with known dimensions, and adjust calibrations as needed. Maintain a printable log and create a simple labeling system for parts and configurations. A deliberate, documented finish ensures your 3d printer build remains reliable and adjustable for years of use.
Tools & Materials
- Allen wrenches set (metric)(Sizes: 2.5, 3, 4, 5 mm; include L-shaped and L-handle for tight spaces)
- Screwdrivers (Phillips & flat)(Assorted sizes (#1, #2))
- Calipers(0.01 mm accuracy preferred)
- Wire cutters/strippers(For wiring and cable prep)
- Multimeter(Useful for checking thermistors and power rails)
- Cable ties(Assorted sizes for neat routing)
- Spare screws and nuts(Keep extra M3/M4 hardware)
- Digital thermometer or IR thermometer(Optional for temperature checks)
- Soldering iron(Only if you plan custom wiring)
- Thermal paste(For thermal coupling if applicable)
- Filament for testing(Test prints and calibration material)
- Safety equipment (gloves and goggles)(Always wear during wiring and cutting)
Steps
Estimated time: 6-12 hours
- 1
Inventory and prep
Unbox all parts, verify counts against the BOM, and organize components by subsystem. Take photos during unpacking to document orientation and fit. Confirm you have a stable workspace and the necessary tools at hand.
Tip: Label components as you remove them to prevent mix-ups later. - 2
Assemble the frame
Lay out the frame pieces, square corners, and secure joints with the provided fasteners. Check for diagonal squareness using a carpenter’s square or a digital caliper cross-check. Tighten fasteners evenly to avoid skew.
Tip: Use a level surface and a square for initial alignment; loose frames degrade accuracy. - 3
Mount the motion system
Install X, Y, and Z axes, set up belts or leadscrews, and route linear guides. Verify smooth, backlash-free movement with light manual jogs. Attach endstops at their defined reference points.
Tip: Mark belt lengths before installation to ensure consistent tension later. - 4
Install the extruder and hotend
Mount the extruder assembly and secure the hotend with proper clearance from frame parts. Check the heat sink and cooling fan orientation. Verify that the filament path is clear and free of obstructions.
Tip: Ensure thermistor wires are routed away from moving parts and heat zones. - 5
Wire the electronics and power supply
Connect motors, endstops, thermistors, heater cartridge, and fans to the control board. Use proper gauge wires and add strain relief where needed. Test power rails with a multimeter before applying full power.
Tip: Label wires by subsystem to simplify future maintenance. - 6
Flash firmware and connect to software
Load the chosen firmware, configure basic parameters (steps/mm, thermistor type, and sensor pins), and connect to a slicer. Verify serial communication and run a dry run to confirm axis movement.
Tip: Keep a copy of the default firmware in case you need to revert. - 7
Bed leveling and endstops
Calibrate the bed height using a known method (manual or sensor-assisted). Confirm endstops register true home position and verify travel limits. Do a basic extrusion test to check material flow.
Tip: Document the endstop offsets for future reference. - 8
First prints and tuning
Run a small calibration cube; inspect layer lines, first-layer adhesion, and cooling. Adjust Z-offset, temperature, and cooling settings based on results. Iterate until dimensions are stable and surface finish is clean.
Tip: Start with a 0.2 mm layer height and 20% infill for quick feedback.
People Also Ask
What is the best starting point for a 3d printer build?
Begin with a clear BOM and frame plan. Verify you have compatible components before assembly begins. A staged build helps catch issues early.
Start with a solid parts list and a frame plan to avoid surprises as you assemble.
How long does a DIY 3d printer build typically take?
Time varies with experience and parts. Plan for a full day to several days, including testing and calibration.
It can take a day or more, depending on your kit and familiarity with printers.
Do I need advanced tools for assembly?
Most builds require basic hand tools and some electronics tools. Many kits include essential items, but some specialized tools may be helpful.
Basic tools are enough, but have a few electronics tools on hand if you’re customizing.
Can I reuse parts from another printer?
You can reuse compatible components, but verify fit, wiring, and firmware compatibility. Improper reuse can hinder performance.
You might reuse parts if they fit your frame and electronics, but check compatibility.
What are common calibration issues?
Bed leveling, extrusion rate, and temperature stability are frequent culprits. Systematic testing helps identify and fix them.
Bed leveling and extrusion problems are common early on; methodical testing fixes them.
Is an enclosure necessary?
Enclosures help thermal stability and safety, especially for high-temperature materials and in shared spaces.
Enclosures can improve safety and print consistency in some setups.
Watch Video
Quick Summary
- Plan first, BOM matters
- Calibrate meticulously for accurate prints
- Document all configurations and changes
- Safety comes first when dealing with hot ends
- Expect iterations; track fixes in a log