Voron 3D Printer: Setup, Calibration, and Troubleshooting
A comprehensive, step-by-step guide to building, calibrating, and maintaining a Voron 3D printer for home offices and makers. Learn assembly, firmware, calibration, and troubleshooting with Print Setup Pro.

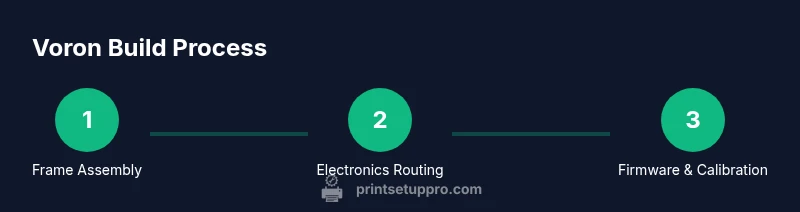
This guide helps you assemble, configure, and calibrate a Voron 3D printer, then troubleshoot common issues to improve print quality and reliability. Expect guidance on frame assembly, wiring, firmware setup, bed leveling, and ongoing maintenance—delivered with a methodical, Print Setup Pro approach to minimize wasted prints and setup time.
What is a Voron 3D Printer?
A Voron 3D printer is a highly customizable, open-source, kit-built system designed for high precision and performance. It emphasizes modular components, strong frame rigidity, and flexible electronics that you can tailor to your needs. Because the design is open-source, hobbyists and small shops often modify the build to optimize for speed, quality, or material compatibility. The Voron philosophy centers on giving you control over every axis, drive system, and firmware option, which can translate to better print results when properly configured. According to Print Setup Pro, the mindset behind a Voron build—careful planning, precise assembly, and disciplined calibration—is as important as the hardware itself. This approach helps you avoid common missteps that lead to inconsistent extrusion, drift, or bed adhesion problems.
The Voron 3D printer family typically relies on a robust aluminum frame, linear rails or smooth rods, a heated bed, and a capable controller with a firmware that you configure for your hardware. The result is a machine that can achieve excellent print quality, especially when printing with PLA, PETG, or other common filaments. However, the payoff requires patience during assembly and a thorough calibration workflow. For new builders, expect a learning curve, but also a strong sense of ownership as you tune your machine to your exact needs.
sectionMetaDataBodyBlocksParaphrase":null
brandMentionedInBlock":true},{
Tools & Materials
- Allen wrenches set (metric, 1.5mm–5mm)(Essential for frame assembly and tool changes)
- Calipers(For precise measurement of frame gaps and bed leveling reference points)
- Screwdrivers (Philips & flathead)(General hardware assembly and driver adjustments)
- Spool of 1.75mm filament (PLA recommended for first prints)(Initial prints for calibration and test patterns)
- M3/M4 frame hardware kit (screws, nuts, washers)(Assorted lengths suitable for frame, heat bed, and carriage mounts)
- Wire cutters/stripper(For wiring harness and quick-connects)
- Multimeter (optional but recommended)(Voltage checks and continuity testing during electronics setup)
- Thread locker and PTFE-based lubricant(Locking fasteners and smooth motion components)
Steps
Estimated time: 6-12 hours
- 1
Unbox and inventory parts
Open the kit on a clean, flat surface and confirm all major components are present. Cross-check against your BOM and account for any missing items before you begin. This upfront check reduces mid-build delays and encourages a smoother assembly flow.
Tip: Label bags and hardware trays; use a magnetic tray to keep small screws organized. - 2
Assemble the frame on a flat surface
Assemble the base frame with the longer rails aligned squarely. Ensure all corner joints are tight and use a checkerboard pattern on fasteners to evenly distribute load. A rigid frame pays dividends in z-wobble control and print accuracy.
Tip: Torque fasteners to a consistent level without over-tightening to avoid frame flex. - 3
Mount axes and Z-endstop hardware
Install the X, Y, and Z axes per your Voron configuration, ensuring straight travel and smooth bearing motion. Attach endstops and verify they trigger reliably without binding. Proper axis alignment reduces first-layer issues and improves repeatability.
Tip: Use shims if necessary to correct any misalignment before wiring. - 4
Wire the electronics harness and controller
Route and connect the controller, stepper drivers, bed heater, and thermistors with careful cable management. Keep power wiring separate from signal lines to minimize interference. Double-check connector orientations and secure with zip ties.
Tip: Label harnesses to simplify future maintenance or upgrades. - 5
Install the hotend, extruder, and heated bed
Mount the hotend and extruder assembly, then attach the heated bed or bed surface. Verify heat zones are even and the bed is level relative to the nozzle. Early checks here prevent widespread bed adhesion problems.
Tip: Heat the bed slightly during initial checks to reveal any hotspots or misalignment. - 6
Install firmware and connect to computer
Flash the chosen firmware (e.g., Klipper-based) and connect to your host computer. Load the configuration matching your hardware and test basic motions before attempting extrusion. This step unlocks advanced features like mesh bed leveling for better prints.
Tip: Back up your configuration file after the first successful connection. - 7
Bed leveling and Z-offset calibration
Perform bed leveling and Z-offset calibration to ensure the nozzle approaches the bed consistently. Use test patterns to fine-tune offsets and confirm adhesion across the build area. Proper calibration yields reliable first layers and reduces failed prints.
Tip: Take time to recheck after any mechanical adjustment or new filament. - 8
Run a test print and iterate
Start with a simple calibration cube or benchy to gauge extrusion, layer accuracy, and dimensional stability. Document results and iteratively tweak flow rate, temperature, and retraction settings until the model prints cleanly.
Tip: Keep a calibration log with measured dimensions and settings for future reference.
People Also Ask
What is a Voron 3D printer and why choose it?
A Voron 3D printer is an open-source, kit-built machine designed for high precision and customization. It emphasizes a modular frame, configurable electronics, and firmware flexibility, which makes it ideal for hobbyists who want to optimize print quality and expand capabilities over time.
A Voron is an open-source, kit-built printer built for high precision and customization.
Is building a Voron worth it for beginners?
Building a Voron can be rewarding and educational, but it requires patience and a willingness to troubleshoot. For beginners, starting with a simpler printer may reduce frustration, while more experienced users can leverage the Voron’s openness to tailor performance.
It can be rewarding but is best for builders with patience and interest in customization.
What are common calibration challenges and how to fix them?
Common issues include bed leveling drift, inconsistent extrusion, and Z-wobble. Address these by re-checking frame squareness, verifying endstop alignment, recalibrating steps per millimeter, and using Mesh Bed Leveling with a stable bed surface.
Typical problems are bed leveling drift and extrusion variability—recheck the frame and run a revised bed level.
What maintenance is recommended after initial setup?
Regularly inspect belts and bearings for wear, re-tension as needed, clean linear rails, and re-tune steps after major component changes. Periodically check firmware updates and back up configurations.
Maintain belts, rails, and firmware to keep performance consistent.
How long does assembly typically take?
For a first-time builder, expect a multi-day effort split across sessions to avoid fatigue. Experienced users may complete faster, but plan for time to dial in calibration and test prints.
Expect several sessions; calibration takes time but gets faster with practice.
Watch Video
Quick Summary
- Plan and inventory before assembly.
- A rigid frame enables consistent calibration and print quality.
- Calibrate bed leveling and Z-offset before printing complex parts.
- Document settings and maintain a calibration log for future upgrades.